What are the different types of light fixtures and their uses?

Lighting is more than just a functional necessity; it’s a key element that sets the mood, enhances aesthetics, and transforms the atmosphere of any space.

With a myriad of light fixtures available on the market, choosing the right one can feel overwhelming. From the soft glow of pendant lights that create an intimate dining experience to the bright, focused illumination of recessed lighting perfect for workspaces, each type of fixture serves a distinct purpose and style. In this comprehensive guide, we will explore various types of light fixtures, their unique features, and ideal applications, helping you make informed decisions that not only brighten your home but also reflect your personal style. Whether you’re redesigning a room, upgrading your lighting scheme, or simply seeking inspiration, this guide will illuminate your path to creating a beautifully lit environment that caters to your needs and enhances your everyday living.

1. Introduction to Lighting and Its Importance

What are the different types of light fixtures and their uses?
Credit : whatcanu.com

Lighting is often an overlooked aspect of interior design, yet it plays a pivotal role in shaping the ambiance, functionality, and overall aesthetic of any space. The right lighting can transform an ordinary room into an inviting haven, enhance productivity in a workspace, or create a cozy atmosphere for intimate gatherings. It sets the mood and can influence emotions, making it an essential element in both residential and commercial environments.

Understanding the importance of lighting goes beyond mere illumination. It involves recognizing how different types of light fixtures can serve various purposes, from providing task lighting for focused activities to creating ambient light that envelops a space in warmth. The strategic use of lighting can highlight architectural features, artwork, and decor, drawing attention to the elements you want to showcase while downplaying areas that may not be as visually appealing.

As we delve into this guide, we will explore the diverse types of light fixtures available, each with its unique characteristics and applications. From elegant chandeliers that serve as statement pieces to sleek recessed lights that offer a clean, modern look, each fixture has a specific role to play in enhancing the atmosphere of your home or workplace. Whether you’re redesigning a room, renovating a space, or simply seeking to improve the lighting in your environment, understanding these options will empower you to make informed choices that reflect both your style and functional needs. Join us as we illuminate the world of lighting, helping you navigate the myriad of choices available and discover how to effectively harness the power of light to enhance your daily life.

2. Understanding the Basics: Types of Light Fixtures

When it comes to lighting your space, understanding the different types of light fixtures available is essential for creating a well-lit, functional, and aesthetically pleasing environment. Each fixture serves a specific purpose and brings its unique charm to a room. Here’s a closer look at the primary types of light fixtures and how they can enhance your home or office.

### 1. **Ambient Lighting Fixtures**
Ambient lighting provides the foundational layer of light in any space, establishing a soft glow that illuminates the entire room. Common options include ceiling-mounted fixtures, chandeliers, and wall sconces. These fixtures are designed to offer general illumination, ensuring that every corner of the room is bright enough for day-to-day activities. When selecting ambient lighting, consider the height of your ceilings and the size of your space; larger rooms might benefit from a statement chandelier, while smaller areas may be better suited for flush-mount or semi-flush fixtures.

### 2. **Task Lighting Fixtures**
When you need focused light for specific tasks, task lighting is your go-to solution. These fixtures include desk lamps, under-cabinet lights, and pendant lights, which direct light where it’s needed most. For instance, a well-placed desk lamp can enhance your productivity while working, while under-cabinet lighting can transform a kitchen workspace into a chef’s paradise. Choose adjustable fixtures that allow you to direct light precisely where it’s needed, reducing strain on your eyes and enhancing functionality.

### 3. **Accent Lighting Fixtures**
Accent lighting is all about highlighting features within your space, such as artwork, architectural details, or beautiful plants. Track lighting, spotlights, and wall-mounted picture lights are all excellent choices for creating visual interest and depth. By strategically placing accent lighting, you can draw attention to your favorite decor items and create a layered lighting effect that adds warmth and character to your rooms.

### 4. **Decorative Lighting Fixtures**
While functionality is key, decorative lighting can also serve as a focal point in your design scheme. These fixtures range from ornate chandeliers and artistic pendant lights to whimsical table lamps. They not only provide illumination but also contribute to the overall aesthetic of your space, showcasing your style and personality. When selecting decorative lighting, consider the color, material, and shape to ensure it complements your decor while being a conversation starter.

### 5. **outdoor Lighting Fixtures**
Don’t forget about lighting for the exterior of your home! Outdoor lighting fixtures, such as garden lights, path lights, and wall sconces, enhance your curb appeal while providing safety and security. They allow you to enjoy your outdoor spaces at night, creating an inviting atmosphere for gatherings, barbecues, or quiet evenings under the stars. Look for weather-resistant options to ensure durability and longevity.

By understanding these basic types of light fixtures and their uses, you can make informed decisions that enhance the functionality and beauty of your space. Whether you’re renovating, redecorating, or simply looking to refresh your lighting, the right fixtures can transform your environment and illuminate your lifestyle.

3. Ambient Lighting: Creating a Warm Atmosphere

What are the different types of light fixtures and their uses?
Credit : whatcanu.com

Ambient lighting serves as the foundation of any well-designed space, creating a warm and inviting atmosphere that enhances the overall comfort of a room. This type of lighting is essential for providing a soft, overall glow that fills the area without overwhelming the senses. Think of it as the gentle embrace of light that welcomes you home after a long day.

When selecting ambient lighting, consider fixtures that diffuse light evenly, such as ceiling-mounted flush or semi-flush lights, chandeliers, or even large floor lamps. These fixtures can be strategically placed to eliminate harsh shadows and create a balanced illumination that softens the edges of furniture and architectural features.

For instance, a stylish pendant light hung over a dining table not only provides functional light for meals but also adds a touch of elegance, encouraging conversation and connection. Similarly, wall sconces can be used to accentuate the architecture of a hallway or living area, casting a warm glow that invites exploration.

In addition to traditional fixtures, consider incorporating other sources of ambient light, such as LED strips placed behind furniture or along shelves, to create a subtle, modern touch. Dimmers are also a fantastic addition, allowing you to adjust the brightness according to the time of day or the mood you want to set, whether it’s a cozy movie night or a lively gathering with friends.

Ultimately, ambient lighting is about establishing a sense of balance and tranquility within your space. By thoughtfully selecting the right fixtures and layers of light, you can transform any room into a welcoming retreat, ensuring that your home feels as inviting as it looks.

4. Task Lighting: Illuminating Workspaces Effectively

Task lighting plays a crucial role in creating functional and efficient workspaces, ensuring that you can focus on the task at hand without straining your eyes. Unlike ambient lighting, which sets the overall mood of a room, task lighting is specifically designed to illuminate areas where precise activities occur, such as reading, writing, cooking, or crafting.

When choosing task lighting, consider fixtures that provide direct, concentrated light to reduce shadows and enhance visibility. Desk lamps with adjustable arms or headlamps are perfect for home offices or study areas, allowing you to direct the light exactly where it’s needed. In kitchens, under-cabinet lighting brightens countertops, making meal prep safer and easier. Similarly, pendant lights hung over a dining table or island not only serve as a stylish statement but also provide focused illumination for meals and gatherings.

The color temperature of task lighting is also essential to consider. Cooler tones, typically in the range of 4000K to 5000K, mimic daylight and are ideal for stimulating productivity, making them perfect for workspaces. Warmer tones, on the other hand, can create a cozy atmosphere in areas where relaxation is key, like reading nooks or lounges.

With the right task lighting, you can significantly enhance your productivity and comfort, transforming any workspace into an inviting and efficient haven. Whether it’s through sleek desk lamps, stylish wall sconces, or practical under-cabinet fixtures, the goal remains the same: illuminate your activities effectively, so you can work smarter, not harder.

5. Accent Lighting: Highlighting Your Home’s Features

What are the different types of light fixtures and their uses?
Credit : whatcanu.com

Accent lighting serves as the cherry on top of your home’s lighting design, providing the perfect opportunity to showcase your favorite features and create an inviting atmosphere. Unlike general lighting, which fills a space with overall illumination, accent lighting is all about highlighting specific areas or objects, such as artwork, architectural details, or beautiful plants.

When you think of accent lighting, think of it as a spotlight that draws the eye to what makes your home unique. Wall sconces can frame a painting, while adjustable track lighting can illuminate a sculpture or a cherished family heirloom displayed on a shelf. Table lamps with unique designs can serve as both functional lighting and decorative pieces, adding character to a room.

In addition to enhancing aesthetics, accent lighting contributes to the overall mood of a space. Warm, soft lights can create a cozy ambiance in a living room, while brighter, focused beams can energize a workspace or kitchen. Consider using dimmers to adjust the intensity of your accent lights, allowing you to change the atmosphere based on the occasion—whether it’s a lively dinner party or a quiet evening spent reading.

Moreover, accent lighting can significantly impact how we perceive a room’s size and depth. By strategically placing lights at varying heights, you can create layers of light that add dimension to your space, making it feel more inviting and expansive.

Incorporating accent lighting into your home doesn’t have to be complicated. Simple additions, such as LED strip lights under cabinets or behind furniture, can create an ethereal glow that elevates the design of your space. Whether you opt for dramatic lighting to make a bold statement or subtle fixtures to add a touch of elegance, accent lighting is an invaluable tool in crafting a home that not only looks good but feels inviting and lived-in. Embrace the art of highlighting your home’s best features and watch as your spaces transform into beautiful showcases of your personal style.

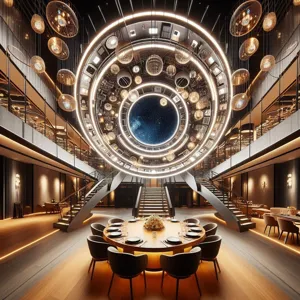
6. Chandeliers: Elegance and Style for Any Room

Chandeliers have long been synonymous with elegance and grandeur, often gracing the ceilings of opulent ballrooms and lavish dining rooms. However, their versatility has allowed them to find a place in a variety of settings, making them an excellent choice for anyone looking to add a touch of sophistication to their home. Available in an array of styles—from traditional crystal-laden designs to sleek, modern fixtures—chandeliers can enhance the aesthetic of any room, transforming an ordinary space into something extraordinary.

In dining rooms, a well-placed chandelier serves not only as a functional source of light but also as a stunning focal point that sets the tone for gatherings and special occasions. Imagine a beautifully designed chandelier casting a warm, inviting glow over a sumptuous dinner, its crystals shimmering like stars—a perfect backdrop for memorable moments.

Living rooms benefit from chandeliers as well, where they can contribute to the overall ambiance of the space. A contemporary chandelier with clean lines can complement modern decor, while an antique piece can add character to a more traditional setting. Additionally, chandeliers can be used in unexpected places; hanging one in a bedroom can create a romantic atmosphere, while a bold, colorful fixture in a playroom can spark joy and creativity.

When selecting a chandelier, consider the scale of your room. A large chandelier can be a statement piece in a spacious entryway, while smaller fixtures work best in cozy nooks or intimate spaces. The key is to strike a balance; ensure that your chandelier harmonizes with the surrounding decor without overwhelming it.

Beyond aesthetics, chandeliers also offer flexibility in lighting options. Many designs come equipped with dimmer switches, allowing you to adjust the brightness to suit your mood—be it a bright, lively gathering or a soft, intimate dinner.

In essence, chandeliers are more than just light fixtures; they are artistic expressions that elevate the style of any room. Whether you opt for the classic charm of crystal or the sleek sophistication of modern designs, incorporating a chandelier into your home is a surefire way to illuminate your space with elegance and flair.

7. Pendant Lights: Versatility and Design Options

What are the different types of light fixtures and their uses?
Credit : whatcanu.com

Pendant lights are a shining example of versatility in the world of lighting design. Suspended from the ceiling by a cord, chain, or rod, these fixtures can dramatically transform the ambiance of any space while serving practical lighting needs. Their unique ability to blend functionality with artistic flair makes them a popular choice for various settings, from cozy homes to bustling restaurants.

One of the most appealing aspects of pendant lights is the vast array of design options available. Whether you prefer the sleek lines of modern minimalism or the intricate details of vintage-inspired fixtures, there’s a pendant light to match every aesthetic. For a contemporary look, consider geometric shapes crafted from metal or glass, which can add an air of sophistication to dining areas or kitchens. On the other hand, if you’re aiming for a rustic or industrial feel, pendant lights made from reclaimed wood or exposed Edison bulbs can create an inviting, warm atmosphere.

In terms of functionality, pendant lights can be used in a multitude of ways. Hang a cluster of smaller pendants at varying heights above a kitchen island to create a focal point that doubles as task lighting. A single, oversized pendant can make a bold statement in an entryway or living room, drawing the eye upward and enhancing the sense of space. Additionally, pendant lights work beautifully in dining rooms, providing soft, direct illumination that encourages conversation and connection during meals.

For those who want to experiment with layering light, pendant fixtures can be combined with other sources, such as wall sconces or floor lamps, to create depth and dimension in a room. Consider using dimmable options for added flexibility, allowing you to adjust the brightness according to the occasion, whether it’s a lively dinner party or a quiet evening at home.

In summary, pendant lights are not just a source of illumination—they are a design statement that can enhance the style and functionality of any area. With their diverse styles and adaptable uses, they illuminate the path toward creating inviting, beautifully lit spaces that resonate with your personal taste.

8. Floor and Table Lamps: Functional Decor

When it comes to blending functionality with aesthetic appeal, floor and table lamps are the unsung heroes of interior design. These versatile light fixtures not only illuminate your space but also serve as striking decor pieces that can elevate the overall ambiance of a room.

Floor lamps, with their towering presence, can create drama in a living area or cozy up a reading nook. Available in various styles—from sleek and modern to rustic and industrial—they can complement any décor theme. Imagine a minimalist, angular floor lamp casting a warm glow over a stylish sofa, or a vintage arc lamp creating a soft, inviting corner in a family room. The height of floor lamps allows them to fill the vertical space in a room, drawing the eye upward and creating a sense of openness.

Table lamps, on the other hand, offer a more intimate lighting option, perfect for bedside tables, desks, or side tables in a living room. Their compact design allows them to fit seamlessly into smaller spaces while providing much-needed task lighting for reading, working, or enjoying a cup of tea. With countless designs—from classic ceramic bases to contemporary glass finishes—table lamps can act as statement pieces that reflect your personality and style. A beautifully crafted lamp can serve as a focal point, drawing attention and sparking conversation.

Both types of lamps can be enhanced with various shades, allowing you to control the mood and intensity of the light. A soft, fabric shade diffuses light, creating a warm and cozy atmosphere, while a sleek, metallic shade can provide a more directed beam, perfect for reading or focusing tasks.

Incorporating floor and table lamps into your decor strategy not only enhances the functionality of your spaces but also gives you the opportunity to express your individual style. By thoughtfully choosing these fixtures, you can create a layered lighting design that is both beautiful and practical, ensuring that your home feels warm, inviting, and effortlessly stylish.

9. Wall Sconces: Space-Saving Solutions

Wall sconces are the unsung heroes of lighting design, offering both functionality and flair without consuming precious floor space. These elegant fixtures are mounted directly onto the wall, making them perfect for rooms where space is at a premium or where you want to create a cozy, intimate atmosphere.

Available in a myriad of styles, from sleek modern designs to ornate vintage looks, wall sconces can complement any decor theme. They serve a variety of purposes, whether you need task lighting for reading in a nook, ambient light to soften a room’s overall brightness, or accent lighting to highlight artwork or architectural features.

Imagine a hallway lined with stylish sconces, casting a warm glow that invites guests to explore further. Or picture flanking a mirror in your entryway, where the soft illumination enhances your space while providing practical lighting for last-minute touch-ups before heading out. In living rooms, wall sconces can replace bulky table lamps, freeing up surfaces and allowing for a more streamlined design.

Moreover, many wall sconces are designed to be adjustable, with some featuring swing arms that allow you to direct light exactly where it’s needed. This versatility makes them ideal for bedrooms, where they can be positioned above nightstands for reading without taking up valuable bedside real estate.

Incorporating wall sconces into your lighting plan not only maximizes your space but also adds a layer of sophistication and depth to your home’s ambiance. With their myriad styles, sizes, and functionalities, these fixtures are the perfect solution for anyone looking to enhance their home’s lighting while maintaining a clean and uncluttered aesthetic.

10. Recessed Lighting: Sleek and Modern Choices

Recessed lighting, often hailed as the epitome of sleek and modern design, has become a staple in contemporary interiors. These unobtrusive fixtures, embedded into ceilings, provide a clean and sophisticated aesthetic, making them ideal for various settings — from upscale homes to commercial spaces.

One of the standout features of recessed lighting is its versatility. Available in a range of sizes, shapes, and beam angles, these fixtures can be tailored to suit any room’s needs. Whether you’re aiming to create a warm, inviting atmosphere in your living room or need focused illumination for a kitchen countertop, recessed lights can achieve it all. They can be used to highlight architectural details, artwork, or even specific areas such as a reading nook, seamlessly blending functionality with style.

In addition to their aesthetic appeal, recessed lights are known for their energy efficiency. Many modern options utilize LED technology, which not only consumes less power but also boasts a longer lifespan compared to traditional bulbs. This means you can enjoy beautiful lighting without the hefty energy bills.

Installation is another key aspect of recessed lighting. Though it may require some ceiling modifications, once installed, the fixtures offer a streamlined look that can make a room feel more spacious. With dimmable options available, you can effortlessly adjust the light intensity to suit different occasions, transforming your living space from a bright, lively area for entertaining to a cozy retreat for a quiet evening.

In summary, recessed lighting embodies a sleek and modern choice for illuminating your spaces. Its ability to combine aesthetic elegance with practical benefits makes it an excellent addition to any lighting plan, ensuring your home not only looks stunning but feels inviting and functional.

11. Outdoor Lighting: Enhancing Curb Appeal and Safety

Outdoor lighting serves as a pivotal element in transforming your home’s exterior, seamlessly blending aesthetic appeal with practical safety. When thoughtfully designed, outdoor lighting can boost your home’s curb appeal, making it inviting and warm as dusk falls. Whether you’re illuminating a pathway, accentuating architectural features, or creating cozy outdoor spaces for gatherings, the right light fixtures can work wonders.

**Pathway Lights** are essential for guiding guests safely to your front door. These fixtures, often installed along sidewalks or garden paths, not only enhance safety by illuminating potential trip hazards but also add a charming touch to your landscape. Choose fixtures that are low to the ground, with warm bulbs that create a welcoming glow, and consider solar-powered options for an eco-friendly twist.

**Wall Sconces** and **Floodlights** can accentuate the structure of your home, drawing attention to unique architectural details while providing additional security. Wall sconces mounted on either side of your front door can create a symmetrical and inviting entrance, while floodlights can deter intruders by illuminating dark corners of your property.

**String Lights** and **Lanterns** bring a whimsical touch to patios and gardens. These fixtures create an enchanting atmosphere for outdoor dining or evening socializing, casting a soft, warm light that encourages relaxation and conversation. Consider using dimmable options or smart lighting systems to adjust the ambiance based on the occasion.

In addition to enhancing aesthetics, outdoor lighting plays a crucial role in safety. **Motion Sensor Lights** can automatically illuminate your driveway or yard when someone approaches, providing a sense of security and deterring unwanted visitors. Moreover, well-lit outdoor spaces deter accidents by ensuring that walkways, stairs, and entrances are visible.

Ultimately, outdoor lighting serves a dual purpose: it enhances the beauty of your home while ensuring safety for you and your guests. By carefully selecting and strategically placing your light fixtures, you can create a stunning exterior that beckons visitors while providing peace of mind.

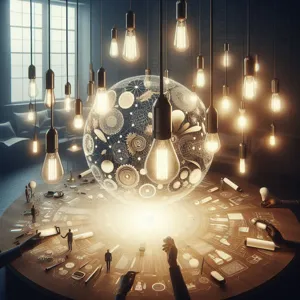
12. Smart Lighting Solutions: The Future of Illumination

In an age where technology seamlessly integrates into our daily lives, smart lighting solutions are emerging as a transformative force in the world of illumination. These innovative fixtures do more than just light up a room; they offer an unparalleled level of control, convenience, and customization that caters to the dynamic needs of modern living.

Imagine entering your home and having the lights automatically adjust to your preferred brightness and color temperature, all thanks to sensors and smart technology that respond to your presence. Smart lighting systems can be controlled via smartphone apps, voice commands, or even automated schedules, allowing homeowners to create the perfect ambiance for any occasion. Whether you’re hosting a dinner party, winding down for the evening, or waking up in the morning, you can easily set the mood with a simple tap or voice prompt.

Moreover, smart lighting solutions are not just about aesthetics; they are also designed with energy efficiency in mind. Many of these fixtures utilize LED technology, which consumes significantly less power than traditional bulbs. With features like dimming capabilities and the ability to turn lights off remotely, smart lighting can help reduce your energy costs while also contributing to a more sustainable environment.

Additionally, smart lighting can enhance your home’s security. Many systems offer features like motion detection and the ability to simulate occupancy by scheduling lights to turn on and off at specific times. This deters potential intruders and provides peace of mind when you’re away from home.

As the future of illumination unfolds, embracing smart lighting solutions can transform your living spaces into intelligent environments that adapt to your lifestyle. Whether you’re looking to increase efficiency, enhance security, or simply enjoy customizable lighting experiences, smart fixtures are a worthwhile investment for any modern home. So, step into the future of lighting and illuminate your spaces with the brilliance of technology.

13. Choosing the Right Bulbs: LED vs. Incandescent

When it comes to illuminating your space, the choice of light bulbs can have a significant impact on both the ambiance and energy efficiency of your home. The two most popular options on the market today are LED (Light Emitting Diode) and incandescent bulbs, each offering distinct advantages and characteristics that cater to different needs and preferences.

**LED Bulbs** have surged in popularity over the past decade, and for good reason. These energy-efficient powerhouses consume up to 80% less energy than traditional incandescent bulbs, translating into substantial savings on your electricity bill over time. Additionally, LED bulbs boast an impressive lifespan, often lasting up to 25,000 hours compared to the mere 1,000 hours typical of incandescent options. This means fewer trips to the store and less waste, making LEDs a more environmentally friendly choice. Furthermore, LEDs are available in a range of color temperatures, from the warm glow of a candle to the bright white light reminiscent of midday sun, allowing for versatility in creating the desired mood in any room.

On the other hand, **Incandescent Bulbs**, though less energy-efficient, offer a warmth and quality of light that many people find appealing. The soft, inviting glow of incandescent lighting can create a cozy atmosphere, making it a popular choice for living rooms and bedrooms. They are also typically less expensive upfront than their LED counterparts, which can be attractive for those looking to make quick, budget-friendly lighting decisions. However, it’s essential to consider that these bulbs have a shorter lifespan and higher energy costs in the long run, which may offset their initial affordability.

Ultimately, the decision between LED and incandescent bulbs comes down to your specific lighting needs, budget, and preferences. If you prioritize energy efficiency, longevity, and versatility, LEDs are the clear winner. Conversely, if you’re seeking a warm, traditional glow for your home, incandescent bulbs may be your go-to choice. Whichever you choose, understanding the benefits and limitations of each will empower you to make informed decisions that enhance your space’s beauty and functionality.

14. Tips for Layering Light in Your Space

Layering light in your space is an art that can transform the ambiance and functionality of any room. By combining different types of lighting—ambient, task, and accent—you create a dynamic environment that meets various needs while enhancing the aesthetic appeal of your home. Here are some practical tips to help you master the art of layered lighting.

**Start with Ambient Lighting**: Ambient lighting serves as the foundation of your lighting scheme, providing general illumination for the entire room. Consider ceiling-mounted fixtures, chandeliers, or recessed lighting to establish a warm, inviting glow. Dimmers can be your best friend here, allowing you to adjust the brightness depending on the time of day or the mood you wish to create.

**Incorporate Task Lighting**: Once the ambient layer is set, it’s time to focus on task lighting—fixtures that provide direct light for specific activities. Think desk lamps for reading, under-cabinet lights in the kitchen for food prep, or wall sconces beside your bed for nighttime reading. Task lighting should be strategically placed to reduce shadows and enhance visibility where it’s most needed.

**Add Accent Lighting**: To further elevate the atmosphere, introduce accent lighting to highlight features of your space. This could be a stylish pendant light over a dining table, LED strip lights illuminating shelves of decorative items or artwork, or spotlights that draw attention to architectural details like a fireplace or a textured wall. Accent lighting adds depth and character, making your space feel more curated and inviting.

**Consider the Color Temperature**: The color temperature of your light fixtures plays a crucial role in the overall feel of the room. Warmer lights (around 2700K-3000K) create a cozy and intimate ambiance, ideal for living rooms and bedrooms, while cooler lights (4000K or higher) are perfect for workspaces or kitchens where clarity and focus are essential. Mixing different color temperatures within your layered lighting design can create a balanced and interesting visual effect.

**Use Dimmer Switches Wisely**: Installing dimmer switches can significantly enhance the versatility of your lighting. By adjusting the intensity of each layer of light, you can easily transition from a bright, energetic environment during the day to a soft, relaxing glow at night. This adaptability ensures that your space feels comfortable and inviting, regardless of the occasion.

**Keep Scale and Proportion in Mind**: Finally, remember that the size and scale of your light fixtures should complement the dimensions of the room. A large chandelier can serve as a stunning focal point in a grand dining room, while a cluster of smaller pendant lights might work better in a cozy kitchen nook. Ensuring that your lighting choices are proportional to the space will help create a harmonious design.

By thoughtfully layering different types of lighting, you can effortlessly enhance both the functionality and aesthetic charm of your home, creating spaces that are not only well-lit but also warm, inviting, and uniquely yours.

15. Conclusion: Making Informed Choices for Your Lighting Needs

In conclusion, making informed choices for your lighting needs is essential to create the perfect ambiance and functionality in your spaces. As we’ve explored throughout this guide, the variety of light fixtures available today can cater to an array of styles, preferences, and practical requirements. From the sleek elegance of pendant lights that illuminate kitchen islands, to the warm glow of table lamps that enhance cozy reading nooks, each fixture plays a pivotal role in shaping the atmosphere of your home or office.

Understanding the purpose of each type of light fixture—whether it’s task lighting for focused activities, ambient lighting for overall illumination, or accent lighting to highlight artwork—empowers you to select the right pieces that align with your vision. Consider the scale of your rooms, the color schemes, and the specific needs of each area before making a decision. Additionally, don’t overlook the significance of energy efficiency and the latest innovations in LED technology, which offer longevity and sustainability without sacrificing style.

Ultimately, the choices you make in lighting affect not just the aesthetics of your space but also its functionality and your overall well-being. By taking the time to assess your lighting needs and exploring the myriad of options available, you can create an inviting, well-lit environment that enhances both comfort and productivity. Illuminate your life with thoughtful lighting choices that reflect your personal style and meet the demands of your everyday activities.

In conclusion, we hope this guide to different types of light fixtures has illuminated your understanding of how to enhance your spaces with the perfect lighting solutions. From the warm ambiance of pendant lights to the task-oriented brilliance of recessed fixtures, each type serves a unique purpose and can dramatically transform the atmosphere of any room. As you embark on your lighting journey, remember to consider both functionality and aesthetics, ensuring that your choices not only meet your practical needs but also reflect your personal style. With the right fixtures, you can create inviting, dynamic environments that brighten up your home and elevate your daily experiences. Thank you for joining us on this exploration of light—may your choices be inspired and your spaces beautifully lit!

How to install a new light fixture?

Transforming the ambiance of your home can be as simple as changing a light fixture.

Whether you’re looking to brighten up a dim corner, create a cozy atmosphere in your living room, or add a touch of elegance to your dining area, the right lighting can make all the difference. In this comprehensive guide, we’ll walk you through the entire process of installing a new light fixture, from selecting the perfect design that complements your decor to the practical steps of wiring and mounting. With just a few tools and a little bit of patience, you’ll be able to enhance your space with a fresh glow. So grab your toolkit, and get ready to illuminate your home as we delve into the art of light fixture installation—your space is about to shine brighter than ever!

1. Introduction: The Importance of Lighting in Your Space

How to install a new light fixture?
Credit : whatcanu.com

Lighting plays a crucial role in defining the ambiance and functionality of any space. Whether you’re transforming a cozy corner in your living room or enhancing the workspace in your kitchen, the right light fixture can make all the difference. It’s not just about illumination; it’s about creating an atmosphere that reflects your personal style and meets your everyday needs.

Good lighting can elevate the aesthetics of a room, highlighting its best features while providing essential illumination for tasks at hand. It can make a small room feel larger, a dull space feel vibrant, and a stark area feel warm and inviting. Think about how the soft glow of a pendant light can create an intimate dining experience, or how a bright chandelier can add a touch of elegance to a foyer.

Moreover, effective lighting has practical benefits as well. It can increase safety and security by eliminating dark corners that may hide potential hazards or intruders. By strategically placing light fixtures, you can enhance visibility and comfort, allowing you to navigate your space with ease at any hour of the day.

In this guide, we’ll take you through the steps of installing a new light fixture, empowering you to harness the transformative power of lighting. Whether you’re a seasoned DIY enthusiast or a first-time installer, our clear instructions and helpful tips will ensure that you can illuminate your space with confidence and flair. Let’s dive in and brighten up your home!

2. Choosing the Right Light Fixture for Your Room

Choosing the right light fixture for your room is a vital step in illuminating your space effectively and enhancing its overall aesthetic. The light fixture you select should not only complement the existing decor but also serve the practical purposes of the room. Start by considering the function of the space. For example, a cozy living room may benefit from warm, ambient lighting, while a kitchen requires bright, focused light for meal prep and cooking.

Next, think about the style that resonates with you and fits the room’s theme. Are you drawn to modern minimalism, rustic charm, or perhaps a vintage flair? Chandeliers can add a touch of elegance to dining areas, while sleek pendant lights work beautifully over kitchen islands. Additionally, wall sconces can contribute to the ambiance without taking up valuable floor space in smaller rooms.

Size matters, too. A fixture that is too large can overwhelm a small space, while one that is too small can get lost in a larger room. As a rule of thumb, consider the dimensions of your room when selecting a fixture: the diameter of the chandelier or light fixture in inches should equal the sum of the room’s length and width in feet. This simple formula helps ensure that your choice will be visually proportional.

Finally, don’t overlook the importance of the light bulb itself. The type of bulb you choose—whether LED, incandescent, or fluorescent—will impact not only the quality of light but also energy efficiency and longevity. Pay attention to the color temperature as well; warmer tones create a cozy atmosphere, while cooler tones can invigorate and energize.

Taking the time to thoughtfully select the right light fixture will transform your room into a beautifully illuminated space that reflects your personal style while meeting your lighting needs.

3. Tools and Materials Needed for Installation

How to install a new light fixture?
Credit : whatcanu.com

Before diving into the exciting world of light fixture installation, it’s essential to gather the right tools and materials to ensure a smooth and safe process. Here’s a detailed list of what you’ll need, along with some handy tips to help you prepare for the task ahead.

**Tools:**

1. **Screwdriver Set**: Both flathead and Phillips screwdrivers are indispensable for removing old fixtures and securing the new ones. Consider using a magnetic screwdriver to prevent screws from falling during installation.

2. **Wire Strippers**: These are crucial for exposing the ends of the wires if they are covered with insulation. A good pair will make your connections clean and secure.

3. **Voltage Tester**: Safety first! Before you start working with electrical components, use a voltage tester to ensure that the power is off in the wiring area. This tool will provide peace of mind while you work.

4. **Drill and Drill Bits**: A power drill can simplify the process of mounting your new fixture, especially if you need to create pilot holes for screws.

5. **Ladder**: Depending on the height of your ceiling, a sturdy ladder will help you reach the fixture safely and comfortably.

6. **Pliers**: Needle-nose pliers are helpful for tightening wire connectors or securing any loose wires.

**Materials:**

1. **New Light Fixture**: Choose a fixture that complements your space and meets your lighting needs. Make sure it’s compatible with your existing electrical setup.

2. **Wire Connectors**: These small but vital components will help you securely connect the wires from your new fixture to the existing wiring. It’s often recommended to use wire nuts for a safe and effective connection.

3. **Electrical Tape**: This is a handy safety measure for wrapping exposed wires and ensuring that your connections are insulated.

4. **Mounting Hardware**: Most light fixtures come with the necessary mounting hardware, but make sure you have everything you need, including screws and anchors, especially if you’re mounting on drywall or other materials.

5. **Instruction Manual**: Don’t forget to have the manual for your new light fixture on hand! It typically contains specific instructions for installation, including wiring diagrams and safety warnings.

With these tools and materials at your disposal, you’re well-equipped to tackle the installation of your new light fixture. Remember to take your time, follow safety protocols, and enjoy the transformative effect your new lighting will have on your space!

4. Safety First: Preparing for Installation

Before diving into the exciting process of installing your new light fixture, it’s crucial to prioritize safety. Proper preparation can prevent accidents and ensure a smooth installation. Start by gathering the necessary tools and materials: a screwdriver, wire strippers, electrical tape, a voltage tester, and your new fixture, of course. A sturdy ladder is also essential if the fixture is mounted high on the ceiling.

Once you have your tools at hand, the very first step is to turn off the power at the circuit breaker. This might seem like a no-brainer, but it’s a critical step that ensures no electricity is flowing to the existing fixture while you work. Take a moment to confirm that the power is indeed off by using a voltage tester on the wires; this little device will give you peace of mind and help you avoid any electrical shocks.

Next, protect your workspace by laying down a drop cloth or old towels beneath the area where you’ll be working. This will catch any debris or dust that may fall during the installation, keeping your space tidy. If you’re working in a particularly high or hard-to-reach place, consider having a friend or family member nearby to assist you, ensuring you have someone to help stabilize your ladder or hand you tools as needed.

Lastly, don’t forget to wear safety goggles and gloves. While it may seem excessive, these small precautions can protect you from any unexpected accidents, such as falling debris or sharp edges. With safety measures firmly in place, you’re now ready to embark on the installation journey, armed with the knowledge that you’ve taken the necessary steps to keep yourself safe.

5. Turning Off the Power: How to Find Your Circuit Breaker

How to install a new light fixture?
Credit : whatcanu.com

Before diving into the installation of your new light fixture, ensuring your safety is paramount. The first step in this crucial process is turning off the power to the existing fixture, and that begins with locating your circuit breaker. This may sound straightforward, but a little guidance can make all the difference, especially if you’re unfamiliar with your home’s electrical layout.

Start by making your way to your home’s electrical panel, usually found in a basement, garage, or utility room. The panel may be a metal box mounted on the wall, often with a door that swings open to reveal rows of circuit breakers. Take a moment to familiarize yourself with the panel’s layout. Each breaker is labeled, indicating which area of the house it controls. If you’re unsure which breaker powers the old fixture, you may need to do a bit of detective work.

To identify the correct breaker, you can turn on the existing light fixture and then head to the panel. As you flip each breaker off, pay attention to the light – when it goes dark, you’ve found the right one! Once you’ve identified the correct circuit, switch it to the off position and confirm that the fixture is no longer receiving power.

For added safety, it’s wise to label your breaker box if it isn’t already labeled. This will save you time and effort in future projects and ensure you can quickly find the right breaker when needed. After you’ve confidently turned off the power, it’s a good practice to test the fixture with a voltage tester to guarantee there is no electricity flowing to the wires. With the power securely off, you can proceed with your installation, knowing you’ve taken the necessary precautions to work safely.

6. Removing the Old Light Fixture: Step-by-Step Instructions

Removing the old light fixture can seem daunting, but with the right approach, it’s a straightforward task that paves the way for your stunning new addition. Before you begin, ensure you have the necessary tools at hand: a screwdriver, a voltage tester, and possibly a pair of wire cutters. Safety is paramount, so let’s dive into the step-by-step process.

**Step 1: Turn Off the Power**
Safety first! Head to your circuit breaker and switch off the power to the light fixture you’ll be replacing. It’s a good idea to double-check that the power is off by using a voltage tester on the wires. This will give you peace of mind while you work.

**Step 2: Remove the Light Bulbs**
Once you’ve confirmed that the electricity is off, carefully remove any light bulbs from the fixture. This will lighten the load and make handling the fixture easier. Store the bulbs in a safe place to avoid breakage.

**Step 3: Detach the Fixture from the Ceiling**
Most light fixtures are secured with screws or mounting brackets. Using your screwdriver, carefully unscrew the fixture from the ceiling. If there’s any resistance, make sure you haven’t overlooked any hidden screws. Once the fixture is loose, gently lower it to inspect the wiring.

**Step 4: Disconnect the Wires**
You’ll typically find three wires connected to the fixture: a black (or red) wire, a white wire, and a green or bare wire. Carefully disconnect these wires by either unscrewing the wire nuts or loosening the screws that hold them in place. It’s a good practice to take a photo of the wiring setup before you disconnect anything, as this will help you when you install the new fixture.

**Step 5: Remove the Mounting Bracket**
After disconnecting the wires, you’ll need to take down the mounting bracket attached to the electrical box in the ceiling. This is often held in place by screws, so use your screwdriver to remove it.

**Step 6: Clean Up**
With the old fixture removed, take this opportunity to clean the area around the electrical box. Dust and debris can accumulate over time, and a clean space will ensure better installation of the new fixture.

Congratulations! You’ve successfully removed the old light fixture and are one step closer to transforming your space with a new, stylish illumination. As you prepare to install the new fixture, keep these steps in mind to ensure a smooth transition.

7. Understanding Electrical Wiring: A Beginner’s Guide

How to install a new light fixture?
Credit : whatcanu.com

### 7. Understanding Electrical Wiring: A Beginner’s Guide

Before diving into the installation of your new light fixture, it’s crucial to grasp the basics of electrical wiring. While it may seem intimidating at first, understanding a few key concepts can empower you to approach the task with confidence and safety.

Start by familiarizing yourself with the essential components of your home’s electrical system. The most common wiring colors you’ll encounter include black (or red) for hot wires, white for neutral wires, and green or bare copper for ground wires. These colors are not just for aesthetics; they serve important functions that ensure your electrical system operates safely.

Next, take a moment to locate your circuit breaker panel. It’s your first line of defense against electrical mishaps. Before you begin any work, turn off the circuit that powers the existing light fixture. This step is non-negotiable; safety should always come first. Use a non-contact voltage tester to double-check that the power is truly off.

Once the power is disconnected, inspect the wiring in the existing fixture. You might find a combination of wires: the hot wire, neutral wire, and possibly a ground wire. Take note of how they are connected, as this will guide you when installing your new fixture. If you’re unsure, don’t hesitate to take a photo for reference.

When you’re ready to proceed, carefully remove the old fixture, ensuring that you untwist the wire connections gently. This is where your confidence will grow—by seeing how the wires are connected and realizing that it’s just a matter of connecting like with like. The new fixture will typically come with instructions, so follow those closely for any specific wiring requirements.

Finally, once your new light fixture is secured and connected correctly, restore power at the circuit breaker and flip the switch. The moment the new fixture illuminates your space is not just a reward for your hard work; it’s a testament to your newfound understanding of electrical wiring. Remember, if you ever feel uncertain or overwhelmed, consulting a professional electrician is always a wise choice. Your safety is paramount, and sometimes it’s best to leave complex tasks to the experts.

8. Installing the New Light Fixture: A Detailed Process

Once you’ve selected the perfect light fixture to elevate your space, it’s time to get into the nitty-gritty of installation. This stage is where your vision truly comes to life, transforming the ambiance of your room. Follow these detailed steps to ensure a smooth installation process:

1. **Prepare Your Workspace**: Start by clearing the area beneath the existing light fixture. Lay down a drop cloth to protect your flooring and ensure that you have ample space to work. Gather all necessary tools, including a screwdriver, wire stripper, voltage tester, and ladder. Always double-check that your new fixture comes with all the required mounting hardware.

2. **Turn Off the Power**: Safety first! Locate your circuit breaker and switch off the power to the existing light fixture. To ensure there’s no electrical hazard, use a voltage tester to confirm that the wires are not live. This step is crucial for preventing any potential accidents or shocks while you work.

3. **Remove the Old Fixture**: Carefully detach the old light fixture from the ceiling. This typically involves unscrewing the mounting bracket and disconnecting the wires. As you remove the fixture, take note of how the wires are connected—this will help guide you in connecting the new fixture. If you’re unsure, a quick photo with your phone can serve as a handy reference.

4. **Prepare the New Fixture**: Before installation, assemble your new light fixture according to the manufacturer’s guidelines. This may involve attaching bulbs, shades, or other decorative elements. Make sure everything is secure and ready for mounting.

5. **Connect the Wires**: Following the instructions that came with your new fixture, connect the wires from the fixture to the corresponding wires in the ceiling. Typically, this involves twisting the black (live) wire from the fixture to the black wire in the ceiling, the white (neutral) wires together, and grounding it with the green or bare wire. Use wire nuts to secure each connection and ensure that no bare wire is exposed.

6. **Mount the New Fixture**: Once the wiring is secured, it’s time to mount the fixture to the ceiling. Align it with the mounting bracket, and gently push any excess wiring back into the electrical box. Use screws to secure the fixture in place, following the manufacturer’s instructions for proper installation.

7. **Install Light Bulbs and Test**: With the fixture securely mounted, insert the appropriate light bulbs. Once everything is in place, return to your circuit breaker and switch the power back on. Test your new light fixture to ensure it’s working correctly. If it doesn’t illuminate, double-check your wiring connections to troubleshoot any issues.

8. **Final Touches**: With the light fixture functioning properly, take a moment to clean up your workspace. Dispose of any packaging materials and tools, and enjoy the fresh glow of your newly installed light fixture. Consider adjusting the brightness with dimmable bulbs or smart lighting options for added versatility.

By following these detailed steps, you’ll not only enhance the aesthetic of your space but also gain a sense of accomplishment from your DIY project. Enjoy your beautifully illuminated room!

9. Connecting Wires: Tips for Safe and Secure Connections

Connecting wires is a crucial step in the installation of your new light fixture, and it’s essential to approach this task with both care and precision to ensure safety and functionality. Before diving into the process, it’s imperative to turn off the power at the circuit breaker to avoid any electrical hazards. Once you’ve confirmed that the power is off, gather your tools: a wire stripper, a voltage tester, and some wire nuts.

Begin by removing the existing fixture and carefully inspecting the wiring. You should see three types of wires: the hot wire (usually black or red), the neutral wire (typically white), and the ground wire (green or bare copper). It’s helpful to organize these wires visually so you can clearly identify which ones need to be connected to your new fixture.

When connecting wires, always follow the color-coded system: twist the hot wires together, pairing the black from your fixture with the black from the ceiling. Then, do the same for the neutral wires, connecting white to white. Ground wires are connected last; secure them to the fixture’s ground wire or a grounding screw on the mounting bracket. Ensure that each twist connection is tight and secure, as loose connections can lead to flickering lights or, worse, electrical fires.

After making your connections, it’s a good idea to use a voltage tester to double-check that everything is safe before powering the circuit back on. Once you’ve verified that there are no exposed wires and that all connections are insulated with wire nuts, you can gently tuck the wires into the electrical box and mount your new light fixture according to the manufacturer’s instructions.

Remember, if at any point you feel uncertain about the wiring process, it’s always wise to consult with or hire a professional electrician to ensure that your installation is safe and up to code. With the right approach, your new light fixture will not only brighten your space but will also be installed securely and safely.

10. Securing the Fixture: Ensuring Stability and Safety

Securing your new light fixture is a crucial step that ensures both stability and safety in your home. After you’ve successfully connected the wiring, it’s time to focus on mounting the fixture securely to the ceiling or wall. Begin by aligning the fixture with the mounting bracket, ensuring that any screws or clips designed to hold it in place are easily accessible.

Before you proceed, double-check that the mounting bracket is firmly attached to the electrical box. If the electrical box wobbles or feels loose, it’s imperative to address this issue first. A sturdy mount is essential for preventing accidents or damage, particularly for heavier fixtures.

Once you are confident that everything is secure, carefully position the fixture against the ceiling. If it has a canopy, make sure it covers the electrical box completely to prevent any exposed wiring. Use the included screws to fasten the fixture to the mounting bracket, ensuring that they are tightened adequately but not overly so, as this could strip the threads or damage the fixture.

As you work, it’s important to keep your hands steady and check for level alignment. An uneven fixture can not only look unappealing but can also place undue stress on the wiring, leading to potential electrical issues down the line. Use a level tool if necessary to ensure that everything is straight.

After the fixture is secured, take a moment to gently tug on it to confirm that it is firmly in place. If it holds steady, you’ve successfully completed this phase of the installation! This attention to detail will not only enhance the aesthetic appeal of your space but also provide peace of mind knowing that your light fixture is safe and secure. With the fixture now in place, you’re just a switch flick away from illuminating your space beautifully!

11. Restoring Power: How to Turn the Electricity Back On

Restoring power after installing a new light fixture is a crucial step that marks the culmination of your hard work. Once you’ve ensured that the fixture is securely mounted and all electrical connections are properly made, it’s time to breathe life back into your newly illuminated space.

Start by locating your circuit breaker panel, which is typically found in a basement, utility room, or closet. Before you flip the switch back on, take a moment to double-check that all tools and materials are cleared from the installation area. It’s essential to ensure that everything is clean and free of any debris, as this will help prevent any accidents when the power is restored.

Identify the circuit breaker that corresponds to the area where you installed your new light fixture. Most panels are clearly labeled, but if yours isn’t, you may need to turn off and on a few breakers to find the correct one. Once you’ve identified the right breaker, firmly switch it back to the ‘on’ position.

As you do this, remain vigilant for any unusual sounds or smells. If you hear a pop or notice any burning odors, turn the breaker off immediately and double-check your connections. A simple mistake can lead to a short circuit, so it’s better to be cautious.

Now, with the power restored, it’s time to test your new light fixture. Flip the wall switch and bask in the glow of your hard work. If the light illuminates as intended, you’ve successfully completed the installation! If not, revisit your wiring connections to ensure everything is in order.

Lastly, take a moment to tidy up your workspace and dispose of any old fixtures or packaging materials. Enjoy the fresh ambiance your new light fixture brings to your space, and revel in the satisfaction of having accomplished this illuminating task!

12. Testing Your New Light Fixture: What to Look For

Once you’ve successfully installed your new light fixture, it’s time for the moment of truth: testing it to ensure everything is functioning as it should. This step is crucial, as it not only confirms that your hard work has paid off but also ensures that the fixture is safe and effective in illuminating your space.

Start by flipping the switch to turn on your new fixture. Observe the light closely. Is it illuminating the room as you envisioned? Take note of the brightness and the quality of the light. Does it cast a warm, inviting glow, or is it harsh and unflattering? If the light seems dim or overly bright, you may need to consider swapping out the bulb for a different wattage or type to achieve the desired ambiance.

Next, check for any flickering or unusual noises. Flickering could indicate a loose connection or the need for a different bulb, while buzzing sounds might suggest an issue with the fixture itself or the electrical wiring. If you notice any of these issues, it’s best to turn the power off and double-check your connections to ensure everything is secure.

Additionally, pay attention to the fixture’s placement. Walk around the room to see how the light interacts with the space. Are there any dark corners that could benefit from additional lighting? Does the fixture create any unwanted shadows? This is your opportunity to adjust the height or angle of the fixture if it’s adjustable, or to consider adding supplementary lights for a more balanced illumination.

Lastly, allow your fixture to run for a short period and monitor how it behaves over time. This will help you identify any potential overheating issues. If everything checks out, congratulations! You’ve successfully illuminated your space and created a beautiful focal point in your home. With your new light fixture shining brightly, you can now enjoy the enhanced atmosphere and style it brings to your environment.

13. Troubleshooting Common Installation Issues

Even the most meticulous DIY enthusiasts can encounter a few bumps in the road when installing a new light fixture. Troubleshooting common installation issues is essential to ensure your lighting project goes smoothly and safely. Here are some of the most frequent problems you might face, along with tips to resolve them.

**1. The Light Fixture Won’t Turn On:**
If your new light fixture isn’t illuminating, the first step is to check the power supply. Ensure that the circuit breaker is switched on and that you have replaced any blown fuses. Next, verify that all connections are secure—loose wires can easily disrupt the flow of electricity. If you’ve done all this and the fixture still doesn’t work, consider testing the bulb in a different fixture to rule out a faulty light bulb.

**2. Flickering Lights:**
A flickering light can be more than just an annoyance; it could indicate a deeper electrical issue. Check to make sure the bulb is tightly screwed in. If that doesn’t resolve the flicker, inspect the wiring connections in the junction box. Corroded or loose connections can cause fluctuations in power. If your fixture is compatible with a dimmer switch, ensure the bulb type is compatible as well, as some LED bulbs don’t work well with older dimmer systems.

**3. Uneven Lighting:**
If your new fixture isn’t providing the desired amount of light, it may be positioned incorrectly or the wrong type of fixture for the space. Consider the wattage and lumens of the bulb you’re using—an underpowered bulb could be the culprit. Additionally, assess the height and angle of the fixture; sometimes simply adjusting its position can enhance light distribution.

**4. Noise from the Fixture:**
Humming or buzzing sounds from your fixture can be frustrating. This is often caused by incompatible dimmer switches or a faulty ballast in fluorescent fixtures. If you suspect the dimmer is the issue, try replacing it with a compatible one or switch to standard switches to see if that eliminates the noise. If the problem persists with a fluorescent fixture, you may need to replace the ballast.

**5. Incorrect Fixture Size:**
Sometimes, the size of your new fixture can feel out of place, either dwarfing the room or overwhelming it. If you find that your new light fixture isn’t proportional to the space, take a moment to evaluate the room’s dimensions. Consider swapping it out for a size that better complements your decor and the scale of the room.

By addressing these common issues head-on, you can ensure that your new light fixture not only shines brightly but also enhances the beauty and functionality of your space. Remember, safety is paramount, so if you encounter complex wiring problems or persistent issues, don’t hesitate to consult a professional electrician. With a little patience and problem-solving, you’ll have your space illuminated just the way you envision!

14. Final Touches: Enhancing Your Space with Light

Once your new light fixture is securely installed and shining bright, it’s time to consider the final touches that will truly enhance your space. Lighting is not just about functionality; it plays a pivotal role in setting the mood and atmosphere of a room. Here are some simple yet effective ways to elevate your newly illuminated area.

First, think about the color of your bulbs. Soft white or warm LED bulbs create a cozy ambiance, perfect for living rooms and bedrooms, while bright white or daylight bulbs work well in kitchens and workspaces, promoting clarity and focus. Experiment with different bulb options to find the perfect hue that complements your decor and personal style.

Next, consider adding dimmers. A dimmer switch allows you to adjust the brightness of your new fixture, giving you control over the ambiance depending on the time of day or the occasion. Whether you want bright light for a lively gathering or a soft glow for a romantic dinner, dimmers give you that versatile flexibility.

Additionally, think about layering your lighting. While your new fixture may serve as the centerpiece, incorporating other light sources can create depth and interest. Table lamps, floor lamps, or even wall sconces can provide supplementary light, enhancing the overall aesthetic and functionality of the space.

Don’t forget to consider decorative elements that can enhance the light itself. Mirrors can reflect light, making your space feel larger and brighter. Placing a strategically positioned mirror across from your light fixture can double the effect of your new installation.

Finally, add personal touches that resonate with your style. Whether it’s a beautiful lampshade, decorative bulbs, or even a few accents around the base of your fixture, these details will tie your design together and make the space feel uniquely yours.

By focusing on these final touches, you can transform your newly installed light fixture from a mere necessity into a stunning focal point that enhances both your space and your experience within it. Happy illuminating!

15. Conclusion: Enjoying Your Newly Illuminated Room

Congratulations! After following the steps outlined in this guide, you have successfully transformed your space with a new light fixture. Stepping back to appreciate your handiwork is not just a moment of pride; it’s the beginning of a new chapter in how you experience your room. The gentle glow of your freshly installed fixture creates an inviting atmosphere that enhances both the aesthetics and functionality of the space.

As you bask in the warm light, take a moment to notice how the illumination has altered the dynamics of the room. Perhaps the colors on your walls now shine brighter, or the texture of your furniture becomes more pronounced under the new lighting. Whether it’s a cozy dining area, a vibrant living room, or a serene bedroom, your choice of fixture has undoubtedly added a personal touch that reflects your style.

Moreover, consider the various ways you can maximize your new lighting. Experiment with dimmers to adjust the ambiance according to the time of day or occasion. Layer your lighting by adding complementary sources, such as floor lamps or wall sconces, to create depth and warmth. You may even find joy in arranging your decor to highlight the new fixture, turning it into a focal point that draws the eye.

Lastly, don’t forget to share your achievement! Showcase your newly illuminated room on social media or with friends and family. Your project may inspire others to embark on their own lighting upgrades. So, sit back, relax, and enjoy the transformed atmosphere that your new light fixture brings—because a well-lit room is not just about visibility; it’s about setting the mood for countless memories to come.

As we wrap up our guide on installing a new light fixture, we hope you feel empowered to transform your space with newfound brilliance. Whether you’re looking to create a cozy ambiance in your living room or a bright workspace in your home office, the right lighting can truly elevate the atmosphere of any room. By following our step-by-step instructions, you can confidently tackle this DIY project and enjoy the satisfaction of a job well done. Remember, the process may take a little time and patience, but the end result—a beautifully illuminated space that reflects your personal style—will be well worth the effort. So gather your tools, unleash your creativity, and let your home shine with warmth and elegance! Happy illuminating!

How to choose the right lighting for your home?

Lighting is more than just a functional element of a home; it has the power to transform spaces, enhance moods, and create a welcoming atmosphere.

As the saying goes, “lighting can make or break a room,” and it’s true—how you illuminate your home can dramatically affect its style and ambiance. From cozy, warm tones that invite relaxation to bright, crisp lights that energize and inspire, the right lighting choices can elevate your interiors to new heights. Whether you’re revamping an entire room or simply looking for ways to enhance your existing decor, this comprehensive guide will walk you through the essentials of selecting the perfect lighting for every corner of your home. Discover the latest trends, practical tips, and expert insights to help you illuminate your space beautifully and effectively, ensuring that your home shines just as brightly as your personality!

1. Understanding the Importance of Lighting in Home Design

How to choose the right lighting for your home?
Credit : whatcanu.com

Lighting is often referred to as the unsung hero of home design, and for good reason. Its impact on the ambiance, functionality, and overall aesthetic of a space is profound. Imagine walking into a room drenched in natural light, where the sun’s rays dance off the walls, creating a warm and inviting atmosphere. Conversely, picture a dimly lit area that feels cramped and uninviting. The difference is stark, and it underscores the crucial role that lighting plays in shaping our living environments.

Understanding the importance of lighting goes beyond mere brightness; it’s about creating layers and moods that enhance each room’s purpose. Ambient lighting provides general illumination, ensuring that every corner is visible and accessible. Task lighting, on the other hand, focuses on specific areas where activities like reading, cooking, or working take place, providing the necessary brightness to perform these tasks efficiently. Accent lighting adds drama and character, highlighting artwork, architectural features, or cherished decor items, transforming an ordinary space into a showcase.

Moreover, lighting influences not just how we see our spaces, but how we feel in them. Warm tones can evoke feelings of relaxation and comfort, making a room feel cozy and inviting. In contrast, cooler tones can promote alertness and concentration, which is perfect for workspaces or study areas. By thoughtfully choosing different types of lighting, you can manipulate the emotional temperature of your home, guiding family and guests through a journey of comfort and inspiration.

Ultimately, mastering the art of lighting design is about more than just illuminating a space; it’s about painting with light to create a harmonious environment that reflects your style and meets your needs. As you embark on your journey to illuminate your space, remember that effective lighting can transform your home into a sanctuary, enhancing both its beauty and functionality.

2. Different Types of Lighting: Ambient, Task, and Accent

When it comes to transforming your living space, understanding the three fundamental types of lighting—ambient, task, and accent—is essential. Each serves a unique purpose and plays a crucial role in creating a harmonious environment that enhances both functionality and aesthetic appeal.

**Ambient Lighting** is the foundation of any well-lit room. Think of it as the general illumination that fills your space, providing a comfortable level of brightness without overwhelming the senses. Often achieved through ceiling fixtures, wall sconces, or floor lamps, ambient lighting sets the mood and ensures that every corner of your room is adequately lit. Soft, warm tones can create a cozy atmosphere, making it perfect for living rooms and bedrooms, while brighter, cooler lights can energize spaces like kitchens and home offices.

**Task Lighting**, on the other hand, is all about functionality. This type of lighting is specifically designed to illuminate areas where activities such as reading, cooking, or working take place. Desk lamps, under-cabinet lights, and pendant lights above kitchen islands are excellent examples of task lighting. By providing focused illumination, task lighting helps reduce eye strain and increases productivity, making it an essential component of any well-planned space. When selecting task lighting, consider the intensity and direction of the light to ensure it meets the specific needs of the activities you engage in.

Finally, **Accent Lighting** adds personality and flair to your home. This type of lighting is used to highlight specific features, such as artwork, architectural details, or decorative elements. Spotlights, track lighting, and decorative lamps can draw attention to these focal points, creating visual interest and depth in your space. Accent lighting allows you to express your style while enhancing the overall ambiance, making your home feel curated and inviting.

By thoughtfully incorporating ambient, task, and accent lighting into your design, you can create a well-balanced and inviting atmosphere that not only meets your practical needs but also reflects your personal taste. Embrace the transformative power of lighting and illuminate your space in a way that feels both functional and beautiful.

3. Assessing Your Space: Factors to Consider Before Choosing Lighting

How to choose the right lighting for your home?
Credit : whatcanu.com

When it comes to choosing the perfect lighting for your home, taking the time to assess your space is crucial. Different areas of your home have unique characteristics and purposes that influence the type of lighting that will work best. Start by considering the size and layout of the room. A large, open-concept living area may benefit from layered lighting, which combines ambient, task, and accent lighting to create a warm and inviting atmosphere. In contrast, a small, cozy bedroom might thrive on soft, diffused light, providing a tranquil haven for rest.

Next, evaluate the room’s color scheme and design aesthetic. Light can dramatically alter the perception of color—warm tones can enhance the coziness of a space, while cooler hues can make it feel more spacious and airy. Take note of the existing decor and furnishings: a rustic-style home might pair beautifully with vintage-inspired fixtures, while modern minimalist spaces may call for sleek, streamlined designs.

Additionally, consider the room’s functionality. A home office requires bright, focused lighting to enhance productivity, while a dining room might benefit from dimmable fixtures that set the mood for intimate gatherings. Don’t forget to factor in natural light; the amount and direction of sunlight your space receives throughout the day can affect how artificial lighting looks and feels.

Finally, think about the flexibility of your lighting choices. Adjustable fixtures, such as dimmers or swiveling lamps, can help you tailor the ambiance to suit various activities and moods. By carefully assessing these factors, you can create a harmonious and functional lighting plan that truly illuminates your space, enhancing both its beauty and utility.

4. How to Create a Lighting Plan for Each Room

Creating a lighting plan for each room in your home is an essential step in achieving both functionality and ambiance. A well-thought-out lighting strategy can transform the atmosphere of a space, making it feel warm and inviting or bright and energizing, depending on your needs. Here’s how to develop a comprehensive lighting plan that caters to the unique requirements of each room.

**1. Assess the Functionality of Each Space:**
Start by evaluating how each room will be used. A kitchen, for example, requires bright, focused lighting for cooking tasks, while a bedroom benefits from softer, ambient lighting for relaxation. Consider the activities that will take place in each area to determine the types and intensities of light needed.

**2. Layer Your Lighting:**
Effective lighting design involves layering different types of lighting: ambient, task, and accent. Ambient lighting provides overall illumination, task lighting focuses on specific work areas, and accent lighting highlights architectural features or décor. For instance, in a living room, ceiling fixtures might serve as ambient light, table lamps can provide task lighting for reading, and wall sconces could accentuate artwork.

**3. Choose the Right Fixtures:**
Select lighting fixtures that complement the room’s style and purpose. In a contemporary space, sleek, minimalist fixtures may be ideal, while a rustic-themed room might benefit from more textured, vintage-inspired options. Don’t forget to consider the size of the fixtures in relation to the space; a grand chandelier can become a stunning focal point in a large dining room, while smaller pendant lights may work better in a cozy nook.

**4. Consider Natural Light Sources:**
Take note of existing natural light sources in each room, such as windows and skylights. Position your lighting plan to enhance these features rather than compete with them. For example, sheer window treatments can allow daylight to fill a room, while strategically placed lamps can provide warmth during the evening.

**5. Create Zones:**
If a room serves multiple purposes—such as a home office that doubles as a guest room—consider creating zones with different lighting. Adjustable fixtures, dimmers, and smart lighting solutions can help you easily switch from a bright, productive environment to a cozy, relaxing atmosphere.

**6. Test and Adjust:**
Once you’ve installed your lighting, take the time to evaluate how it feels in practice. Live with it for a few days and be open to making adjustments. Sometimes, a simple reorientation of a lamp or the addition of a dimmer switch can dramatically enhance the experience of the space.

By meticulously crafting a lighting plan tailored to each room, you can elevate your home’s functionality while creating an inviting and aesthetically pleasing environment. Whether you prefer bold statements or subtle elegance, the right lighting can illuminate not only your spaces but also your lifestyle.

5. Choosing the Right Fixtures: Style and Functionality

How to choose the right lighting for your home?
Credit : whatcanu.com

When it comes to illuminating your home, the choice of lighting fixtures is pivotal—not just for the ambiance they create but also for the functionality they provide. The right fixtures can transform a space from mundane to magnificent, merging aesthetic appeal with practical utility.

Start by considering the overall style of your home. Are you drawn to a modern minimalist look, or do you prefer the warmth of rustic charm? Each style demands unique lighting elements. For a contemporary vibe, sleek pendant lights with clean lines can serve as stunning focal points in dining areas or kitchens, while industrial-style fixtures—think exposed bulbs and metal finishes—can add character to loft-like spaces. On the other hand, if your home leans toward traditional or vintage, consider chandeliers with ornate details or table lamps featuring classic designs to enhance the cozy vibe.

But style shouldn’t overshadow functionality. Assess the purpose of each room when selecting fixtures. In the kitchen, bright, direct lighting is essential for meal prep, so consider recessed lighting or under-cabinet lights that offer practicality without compromising style. For living areas, a combination of ambient lighting—like a beautiful floor lamp—and task lighting, such as wall sconces, can create a layered effect that allows for both relaxation and reading.

Don’t forget about the scale of your fixtures. A large chandelier can be stunning in a spacious foyer, but a small lamp can feel lost in a grand room. Conversely, oversized fixtures in a small space can make the area feel cramped. Aim for balance—select fixtures that complement the size and proportions of your rooms.

Lastly, think about the type of light each fixture will emit. Soft, warm light can create a cozy atmosphere in bedrooms and living rooms, while cooler, brighter light might be more appropriate for workspaces. Dimming options can also offer versatility, allowing you to adjust the mood as needed.

In the end, choosing the right fixtures is about finding the perfect marriage of style and functionality. By considering both elements thoughtfully, you can create a beautifully illuminated home that is as inviting as it is practical.

6. The Role of Natural Light in Your Home

Natural light is one of the most transformative elements in a home, playing a crucial role in both the aesthetics and functionality of your living spaces. Not only does it enhance the visual appeal of your interiors, but it also contributes to your overall well-being. Studies have shown that exposure to natural light can boost your mood, increase productivity, and even improve your sleep patterns. Therefore, understanding how to maximize natural light should be a priority when designing your home’s lighting scheme.

Start by assessing the layout of your home and the direction of your windows. South-facing rooms typically receive the most sunlight throughout the day, while north-facing spaces may benefit from reflective surfaces to amplify the light that enters. Consider the use of light, airy curtains that can allow sunlight to filter through while still providing some privacy. Additionally, the strategic placement of mirrors can help bounce light around the room, making even small spaces feel more expansive and inviting.

Incorporating natural elements into your decor can also enhance the impact of natural light. Light-colored walls and furnishings can reflect sunlight, creating a warm and welcoming atmosphere. Plants add a touch of nature and can thrive in well-lit areas, contributing to a healthier environment by purifying the air.

Finally, don’t forget to think about how you can create a seamless transition between indoors and outdoors. Large windows, sliding glass doors, or even skylights can open up your space to the outside world, allowing natural light to flood in while connecting you to your garden or patio. By thoughtfully considering the role of natural light in your home, you can create a vibrant, energizing environment that feels alive and welcoming.

7. Energy-Efficient Lighting Options: LED and Beyond

How to choose the right lighting for your home?
Credit : whatcanu.com

In today’s environmentally conscious world, selecting energy-efficient lighting options is not just a trend; it’s a responsible choice that can illuminate your home while conserving energy and reducing utility bills. Among the myriad of options available, LED (Light Emitting Diode) lighting stands out as a front-runner, offering a perfect blend of efficiency, longevity, and versatility.

LED lights are renowned for their impressive energy-saving capabilities. Consuming up to 80% less energy than traditional incandescent bulbs, LEDs produce the same amount of light while generating significantly less heat. This not only translates to lower electricity bills but also extends the lifespan of your lighting fixtures—often lasting 15,000 hours or more. Imagine the convenience of fewer bulb replacements and the peace of mind that comes with knowing you’re making a sustainable choice.

Beyond LEDs, the lighting market is brimming with additional energy-efficient options worth considering. Compact Fluorescent Lamps (CFLs) are another popular choice, using about 75% less energy than incandescent bulbs. Although they may contain a small amount of mercury, their long lifespan and reduced energy consumption make them a viable option for many households.

For those seeking an even greener alternative, consider solar-powered lights. Perfect for outdoor spaces, these fixtures harness sunlight to provide illumination at night, eliminating electricity costs altogether. Whether you’re lighting up a garden path or creating an inviting ambiance on your patio, solar lights are an excellent way to incorporate sustainable practices into your home.

Smart lighting solutions also deserve a mention, as they allow for greater control over your energy usage. With smart bulbs, you can adjust brightness, color temperature, and even set schedules from your smartphone or voice-activated assistant. This level of customization not only enhances your living environment but also encourages energy conservation by ensuring lights are only on when needed.

As you explore energy-efficient lighting options, consider the mood and functionality of each room in your home. From warm, inviting tones in the living area to bright, focused lighting in your workspace, the right choice can transform any space. By opting for LEDs and exploring other energy-efficient solutions, you’ll create a beautifully lit home while contributing to a more sustainable future—illuminating both your space and your commitment to the planet.

8. Color Temperature: How It Affects Mood and Atmosphere

The color temperature of your lighting plays a pivotal role in shaping the mood and atmosphere of your home. Measured in Kelvin (K), color temperature refers to the appearance of the light source, ranging from warm, inviting hues to cool, crisp tones. Understanding this concept is essential for creating spaces that resonate with your desired ambiance.

Warm white light, typically ranging from 2700K to 3000K, emits a cozy glow reminiscent of a sunset or a crackling fireplace. It’s perfect for spaces where relaxation is key, such as living rooms, bedrooms, or dining areas. This type of lighting encourages a sense of comfort and intimacy, making it ideal for gatherings with family and friends. Imagine curling up with a book under the soft glow of warm light, or sharing a candlelit dinner that feels both romantic and welcoming.

On the other end of the spectrum, cool white light, which can reach up to 5000K, mimics daylight and creates a bright, invigorating environment. This color temperature is best suited for areas where focus and productivity are paramount, like kitchens, home offices, or workshops. It enhances concentration and alertness, making it easier to tackle tasks or engage in creative endeavors. Picture yourself working effectively at a desk bathed in crisp, clear light, or preparing meals in a kitchen that feels fresh and energizing.

When selecting your lighting, consider how each room’s color temperature will influence the activities that take place within it. You can also use dimmers or smart lighting solutions to adjust the ambiance according to the time of day or your specific needs. By thoughtfully choosing the right color temperature for each space, you can create a harmonious flow throughout your home, enhancing both the atmosphere and your overall well-being. Ultimately, lighting is not just about illumination; it’s an art form that can transform your living environment into a sanctuary that reflects your style and meets your emotional needs.

9. Layering Your Lighting for Maximum Effect

Layering your lighting is essential for creating a dynamic and inviting atmosphere in your home. Rather than relying on a single overhead fixture, consider a combination of ambient, task, and accent lighting to achieve a well-rounded illumination scheme that enhances both function and aesthetics.

**Ambient lighting** serves as the foundation of your lighting design, providing a soft, general glow that fills the room. This can be achieved through ceiling-mounted fixtures, chandeliers, or wall sconces. Choose warm bulbs to create a cozy atmosphere that invites relaxation and comfort. The key is to ensure that this layer of light is balanced and evenly distributed, eliminating any harsh shadows or overly bright spots.

Next, **task lighting** addresses specific activities and needs throughout your space. Whether it’s a bright desk lamp for your home office, under-cabinet lighting in the kitchen for meal prep, or reading lamps in the living room, these dedicated light sources are crucial for functionality. When selecting task lighting, focus on adjustable fixtures that can be directed where needed, allowing for flexibility and precision in your lighting design.

Finally, **accent lighting** adds a touch of drama and interest to your home. Use this layer to highlight artwork, architectural features, or decorative objects. Picture lights, track lighting, or even strategically placed floor lamps can draw the eye to focal points, creating a sense of depth and dimension in your space.

To achieve the best results, think of your lighting as a three-dimensional canvas. Experiment with different heights, types, and placements of fixtures to create balance and harmony. Dimmers can also enhance this effect, allowing you to adjust the brightness according to the time of day or occasion. By thoughtfully layering your lighting, you can transform your home into a beautifully lit haven that effortlessly blends style and functionality.

10. Choosing Lighting for Specific Areas: Living Room, Kitchen, and Bedroom

When it comes to illuminating your home, understanding the unique lighting needs of each room is essential for creating an inviting atmosphere. Each space serves a different purpose and requires a tailored approach to lighting design. Let’s explore how to choose the perfect lighting for three of the most frequently used areas in your home: the living room, kitchen, and bedroom.

### Living Room

The living room is often the heart of the home, where family and friends gather to relax and socialize. To achieve a warm and inviting ambiance, consider a layered lighting approach. Start with ambient lighting, such as ceiling fixtures or chandeliers, to provide overall illumination. Next, add task lighting with table lamps or floor lamps in reading nooks or near seating areas, ensuring that everyone has adequate light for activities like reading or playing games. Don’t forget accent lighting to highlight artwork, plants, or architectural features; wall sconces or adjustable spotlights can create visual interest and depth. Opt for dimmable fixtures to easily transition from bright, lively gatherings to cozy, intimate evenings.

### Kitchen

The kitchen is a space of functionality and creativity, requiring a combination of bright task lighting and softer ambient options. Begin with overhead lighting, such as flush mounts or pendant lights over islands, to ensure clear visibility while cooking. Incorporate under-cabinet lighting to illuminate countertops, making meal prep safer and more efficient. For added ambiance, consider incorporating decorative fixtures that complement your kitchen’s style. Pendant lights can be both functional and aesthetic, adding a touch of personality above an island or dining area. Remember to prioritize energy-efficient options like LED bulbs, which not only brighten your space but also save on energy costs over time.

### Bedroom

The bedroom is your sanctuary—a place for rest and relaxation. The lighting here should promote tranquility and comfort. Start with soft, ambient light from ceiling fixtures or lamps placed strategically around the room. Bedside table lamps are essential for reading and provide a cozy glow for winding down in the evening. Consider incorporating adjustable lighting, such as dimmers or smart bulbs, to create the perfect mood for any time of day. Accent lighting, like wall sconces or LED strip lights along shelves, can add a touch of elegance while providing a gentle nightlight. And don’t forget to provide blackout curtains or shades to control natural light for a peaceful sleeping environment.

By thoughtfully selecting the right lighting for each area of your home, you can enhance both functionality and aesthetics, creating spaces that are not only beautifully illuminated but also tailored to your lifestyle. Whether you’re entertaining guests, whipping up a culinary masterpiece, or unwinding after a long day, the right lighting will make all the difference.

11. Smart Lighting Solutions: Technology for Modern Homes

In today’s fast-paced, tech-savvy world, smart lighting solutions have emerged as a game-changer for modern homes, blending functionality with convenience and style. These innovative systems allow you to control your lighting effortlessly—from adjusting brightness levels to changing colors and even setting schedules—right from your smartphone or through voice commands. Imagine walking into your home and having the lights automatically adjust to your preferred settings, creating the perfect ambiance tailored to your mood.

Smart lighting goes beyond mere convenience; it offers energy efficiency that can significantly reduce your utility bills. Many smart bulbs and systems are designed to use less energy than traditional options, and with features like motion sensors and timers, you can ensure that lights are only on when you need them. This not only helps the environment but also aligns with the sustainable living practices that many homeowners are now embracing.

Moreover, you can create unique lighting scenes to complement different activities or times of the day. Whether you’re hosting a dinner party, winding down with a book, or getting energized for a workout, smart lighting can adapt to your needs at the touch of a button. Some systems even allow for integration with other smart home devices, enabling seamless automation—like dimming the lights when your home theater setup is activated or brightening the kitchen as the sun sets.

When selecting smart lighting solutions, consider compatibility with your existing home automation system, the range of features offered, and user-friendliness. With options ranging from smart bulbs to sophisticated lighting systems that can be controlled via apps or voice-activated assistants, there’s a perfect fit for every home. Embrace the future of lighting and transform your space into a modern sanctuary that is not only beautifully illuminated but also intuitively responsive to your lifestyle.

12. Common Mistakes to Avoid When Selecting Lighting

When it comes to selecting the perfect lighting for your home, avoiding common pitfalls can make all the difference in creating a warm and inviting atmosphere. One prevalent mistake is underestimating the importance of layering your lighting. Many homeowners rely solely on overhead fixtures, neglecting the impact of ambient, task, and accent lighting. A well-lit room requires a harmonious blend of these elements to create depth and functionality. For instance, using a combination of ceiling lights, floor lamps, and wall sconces not only illuminates the space effectively but also enhances its visual appeal.

Another frequent error is failing to consider the scale of your lighting fixtures in relation to the room’s size. Oversized chandeliers in a small dining area can feel overwhelming, while tiny pendant lights in a spacious foyer can get lost in the vastness. It’s crucial to strike a balance; choosing fixtures that complement the scale of the room adds a sense of proportion and elegance.

Color temperature is another factor often overlooked. The wrong choice can alter the mood of your space significantly. Bright, cool white lights can create a sterile environment, while warm tones can foster a cozy and inviting atmosphere. Be sure to explore different bulbs and fixtures to find the perfect color temperature that suits your lifestyle and décor.

Finally, don’t forget about the placement of your fixtures. Poorly positioned lights can create harsh shadows or glaring spots, detracting from the overall aesthetic. Take the time to plan your lighting layout, ensuring that key areas are well-lit for both functionality and ambiance. By sidestepping these common mistakes, you’ll be well on your way to illuminating your space in a way that reflects your personal style and enhances the beauty of your home.

13. Maintenance Tips for Keeping Your Fixtures Bright

Once you’ve invested time and effort into selecting the perfect lighting fixtures for your home, it’s crucial to ensure they remain bright and beautiful for years to come. Proper maintenance not only extends the life of your fixtures but also enhances the overall ambiance of your spaces. Here are some essential tips to keep your lighting shining brightly.

**Regular Dusting:** Dust accumulation can dull the brilliance of your fixtures, creating a hazy effect that diminishes their aesthetic appeal. Make it a habit to dust your light fixtures regularly, using a soft microfiber cloth or a feather duster to gently remove any buildup. For more intricate designs, consider using a small paintbrush to reach into crevices and ensure every nook gets the attention it deserves.

**Cleaning Techniques:** Depending on the material of your fixtures, the cleaning process may vary. For glass and crystal fixtures, a mixture of warm water and mild dish soap works wonders. Use a soft sponge to gently wipe down surfaces, followed by a thorough rinse to avoid streaks. For metallic finishes, a specialized cleaner can help maintain shine without causing damage. Always consult the manufacturer’s guidelines for specific cleaning recommendations to avoid harsh chemicals that could tarnish or corrode your fixtures.

**Regular Bulb Replacement:** A dimly lit room can be a result of aging bulbs. Make it a point to check your light bulbs periodically and replace any that are flickering or have burnt out. Consider switching to LED bulbs for their longevity and energy efficiency, and remember to keep a few spare bulbs on hand to ensure that your lighting remains consistent.

**Check Wiring and Connections:** Over time, wiring can wear down or connections can loosen, leading to flickering or complete outages. Schedule routine checks of your fixtures, especially for those hard-to-reach areas. If you notice any issues, don’t hesitate to call in a professional electrician to ensure everything is safe and functioning properly.

**Seasonal Considerations:** Different seasons can bring various challenges to your lighting fixtures. For instance, if you live in a region with heavy snowfall, outdoor fixtures may need extra care to prevent ice build-up. In contrast, summer months might lead to increased dust and pollen that can quickly coat your interior lighting. Adjust your maintenance routine seasonally to address these specific needs.

By implementing these maintenance tips, you not only keep your lighting fixtures looking their best but also create a warm and inviting atmosphere in your home. Consistent care ensures that your chosen lights continue to illuminate your space beautifully, making every corner feel welcoming and vibrant.

14. DIY Lighting Projects to Enhance Your Space

When it comes to personalizing your home, few things can make as significant an impact as DIY lighting projects. These creative endeavors not only brighten up your space but also allow you to infuse your personality and style into every corner of your home. From elegant pendant lights to quirky table lamps, the options are endless, and the satisfaction of crafting something unique is unparalleled.

**Upcycled Jar Lanterns:** One popular project involves repurposing glass jars into charming lanterns. Simply gather some mason jars, twinkling fairy lights, and your favorite decorative elements—think pebbles, sand, or dried flowers. Fill the jars with your chosen materials, entwine the fairy lights inside, and watch as they cast a warm glow in your living space. These lanterns are perfect for accentuating shelves, creating a cozy atmosphere on a patio, or adding flair to a dining table.

**Rustic Wooden Sconces:** If you’re aiming for a farmhouse chic vibe, consider constructing wooden sconces. Using reclaimed wood, you can create a simple shelf or wall-mounted light fixture that holds a bulb or candle. Paint or stain the wood to match your decor, and add your favorite plants or decorative accents for a truly personalized touch. These sconces can transform an empty wall into a stunning focal point, providing both function and style.

**DIY Chandelier:** For those looking to make a bold statement, a DIY chandelier can be a showstopper. Using materials such as wire, beads, or even repurposed items like old wine bottles, you can design a unique piece that reflects your aesthetic. Hang it over a dining table or in a foyer to create an inviting atmosphere. Not only will this project enhance your space, but it will also serve as a conversation starter for your guests.

**Mood Lighting with Cordless Lamps:** If flexibility is key, consider crafting cordless lamps that can easily be moved around your home. Using battery-operated LED lights, you can create stylish lamp bases from materials like ceramic, wood, or even fabric. These lamps are perfect for adding ambiance to a cozy reading nook or illuminating a dark corner without the hassle of cords.

By embracing DIY lighting projects, you not only enhance your space but also engage in a fulfilling creative process. Each project allows you to experiment, learn, and ultimately design lighting that fits your personal style while making your home feel more inviting and uniquely yours. So gather your materials, unleash your imagination, and let your creativity shine!

15. Conclusion: Finding Your Unique Lighting Style

In conclusion, finding your unique lighting style is not just about choosing fixtures; it’s about creating an atmosphere that resonates with your personality and enhances the functionality of your space. Lighting plays a pivotal role in shaping our experiences at home, influencing everything from our mood to our productivity.

As you embark on this illuminating journey, take the time to explore different styles, from minimalist and modern to rustic and bohemian. Consider how each piece can transform a room, whether it’s a statement chandelier that draws the eye or subtle sconces that create a warm, inviting glow. Don’t shy away from mixing and matching various designs, as layering different types of lighting—ambient, task, and accent—can introduce depth and character to your home.

Remember, the right lighting can accentuate your decor, highlight architectural features, and provide the perfect backdrop for your daily life. So, whether you’re revamping a single room or redesigning your entire home, approach your lighting choices with creativity and intention. Allow your personal style to shine through, and let your home reflect not just how you live, but who you are. The perfect lighting is out there, waiting to illuminate your space and enhance your daily experiences. Embrace the journey, and watch as your home transforms into a beautifully lit sanctuary that truly feels like your own.

As we wrap up our guide on choosing the perfect lighting for your home, we hope you feel inspired and empowered to transform your spaces into inviting havens filled with warmth and ambiance. Remember, lighting is not just a functional element; it plays a crucial role in setting the mood, enhancing your décor, and showcasing your personal style. By considering factors such as the purpose of each room, the natural light available, and your unique aesthetic preferences, you can create a harmonious balance that elevates your home. So go ahead, experiment with different fixtures, layer your lighting, and let your creativity shine. Here’s to illuminating your space and making every corner of your home a reflection of you!

What are the different types of plumbing fixtures?

When it comes to designing or renovating your home, one of the most crucial yet often overlooked elements is the plumbing fixtures.

These essential components not only serve functional purposes but also play a significant role in the overall aesthetic of your space. From sleek faucets and stylish sinks to elegant bathtubs and efficient toilets, the right plumbing fixtures can transform your bathroom and kitchen into stylish sanctuaries. However, with the myriad of options available in the market, choosing the perfect fixtures can be a daunting task. In this comprehensive guide, we’ll explore the various types of plumbing fixtures, their unique uses, and essential selection tips to help you make informed decisions that align with your personal style and practical needs. Whether you’re a DIY enthusiast, a seasoned renovator, or simply looking to refresh your living space, this ultimate guide will equip you with the knowledge you need to elevate your home’s functionality and design.

1. Introduction to Plumbing Fixtures

What are the different types of plumbing fixtures?
Credit : whatcanu.com

Plumbing fixtures are the unsung heroes of our everyday lives, seamlessly blending functionality with style in our homes and businesses. From the moment we turn on a tap to wash our hands, fill a bathtub, or flush a toilet, we rely on these essential components to deliver water efficiently and effectively. But plumbing fixtures are not merely utilitarian; they also play a significant role in the aesthetic appeal of our spaces.

In this comprehensive guide, we will explore the various types of plumbing fixtures, their specific uses, and key considerations for selecting the right fixtures for your needs. Whether you are embarking on a renovation project, building a new home, or simply looking to upgrade your existing plumbing, understanding the different options available is crucial.

We’ll delve into the common types of fixtures, such as faucets, sinks, toilets, bathtubs, and showerheads, highlighting their unique features and functions. Additionally, we’ll discuss the importance of water efficiency and how modern fixtures can contribute to sustainability efforts, ultimately saving you money on utility bills while being kinder to the environment.

Moreover, we’ll provide tips on how to choose fixtures that complement your interior design, fit your lifestyle, and meet your budget. By the end of this guide, you will be well-equipped to make informed decisions about plumbing fixtures that enhance both the functionality and beauty of your spaces. So, let’s dive in and discover the world of plumbing fixtures together!

2. Understanding Different Types of Plumbing Fixtures

When embarking on a plumbing project, understanding the various types of plumbing fixtures is crucial to achieving both functionality and aesthetic appeal in your space. Plumbing fixtures are not just essential for the practical aspects of water distribution and waste management; they also contribute significantly to the overall design of your home or business.

**1. Faucets:** The unsung heroes of any kitchen or bathroom, faucets come in a variety of styles, finishes, and functionalities. From single-handle pull-down sprayers in modern kitchens to classic widespread faucets in traditional bathrooms, the right faucet can enhance your space while ensuring efficient water flow. Look for features such as high-arc designs for greater clearance or touchless sensors for added convenience.

**2. Sinks:** Sinks serve as the heart of both kitchens and bathrooms. Kitchen sinks are typically larger and come in styles such as farmhouse, undermount, or drop-in, accommodating everything from food prep to dishwashing. Bathroom sinks range from pedestal and wall-mounted designs to vessel sinks that sit atop countertops. Consider the sink’s material—stainless steel, porcelain, or composite—and its size in relation to the overall space and functionality you desire.

**3. Toilets:** Today’s toilets offer a blend of comfort, efficiency, and style. From conventional two-piece models to sleek one-piece designs, the choices are vast. Look for features such as dual-flush options for water conservation, comfort height for ease of use, and noise-reduction technologies for a quieter experience. Selecting the right toilet can significantly impact both your water usage and the overall aesthetic of your bathroom.

**4. Showers and Bathtubs:** Showers can range from basic models to luxurious walk-in enclosures with multiple showerheads and body sprays. Bathtubs, whether freestanding, alcove, or drop-in, can be a statement piece in a bathroom. Consider your lifestyle and preferences when selecting these fixtures; for instance, if relaxation is key, a deep soaking tub may be ideal, while a streamlined shower may suit smaller spaces or busy households.

**5. Accessories and Additional Fixtures:** Don’t overlook the importance of accessories like showerheads, towel racks, and bathroom storage. These smaller fixtures can dramatically enhance functionality and style. Consider selecting finishes and designs that complement your primary fixtures to create a cohesive look in your space.

By familiarizing yourself with the different types of plumbing fixtures and their unique features, you can make informed decisions that not only meet your practical needs but also elevate the overall design of your home. As you dive into the selection process, keep in mind aspects such as water efficiency, ease of maintenance, and compatibility with your existing plumbing to ensure a seamless integration of style and function.

– 2.1 Faucets

What are the different types of plumbing fixtures?
Credit : whatcanu.com

### 2.1 Faucets

Faucets are the unsung heroes of any plumbing system, serving as the primary interface between users and the water supply. While they may seem like a simple fixture, the variety of styles, designs, and functionalities available today can make selecting the right faucet a daunting task. Understanding the different types of faucets, their uses, and the selection tips can significantly enhance your plumbing project.

At a basic level, faucets can be categorized based on their design and functionality. **Compression faucets**, the traditional type, operate with two separate handles for hot and cold water, allowing for precise temperature control. However, they require a bit of effort to turn on and off, making them less popular in modern applications.

In contrast, **cartridge faucets** feature a single handle or two handles with a cartridge that controls the flow and temperature of water. This type is known for its smooth operation and longevity, making it a favorite for kitchens and bathrooms alike. **Ball faucets**, commonly found in modern kitchen sinks, utilize a single handle that moves over a ball joint to control water flow and temperature, offering a sleek and user-friendly experience.

For those looking for convenience, **pull-down and pull-out faucets** provide added flexibility in the kitchen. These faucets come with a retractable hose that makes it easy to wash dishes or fill large pots directly from the sink. Additionally, **touchless faucets**, which use motion sensors to activate water flow, are increasingly popular in both residential and commercial settings for their hygiene and ease of use.

When selecting a faucet, consider the style and finish that will best complement your space. From polished chrome to matte black, the finish can dramatically impact the overall aesthetic of your kitchen or bathroom. Don’t forget about the installation requirements; some faucets are designed for easy DIY setups, while others may necessitate professional assistance.

Finally, it’s essential to think about your water pressure and the faucet’s flow rate. A faucet that doesn’t match your plumbing system can lead to frustrating issues like low flow or fluctuating temperatures. Researching and selecting a faucet that aligns with your specific needs will not only enhance functionality but also elevate the overall design of your space.

In conclusion, faucets are more than just fixtures; they are integral components that combine practicality with style. By understanding the various types and considering your unique requirements, you can confidently choose the perfect faucet that will serve you well for years to come.

– 2.2 Sinks

### 2.2 Sinks

Sinks are essential fixtures in any home, serving as the heart of many daily activities, from cooking and cleaning to personal hygiene. Available in a wide variety of styles, materials, and configurations, sinks can significantly impact both functionality and aesthetics in your space.

**Types of Sinks**

1. **Kitchen Sinks**: These are typically larger and more robust, designed to handle everything from washing dishes to food preparation. Common types include single-basin, double-basin, and farmhouse sinks, each catering to different needs and preferences. Stainless steel is a popular choice for its durability and ease of cleaning, while porcelain and composite materials can add a touch of elegance.

2. **Bathroom Sinks**: Bathroom sinks come in various shapes and sizes, including pedestal sinks, vessel sinks, and undermount sinks. Pedestal sinks offer a classic look and save space, while vessel sinks add a stylish, modern flair. Materials range from ceramic and glass to stone and metal, allowing homeowners to choose based on their design aesthetic.

3. **Utility Sinks**: Often found in laundry rooms or garages, utility sinks are designed for heavy-duty tasks. These sinks are typically deeper and more rugged, perfect for washing out paintbrushes, rinsing muddy shoes, or cleaning pet supplies. They often come with a high arch faucet for added convenience.

4. **Bar and Prep Sinks**: Smaller in size, these sinks are ideal for entertaining or food prep areas. They can be found in kitchens and bars, providing a convenient spot for washing hands, rinsing fruits and vegetables, or prepping cocktails.

**Materials and Finishes**

When selecting a sink, the material plays a crucial role in both functionality and style. Here are a few popular options:

– **Stainless Steel**: Known for its durability and resistance to stains, stainless steel is a staple in many kitchens. It offers a sleek, modern look but can show water spots and scratches over time.

– **Ceramic and Porcelain**: These materials are often used for bathroom sinks due to their classic aesthetic and ease of cleaning. They are available in various colors but can chip or crack if not handled carefully.

– **Granite and Composite**: These materials provide a luxurious appearance and are resistant to scratches and stains. They come in various colors and patterns, allowing for more personalization in your home.

**Selection Tips**

When selecting a sink, consider the following factors to find the perfect fit for your space:

– **Size and Configuration**: Measure your space to ensure the sink will fit properly, and think about your daily tasks to determine if you need a single or double basin.

– **Style**: Choose a sink that complements your overall design aesthetic, whether it’s modern, traditional, or somewhere in between.

– **Functionality**: Think about how you use your sink daily and select features that enhance efficiency, such as additional accessories like cutting boards or drying racks.

– **Installation Type**: Decide between drop-in, undermount, or vessel sinks based on your countertop material and desired look.

By understanding the various types of sinks available and considering your specific needs and preferences, you can make an informed decision that enhances both the function and style of your home. Remember, a well-chosen sink not only serves practical purposes but also adds to the overall ambiance of your space, making it a vital fixture in your plumbing arsenal.

– 2.3 Toilets

What are the different types of plumbing fixtures?
Credit : whatcanu.com

### 2.3 Toilets

Toilets are among the most essential plumbing fixtures in any home, serving a vital function in daily life while also contributing to the overall aesthetics of a bathroom. When considering toilets, it’s important to understand the various types available, their unique features, and how to select the right one for your needs.

**Types of Toilets**

1. **Two-Piece Toilets:** These are the most common type, consisting of a separate tank and bowl. They are generally easier to install and maintain, and they come in a wide range of styles and price points. Their modular design also allows for easier transport and replacement of parts.

2. **One-Piece Toilets:** As the name suggests, these toilets feature a seamless design where the tank and bowl are integrated into one unit. This design not only creates a sleek, modern look but also minimizes the likelihood of leaks and is easier to clean due to the lack of crevices.

3. **Wall-Mounted Toilets:** For a contemporary touch, wall-mounted toilets offer a space-saving solution, as they free up floor space and provide a minimalist appearance. The tank is hidden behind the wall, which makes cleaning the bathroom floor a breeze. However, installation can be more complex and may require professional assistance.

4. **High-Efficiency Toilets (HETs):** These eco-friendly options use significantly less water per flush compared to standard toilets, making them an excellent choice for those looking to conserve water and reduce utility bills. Many models are designed to flush effectively despite using less water, ensuring both performance and sustainability.

**Features to Consider**

When selecting a toilet, consider features such as the height (standard or comfort height), which can impact accessibility and comfort, especially for taller individuals or those with mobility issues. Additionally, look for toilets with efficient flushing mechanisms, such as dual-flush systems, which allow users to choose between a lower volume flush for liquid waste and a higher volume flush for solid waste.

**Selecting the Right Toilet**

Choosing the right toilet goes beyond just aesthetics; it’s crucial to consider your household’s specific needs and preferences. Measure your bathroom space to ensure that the toilet fits comfortably alongside other fixtures. Pay attention to the rough-in measurement—the distance from the wall to the center of the toilet drain—since this can vary among homes.

Finally, don’t overlook the importance of style and color. Toilets are available in various designs and finishes, from classic white to bold colors and sleek modern shapes. Choosing a toilet that complements your bathroom decor can elevate the overall look of your space.

In conclusion, toilets are a fundamental aspect of any plumbing system. By understanding the different types available and evaluating your needs and preferences, you can make a well-informed decision that ensures both functionality and style in your bathroom.

– 2.4 Showers and Bathtubs

When it comes to creating a relaxing and functional bathroom, the choice between showers and bathtubs is pivotal. Both fixtures serve their unique purposes and can dramatically influence the overall aesthetic and utility of your space.

**Showers** are often favored for their efficiency and convenience. They are ideal for those with busy lifestyles who appreciate a quick, invigorating cleanse. Available in a variety of styles, from compact corner units to expansive walk-in designs, showers can be customized with features such as rainfall showerheads, adjustable jets, and digital controls for a luxurious experience. Modern shower enclosures can also incorporate glass panels that create an open, airy feel, making them a perfect fit for smaller bathrooms.

On the other hand, **bathtubs** evoke a sense of relaxation and indulgence. They provide a sanctuary for unwinding after a long day, making them a staple in many homes. From classic clawfoot tubs that add vintage charm to sleek, modern soaking tubs that encourage long, leisurely baths, the options are endless. Bathtubs can also double as a functional element in the bathroom, serving as a focal point or a space for decorative accents. However, it’s essential to consider the space available; a larger bathroom can accommodate a standalone tub or a luxurious whirlpool, while smaller spaces may benefit from a shower-tub combo.

When deciding between a shower and a bathtub, consider your lifestyle, the needs of your household, and the overall design you wish to achieve. If your home is family-oriented, a bathtub may be invaluable for bath time with young children. Conversely, if space is limited or you prioritize quick routines, a shower might be the more practical choice. Ultimately, the right selection can elevate your bathroom into a personal oasis that meets both functional and aesthetic needs.

– 2.5 Bidets

What are the different types of plumbing fixtures?
Credit : whatcanu.com

### 2.5 Bidets

Bidets have long been celebrated in many cultures for their hygiene and comfort, yet they remain a relatively underappreciated fixture in many Western bathrooms. These ingenious plumbing fixtures are designed specifically for a more thorough cleansing experience after using the toilet, offering an alternative to traditional toilet paper.

Typically resembling a low-mounted sink, a bidet allows users to wash their intimate areas with a gentle stream of water, promoting cleanliness and reducing irritation. Bidets come in various styles, from standalone units that require a dedicated space in your bathroom to more modern attachments that can be easily installed on existing toilets.

In addition to their hygiene benefits, bidets can also be an eco-friendly choice, significantly reducing toilet paper consumption and the associated environmental impact. With many models now featuring adjustable water pressure, temperature control, and even air-drying capabilities, bidets provide a customizable experience that caters to individual preferences.

When selecting a bidet, consider the size and layout of your bathroom, as well as your plumbing capabilities. If space is limited, a bidet toilet seat—an attachment that fits directly onto your existing toilet—may be the ideal solution. For those with more room to spare, a standalone bidet can become a stylish centerpiece, often available in various finishes and designs to complement your bathroom decor.

Investing in a bidet not only enhances personal hygiene but also elevates your bathroom experience, making it a fixture worth considering for any home renovation or upgrade.

– 2.6 Water Heaters

Water heaters are an essential plumbing fixture often taken for granted until the moment we find ourselves shivering in a cold shower. These units provide hot water for a variety of household needs, from bathing and cleaning to cooking and laundry. Understanding the different types of water heaters available can help homeowners make informed decisions that align with their lifestyle and budget.

there are primarily two categories of water heaters: tank and tankless. **Tank water heaters** are the traditional choice, featuring a large reservoir that stores heated water for immediate use. These units come in various sizes, typically measured in gallons, and can supply a significant amount of hot water at once—perfect for families with high demand. However, they may take longer to refill once depleted and can lead to higher energy costs due to heat loss from the tank.

On the other hand, **tankless water heaters** are a more modern solution, providing hot water on demand without the need for a storage tank. They heat water directly as it flows through the unit, delivering a continuous supply of hot water. While tankless models are often more energy-efficient and take up less space, they can be more expensive upfront and may require additional installation considerations, especially for larger households.

When selecting a water heater, homeowners should assess their hot water needs. Factors such as the number of residents in the home, simultaneous hot water usage (e.g., running the dishwasher while showering), and energy source (electric, gas, or solar) all play crucial roles in determining the best fit. Energy efficiency ratings, such as the Energy Factor (EF) or the Uniform Energy Factor (UEF), can guide users toward models that will save them money on utility bills over time.

Moreover, considering the installation process and maintenance requirements is vital. Some models may require professional installation, while others can be DIY-friendly. Regular maintenance, such as flushing the tank to remove sediment build-up and checking the anode rod, can extend the life of any water heater and enhance its efficiency.

In summary, selecting the right water heater is a key step in optimizing your home’s plumbing system. By understanding the differences between tank and tankless options, assessing your hot water needs, and considering energy efficiency and maintenance, you can ensure that you choose a water heater that delivers comfort, convenience, and cost savings for years to come.

3. Choosing the Right Plumbing Fixtures for Your Home

Choosing the right plumbing fixtures for your home is a task that goes beyond mere aesthetics; it significantly impacts both functionality and comfort in your living space. With a myriad of options available, from faucets to sinks, showerheads to toilets, each selection plays a crucial role in the overall efficiency and style of your home.

First, consider your lifestyle and the needs of your household. If you have a busy family, durability and ease of use should be at the forefront of your decision-making process. Look for fixtures made from sturdy materials like brass or stainless steel, which can withstand daily wear and tear. Additionally, choosing fixtures with user-friendly features, such as single-handle faucets or touchless technology, can enhance convenience and hygiene.

Next, think about the overall design of your space. Plumbing fixtures come in various styles—from sleek modern designs to timeless traditional looks. Selecting fixtures that complement your home’s decor not only enhances visual appeal but also creates a cohesive environment. For instance, if you have a farmhouse-style kitchen, a vintage-inspired farmhouse sink paired with a classic bridge faucet can elevate the space beautifully.

Don’t forget about water efficiency! With growing concerns about water conservation, opting for fixtures that meet WaterSense standards can save you money on utility bills while also being environmentally friendly. Low-flow faucets and showerheads, as well as dual-flush toilets, are excellent choices that balance performance with sustainability.

Finally, take the time to measure your existing plumbing setup and any new fixtures you’re considering. Ensuring compatibility is vital to avoid unexpected complications during installation. Many retailers provide detailed specifications for their products, making it easier to determine if your choice will fit seamlessly into your space.

By carefully considering your family’s needs, design preferences, water efficiency, and compatibility, you can choose plumbing fixtures that not only look great but also enhance your home’s functionality and sustainability for years to come.

4. Key Features to Consider in Plumbing Fixtures

When it comes to selecting plumbing fixtures for your home or business, understanding the key features that set different options apart is essential. These fixtures are not just functional; they also significantly impact the overall aesthetics and efficiency of your space. Here are some crucial features to consider:

**1. Material Quality:** The durability and longevity of plumbing fixtures largely depend on the materials used in their construction. Stainless steel and brass are popular choices due to their resistance to corrosion and rust, while ceramic is often favored for sinks and toilets because of its ease of cleaning and classic appearance. Opting for high-quality materials can save you money in the long run, as they often come with longer warranties and require less frequent replacement.

**2. Finish and Style:** The finish of your plumbing fixtures can dramatically influence the look and feel of your bathroom or kitchen. From sleek chrome and polished nickel to matte black and brushed gold, the finish can complement your design scheme while also providing a level of maintenance ease. Remember to choose a style that resonates with your overall decor—whether it’s modern, traditional, or industrial—to create a cohesive look.

**3. Water Efficiency:** In today’s eco-conscious world, water efficiency is more important than ever. Look for fixtures with the WaterSense label, which indicates they meet strict water conservation criteria without sacrificing performance. Low-flow faucets, dual-flush toilets, and aerating showerheads can help reduce water usage, lower your utility bills, and minimize your environmental footprint.

**4. Ease of Installation and Maintenance:** Some fixtures are simpler to install than others, and considering your skill level or willingness to hire a professional can influence your choice. Additionally, some fixtures come with features that make maintenance easier, such as removable aerators or easy-clean coatings. Think about how often you want to clean and maintain your fixtures, and choose accordingly.

**5. Functionality and Ergonomics:** While aesthetics are important, the functionality of plumbing fixtures cannot be overlooked. Consider factors such as handle placement, spout height, and the reach of faucets. Fixtures that are user-friendly will enhance the overall experience in your space, making everyday tasks more enjoyable and efficient.

By keeping these key features in mind, you can make informed choices that not only enhance the beauty of your spaces but also ensure that your plumbing fixtures are functional, durable, and efficient. Selecting the right fixtures is an investment in your home’s comfort and style, so take the time to evaluate each option thoroughly.

5. Materials Used in Plumbing Fixtures

When selecting plumbing fixtures, understanding the materials they are made from is crucial, as it impacts both performance and aesthetics. The right material can enhance the durability of your fixtures while complementing your overall home design. Here’s a closer look at some of the most common materials used in plumbing fixtures, along with their unique qualities.

**1. Chrome:** Chrome-plated fixtures are a popular choice due to their sleek, shiny finish that adds a modern touch to any bathroom or kitchen. They are resistant to tarnishing and corrosion, making them easy to maintain. However, they can show water spots and require regular cleaning to keep their brilliant shine.

**2. Stainless Steel:** Known for its strength and durability, stainless steel fixtures are perfect for high-traffic areas. They resist rust and stains and have a contemporary look that fits well in both modern and traditional settings. While they may come with a higher price tag, their longevity often makes them a worthwhile investment.

**3. Brass:** Brass fixtures exude a classic charm that never goes out of style. This material is highly resistant to corrosion, making it an excellent choice for both aesthetic appeal and functionality. Over time, brass can develop a beautiful patina, adding character to your fixtures. However, if you prefer a polished look, regular maintenance is needed to prevent tarnishing.

**4. Plastic:** Lightweight and cost-effective, plastic fixtures can be a practical option for budget-conscious homeowners. They are often available in a variety of colors and styles, allowing for easy customization. While they resist corrosion, plastic fixtures may not offer the same level of durability as metal options, making them more suitable for temporary or less frequently used spaces.

**5. Porcelain and Ceramic:** Often found in sinks and toilets, porcelain and ceramic fixtures are valued for their smooth, glossy finishes and ease of cleaning. These materials are durable and resistant to scratches and stains, but they can be prone to chipping if not handled carefully. Their aesthetic appeal makes them a popular choice in traditional and vintage-style bathrooms.

**6. Bronze:** Oil-rubbed bronze fixtures offer a rustic, antique look that is highly sought after in home design. They are exceptionally durable and resist corrosion, making them ideal for both indoor and outdoor use. The deep, rich tones of bronze can add warmth and sophistication to any space.

When selecting plumbing fixtures, consider not only the material but also the overall style, maintenance requirements, and how well they will hold up in your specific environment. By understanding the advantages and disadvantages of each material, you can make informed decisions that enhance both the functionality and beauty of your home.

6. Popular Plumbing Fixture Brands

When it comes to selecting plumbing fixtures, the brand can significantly influence not only the aesthetic appeal but also the quality and longevity of the products you choose. With countless manufacturers on the market, certain brands have established themselves as leaders, known for their innovative designs, reliable performance, and commitment to customer satisfaction. Here’s a closer look at some popular plumbing fixture brands that are worth considering for your next renovation or new build.

**Moen**: Renowned for its stylish designs and functional innovations, Moen offers a wide range of faucets, showerheads, and accessories. Their products often feature the brand’s signature Spot Resist™ finish, which repels water spots and fingerprints, making maintenance a breeze. Moen also stands out for its commitment to sustainability, providing water-saving options without sacrificing performance.

**Kohler**: A name synonymous with luxury and quality, Kohler fixtures blend classic elegance with modern technology. From high-efficiency toilets to beautifully crafted sinks and stylish faucets, Kohler offers an extensive selection to suit various tastes and budgets. Their innovative features, such as the Touchless technology in faucets and advanced flushing systems in toilets, enhance convenience while promoting water conservation.

**Delta**: Delta Plumbing is known for its cutting-edge technology and user-friendly designs. Their faucets often come equipped with the Touch2O® Technology, allowing users to turn water on or off with just a touch, which is especially handy when hands are full. Delta’s commitment to innovation extends to their wide range of styles, from contemporary to traditional, ensuring there’s something for everyone.

**American Standard**: Focusing on both function and form, American Standard offers a variety of plumbing fixtures that are both stylish and dependable. Their products often emphasize ease of installation and maintenance, making them a favorite among contractors and DIY enthusiasts alike. With options that cater to various budgets, American Standard ensures quality without breaking the bank.

**Grohe**: For those seeking high-end European designs, Grohe is a top contender. Known for their sleek aesthetics and exceptional engineering, Grohe fixtures often feature advanced technology for water efficiency and user comfort. Their commitment to quality is evident in their durable finishes and innovative features, making them a preferred choice for luxury bathrooms and kitchens.

When shopping for plumbing fixtures, it’s crucial to consider the reputation of the brand alongside the specifics of your project. Investing in reputable brands can ensure that you receive a product that not only enhances your space aesthetically but also performs reliably for years to come. Whether you prioritize style, technology, or sustainability, these popular plumbing fixture brands provide an array of options to meet your needs.

7. Energy Efficiency and Water Conservation

When it comes to choosing plumbing fixtures, energy efficiency and water conservation should be at the forefront of your decision-making process. With the increasing awareness of environmental issues and rising utility costs, selecting fixtures that minimize water usage without sacrificing performance is not just a trend—it’s a necessity.

Modern plumbing fixtures come equipped with innovative technology designed to conserve water and energy. Low-flow faucets and showerheads, for instance, can significantly reduce water consumption, allowing you to enjoy a refreshing shower or a leisurely hand wash while using up to 30% less water than traditional fixtures. Look for models that have the WaterSense label, which indicates they meet specific water-saving criteria set by the Environmental Protection Agency (EPA).

In addition to faucets and showerheads, consider the efficiency of your toilets. Dual-flush toilets, which offer a choice between a low flush for liquid waste and a higher flush for solid waste, can save thousands of gallons of water each year compared to older models. These toilets use advanced flushing technology that maximizes performance while minimizing water use, making them an excellent investment for both your wallet and the environment.

Moreover, when selecting plumbing fixtures, pay attention to the materials used. Fixtures made from durable, sustainable materials not only last longer but can also reduce the need for replacements, thus conserving resources in the long run. Stainless steel, for instance, is not only stylish but also highly resistant to corrosion, while fixtures made from recycled materials can further enhance your commitment to sustainability.

Incorporating energy-efficient appliances, like tankless water heaters, can also contribute to overall water conservation. These heaters only warm water as needed, eliminating standby energy loss and reducing both energy bills and water waste.

Ultimately, by prioritizing energy efficiency and water conservation in your plumbing fixture selections, you not only contribute to a healthier planet but also enjoy the financial benefits of lower utility bills. As you make your choices, consider the long-term impact of your fixtures—both on your home and the environment.

8. Installation Tips for Plumbing Fixtures

When it comes to installing plumbing fixtures, a little preparation can go a long way in ensuring a smooth and hassle-free process. Whether you’re a seasoned DIY enthusiast or a first-time installer, following these essential tips can help you achieve professional results.

**1. Gather Your Tools and Materials:** Before diving into the installation, make sure you have all necessary tools at hand. Common tools include adjustable wrenches, screwdrivers, pliers, a plumber’s tape, a level, and a bucket to catch any stray water. Having everything ready will save you time and frustration.

**2. Read the Instructions:** Each plumbing fixture comes with its own set of instructions tailored to that specific model. Take the time to read through the manufacturer’s guidelines to familiarize yourself with the installation process, parts list, and any special requirements. This can help prevent errors and ensure you don’t miss any critical steps.

**3. Shut Off the Water Supply:** It sounds simple, but it’s a crucial step that many forget. Before you begin any installation, locate the main water shut-off valve and turn it off. This will prevent flooding and reduce the risk of water damage during the installation process.

**4. Prepare the Area:** Clear the installation area of any debris or old fixtures. If you are replacing an existing fixture, ensure that all remnants—like old fittings or pipes—are removed before you begin. This will make the installation cleaner and more efficient.

**5. Take Accurate Measurements:** Precision is key in plumbing. Use a measuring tape to confirm that your new fixture will fit in the designated space, and check that any plumbing connections align properly. If you’re installing a sink, for example, ensure that the faucet holes match the new fixture’s specifications.

**6. Use Plumber’s Tape:** When connecting pipes and fittings, use plumber’s tape on threaded connections to create a watertight seal. This simple step can help prevent leaks and save you from future headaches.

**7. Test for Leaks:** Once your fixture is installed, gradually turn the water supply back on and check for leaks. This initial test is crucial; if you spot any dripping or puddles, turn off the water supply and address the issue before proceeding further.

**8. Don’t Hesitate to Seek Help:** If you encounter challenges or feel uncertain during installation, don’t hesitate to consult a professional plumber. Sometimes, a little expert advice can save you time and money in the long run.

By following these installation tips, you can enhance your confidence and ensure that your new plumbing fixtures are installed correctly and efficiently. With each successful installation, you’ll become more adept at maintaining your home’s plumbing system and enjoying the benefits of your upgraded fixtures.

9. Maintenance and Care for Long-Lasting Fixtures

When it comes to plumbing fixtures, maintenance and care are paramount for ensuring longevity and optimal performance. Well-maintained fixtures not only enhance the aesthetic appeal of your space, but they also save you money in the long run by preventing costly repairs and replacements. Here are some essential tips to keep your plumbing fixtures looking and functioning their best.

**Regular Cleaning:** Different materials require different cleaning methods. For instance, stainless steel fixtures can be cleaned with a mild dish soap and warm water, while chrome fixtures may benefit from a gentle vinegar solution to remove hard water stains. Avoid abrasive cleaners that can scratch the surfaces; instead, opt for soft cloths or sponges to maintain that shiny finish.

**Inspect for Leaks:** Periodically check your faucets, showerheads, and pipes for any signs of leaks. Even a small drip can lead to larger problems over time, such as water damage or mold growth. If you notice any leaks, address them promptly—sometimes, a simple tightening of a screw or replacing a washer can resolve the issue.

**Replace Worn Parts:** Fixtures have components that may wear out over time, such as washers, O-rings, and aerators. Regularly inspect these parts and replace them as needed. A worn washer can cause frustrating dripping, while a clogged aerator can reduce water flow. Keeping these elements in check can enhance the efficiency and performance of your fixtures.

**Avoid Harsh Chemicals:** While it might be tempting to use strong chemical cleaners to tackle tough stains or clogs, these can be damaging to your plumbing fixtures. Instead, consider natural alternatives like baking soda and vinegar, which can effectively clean without causing harm.

**Professional Inspections:** Every few years, consider having a professional plumber inspect your fixtures and plumbing system. They can identify potential issues before they become significant problems and offer tailored maintenance advice based on your specific fixtures and their usage.

By incorporating these maintenance tips into your routine, you can ensure that your plumbing fixtures remain functional, attractive, and durable for years to come, enhancing both your home’s comfort and value. Remember, a little care goes a long way in preserving the beauty and efficiency of your plumbing investments!

10. Trends in Plumbing Fixture Design

In the ever-evolving world of home design, plumbing fixtures are no longer just functional necessities; they have transformed into stylish statements that enhance the overall aesthetic of a space. As homeowners increasingly seek to create personalized environments, plumbing fixture design trends reflect a blend of innovation, sustainability, and elegance.

One prominent trend is the rise of minimalist designs that emphasize clean lines and uncluttered spaces. Fixtures with sleek, geometric shapes made from materials like matte black, brushed nickel, or polished brass are gaining popularity, offering a modern touch that complements various decor styles—from industrial to Scandinavian. The simplicity of these designs allows them to seamlessly integrate into any bathroom or kitchen while making a strong visual impact.

Sustainability is another key trend shaping the plumbing fixture landscape. With a growing awareness of environmental issues, many consumers are opting for water-efficient fixtures that reduce consumption without sacrificing performance. Brands are responding by creating products that blend functionality with eco-friendly technology, such as faucets with aerators that limit water flow while maintaining pressure, and dual-flush toilets that allow users to choose the amount of water used per flush.

Colorful fixtures are also making waves in the design world. Gone are the days of standard chrome and white; now, vibrant hues in fixtures are capturing attention and adding personality to spaces. From deep navy sinks to bold red faucets, these colorful options allow homeowners to express their style and create striking focal points in their bathrooms and kitchens.

Finally, smart technology is revolutionizing plumbing fixtures, integrating convenience and efficiency into everyday tasks. From touchless faucets that activate with a simple wave to shower systems that can be controlled via smartphone apps, these innovations not only enhance the user experience but also promote hygiene and save water.

As you consider updating your plumbing fixtures, staying informed about these trends can help ensure your selections not only meet your practical needs but also reflect your personal style and values. Embracing these design elements can transform your space into a contemporary haven that balances aesthetics with functionality.

11. Cost Considerations: Budgeting for Fixtures

When it comes to renovating or updating your home’s plumbing fixtures, budgeting is a crucial step that can significantly impact your choices and overall satisfaction with the project. Understanding the cost considerations associated with different types of fixtures is essential for making informed decisions that align with your financial plans.

First and foremost, it’s important to establish a realistic budget based on your specific needs and desired aesthetic. Plumbing fixtures can range widely in price, from affordable options that offer solid functionality to high-end designs that serve as statement pieces in your home. For instance, basic faucets and showerheads can be found for as little as $50, while luxury brands may charge upwards of $500 or more for designer models crafted from premium materials.

Beyond the initial purchase price, consider the long-term costs associated with your chosen fixtures. Some high-efficiency models may come with a steeper upfront investment but can save you money on water bills in the long run. Similarly, investing in durable materials, such as brass or stainless steel, can reduce the frequency of replacements and repairs, ultimately saving you money over time.

Don’t forget to account for additional expenses that may arise during the installation process. Hiring a licensed plumber can lead to added labor costs, especially if your project involves complex plumbing work or if you’re replacing old fixtures with new ones that require different plumbing configurations. To streamline costs, it’s often wise to tackle multiple fixture upgrades at once, minimizing labor fees and maximizing efficiency.

Lastly, keep an eye out for promotions, sales, or package deals offered by home improvement retailers. Many stores frequently run discounts on plumbing fixtures, especially during seasonal sales events, providing an opportunity to snag high-quality products at a more budget-friendly price.

By carefully considering all these factors and setting a well-defined budget, you can confidently select plumbing fixtures that not only enhance your home’s functionality and style but also fit within your financial parameters.

12. Common Plumbing Fixture Problems and Solutions

When it comes to plumbing fixtures, even the most reliable installations can encounter issues over time. Understanding the common problems associated with these fixtures, along with their solutions, can save you both time and money while ensuring your home remains comfortable and functional.

One of the most frequent issues homeowners face is dripping faucets. Not only can a leaky faucet be a nuisance, but it can also lead to increased water bills. The culprit is often a worn-out washer or O-ring. To resolve this, you can easily disassemble the faucet, replace the damaged components, and restore it to its original state. Regular maintenance, such as checking and replacing washers every few years, can help prevent this problem from recurring.

Another common issue is clogged drains, which can occur in sinks, bathtubs, and showers. Hair, soap residue, and food particles often contribute to these blockages. A simple solution involves using a plunger or a drain snake to dislodge the clog. For persistent blockages, a mixture of baking soda and vinegar can effectively break down buildup, providing a natural alternative to harsh chemical drain cleaners.

Toilet problems can also arise, with running toilets being a particularly common complaint. This can waste a significant amount of water, leading to a higher utility bill. The cause is often a faulty flapper valve that fails to seal properly. Replacing this inexpensive part can quickly restore your toilet to its efficient state.

Lastly, low water pressure can be incredibly frustrating, especially when showering or washing dishes. This issue can stem from mineral buildup in aerators or showerheads, or even from issues with your plumbing system itself. Cleaning these fixtures can often resolve the problem; however, if low pressure persists, it may be time to consult a professional plumber to assess any underlying issues.

By being aware of these common plumbing fixture problems and their solutions, you can take proactive measures to maintain your fixtures and address any issues promptly, ensuring your home remains a comfortable and efficient space.

13. DIY vs. Professional Installation: What You Need to Know

When it comes to installing plumbing fixtures, one of the most critical decisions you’ll face is whether to tackle the project yourself or hire a professional plumber. This choice can significantly impact not only the outcome of your installation but also the overall cost, time commitment, and potential headaches down the road.

**DIY Installation: The Pros and Cons**

Taking the DIY route can be enticing for many homeowners, particularly those who enjoy hands-on projects and wish to save some money. With a plethora of online tutorials, videos, and guides available, the knowledge to successfully install fixtures like faucets, sinks, and showerheads is often just a click away. If you have a basic understanding of plumbing and are comfortable with tools, you might find DIY installation rewarding and straightforward.

However, it’s essential to weigh the pros against the cons. While you may save on labor costs, mistakes can lead to costly repairs or water damage if something goes wrong. Additionally, some plumbing fixtures may require specialized knowledge or tools, such as knowledge of local plumbing codes or the ability to navigate complex piping systems. If you’re unsure about your skills, consider the time investment—what seems like a simple task can quickly become time-consuming, especially if you encounter unexpected challenges.

**Professional Installation: The Benefits**

On the other hand, opting for professional installation ensures that the job is completed correctly and efficiently. Licensed plumbers bring a wealth of experience and expertise, which can be particularly beneficial for more complex installations, such as those involving multiple fixtures or significant plumbing modifications. Professionals can also navigate local building codes and regulations, ensuring that your installation meets all safety standards.

Moreover, many plumbing companies offer warranties on their work, giving you peace of mind that if anything goes wrong after installation, you have a safety net. This can save you from the stress of potential future repairs and provide confidence in your investment.

**Making the Right Choice**

So, how do you decide? Start by evaluating the scope and complexity of your project. For straightforward installations, such as replacing a faucet or installing a new showerhead, DIY may be a feasible option if you’re comfortable with the task. However, for more involved projects, such as a complete bathroom remodel or significant plumbing work, hiring a professional can save you stress and ensure a high-quality result.

Ultimately, whether you choose to go the DIY route or enlist the help of a professional, understanding the requirements and potential pitfalls of plumbing fixture installation will help you make an informed decision that aligns with your skills, budget, and time constraints.

14. Conclusion: Making Informed Choices for Your Plumbing Needs

As we reach the conclusion of our ultimate guide to plumbing fixtures, it’s clear that making informed choices is essential for both functionality and aesthetics in your home. The vast array of options available can be overwhelming, but understanding the different types of fixtures, their uses, and how to select the right ones for your specific needs can transform your space into a well-coordinated haven.

When considering plumbing fixtures, always prioritize quality and durability. Investing in high-quality materials can save you money in the long run by reducing the need for repairs or replacements. Additionally, consider the style and design of each fixture to ensure they complement your existing decor. Whether you lean towards a sleek modern look or a classic vintage charm, there are fixtures available to match every aesthetic preference.

Don’t overlook the importance of functionality. Assess the specific needs of your household—how many people will be using the fixtures, and what are their habits? For instance, if you have a large family, a dual-flush toilet or a spacious showerhead might be ideal. Furthermore, energy-efficient fixtures not only save water but also lower utility bills, making them a smart choice for environmentally conscious homeowners.

Lastly, seek advice from plumbing professionals or experienced suppliers when in doubt. They can offer insights based on your unique situation and help you navigate the sometimes complex world of plumbing fixtures.

In summary, informed choices regarding plumbing fixtures can enhance your home’s functionality, aesthetic appeal, and energy efficiency. By taking the time to research and consider your options, you’ll ensure that your plumbing system not only meets your immediate needs but also stands the test of time. Happy renovating!

15. Resources for Further Reading and Exploration

When it comes to deepening your understanding of plumbing fixtures, a wealth of resources is available to guide you through the nuances of selection, installation, and maintenance. Whether you’re a DIY enthusiast looking to tackle a home improvement project or a homeowner seeking to make informed decisions, these resources can serve as invaluable tools in your journey.

**Books and E-books**: Consider diving into comprehensive guides such as “The Complete Guide to Plumbing” by Black & Decker or “Plumbing 101” by the same publisher. These books not only cover the fundamentals of plumbing fixtures but also offer insights into the latest trends and technologies in the industry.

**Online Courses**: Websites like Udemy and Coursera offer expert-led courses on plumbing basics and advanced techniques. These courses often include video tutorials, quizzes, and forums for discussion, providing a structured learning environment where you can gain hands-on skills and knowledge.

**Manufacturer Websites**: Many plumbing fixture manufacturers provide detailed resources on their websites, including installation guides, product specifications, and maintenance tips. Brands like Kohler, Moen, and Delta often have video tutorials and downloadable manuals that can help you better understand their products.

**DIY Forums and Community Groups**: Platforms such as Reddit’s r/Plumbing or DIY Network forums are great places to connect with other homeowners and professionals. Here, you can ask questions, share experiences, and gain insights from those who have tackled similar projects.

**YouTube Channels**: Visual learners will find YouTube to be a treasure trove of information. Channels dedicated to home improvement, such as Home Repair Tutor or This Old House, regularly feature plumbing projects and tips, showcasing step-by-step processes that can demystify even the most complex installations.

**Local Workshops and Classes**: Many community colleges and home improvement stores offer workshops on plumbing basics. These hands-on classes provide an excellent opportunity to learn from experienced instructors, ask questions, and practice skills in a supportive environment.

By exploring these resources, you’ll equip yourself with the knowledge and confidence needed to make informed decisions about plumbing fixtures. Whether you’re upgrading your bathroom or tackling a plumbing emergency, staying informed will ensure that you choose the right fixtures and maintain them effectively, enhancing both the functionality and aesthetics of your home.

In conclusion, we hope this ultimate guide to plumbing fixtures has equipped you with the knowledge and confidence to make informed choices for your home or renovation project. From understanding the different types and their specific uses to navigating the selection tips that can elevate both functionality and aesthetics, you’re now prepared to tackle any plumbing fixture decision. Remember, the right fixtures not only enhance the beauty of your space but also contribute to its overall efficiency and value. So, whether you’re refreshing a bathroom, upgrading a kitchen, or planning a complete remodel, take the time to choose fixtures that reflect your style and meet your needs. Happy plumbing, and may your spaces be both beautiful and functional!

How to install a new light fixture?

Lighting can transform a room from ordinary to extraordinary, setting the mood and enhancing the overall aesthetic of your space.

Whether you’re looking to brighten up a dim corner, create a cozy atmosphere for evenings in, or showcase your personal style with a stunning new light fixture, the right lighting can make all the difference. However, the thought of installing a new fixture might seem daunting, especially if you’re not well-versed in home improvement projects. Fear not! In this step-by-step guide, we will walk you through the process of selecting the perfect light fixture and provide you with clear, practical instructions for installation. From understanding the types of fixtures and their intended spaces to ensuring safety and achieving a seamless finish, you’ll be equipped with all the knowledge you need to illuminate your space with confidence and flair. Get ready to brighten your home and unleash your inner interior designer!

1. Introduction: The Importance of Lighting in Home Design

How to install a new light fixture?
Credit : whatcanu.com

When it comes to home design, lighting is often an unsung hero, wielding the power to transform a space from ordinary to extraordinary. The right light fixture not only illuminates a room but also sets the tone and ambiance, influencing how we feel and interact within our environments. Imagine stepping into a room bathed in soft, warm light, where shadows dance gently along the walls, creating a cozy and inviting atmosphere. Conversely, stark overhead lighting can render a space cold and unwelcoming, dulling the vibrancy of your carefully chosen decor.

Incorporating effective lighting design goes beyond mere functionality; it is an art form that can enhance the aesthetic appeal of your home. Whether it’s a statement chandelier that becomes the focal point of your dining area or understated sconces that provide a warm glow in a hallway, each light fixture plays a crucial role in defining the character of your space.

Moreover, the right lighting can accentuate architectural features, highlight artwork, and even affect the perceived size of a room, creating the illusion of openness or intimacy as needed. It can guide the eye and draw attention to the areas you want to showcase, while also providing the necessary illumination for everyday tasks.

As we delve into this step-by-step guide on installing a new light fixture, remember that lighting is not just a functional necessity; it’s an opportunity to express your unique style and enhance the atmosphere of your home. Let’s embark on this illuminating journey together, ensuring that every room shines as brightly as your vision for it.

2. Choosing the Right Light Fixture for Your Space

Choosing the right light fixture for your space is a crucial step that can transform the ambiance and functionality of any room. With a myriad of styles, shapes, and sizes available, it can be overwhelming to narrow down your options. Start by considering the purpose of the room—different spaces require different types of lighting. For example, a warm, inviting chandelier might be perfect for a dining area, while a sleek, modern pendant light could enhance the aesthetic of a minimalist kitchen.

Next, think about the size of the fixture in relation to your space. A large, statement piece can become a stunning focal point in a spacious living room, while a smaller, more understated fixture might be ideal for a cozy bedroom. It’s also essential to consider the height at which the light will hang. A fixture that’s too low can obstruct views and movement, while one that’s too high may fail to illuminate the area effectively.

Don’t forget to take into account the overall design theme of your home. Whether your style is contemporary, rustic, or eclectic, the light fixture should complement the existing décor. Materials and finishes play a significant role here; for example, a brushed nickel finish might lend a modern touch, while a vintage brass fixture could add a hint of nostalgia.

Finally, consider the type of bulbs you’ll be using. LED bulbs are energy-efficient and long-lasting, perfect for everyday use, while dimmable options can create a versatile lighting scheme that adjusts to your needs. By thoughtfully selecting a light fixture that aligns with your space’s purpose, style, and lighting requirements, you’ll not only enhance the aesthetic appeal of your room but also create a welcoming and functional environment.

3. Tools You’ll Need for the Installation

How to install a new light fixture?
Credit : whatcanu.com

Before diving into the installation of your new light fixture, it’s essential to gather the right tools. Having everything you need on hand will not only streamline the process but also ensure a safe and effective installation. Here’s a detailed list of tools you’ll require:

1. **Screwdriver Set**: A basic set of screwdrivers, both flat-head and Phillips, is crucial for loosening and tightening screws on your light fixture. Depending on the fixture, you might also need a torque screwdriver for specific screws.

2. **Wire Cutters/Strippers**: These handy tools are vital for preparing your wiring. Wire cutters will help you trim any excess wire, while wire strippers will strip the insulation from the ends of the wires, ensuring a clean connection.

3. **Voltage Tester**: Safety first! A non-contact voltage tester will help you confirm that the power is off in the circuit you’ll be working on. This tool is invaluable for preventing electrical shocks.

4. **Pliers**: Needle-nose pliers are particularly useful for grasping and twisting wires together. They provide the leverage needed to secure wire nuts tightly.

5. **Ladder**: Depending on the height of your ceiling, a sturdy ladder will give you safe access to the area where the light fixture will be installed. Ensure it’s stable and positioned on a level surface.

6. **Tape Measure**: To ensure your new light fixture is installed at the right height and distance from walls or furniture, a tape measure is indispensable. Proper measurements will enhance both functionality and aesthetics.

7. **Level**: For fixtures that need to be hung in a straight line or at a specific angle, a level is essential. This tool helps you achieve that perfect alignment that makes a significant difference in the overall look.

8. **Safety Goggles and Gloves**: Protecting yourself during installation is paramount. Safety goggles will shield your eyes from debris, while gloves can prevent cuts and scrapes when handling tools and fixtures.

With these tools in hand, you’re well-equipped to tackle the installation of your new light fixture. Take a moment to familiarize yourself with each tool before you begin, ensuring that the installation process goes as smoothly as possible. Remember, preparation is key to a successful and safe lighting upgrade!

4. Safety First: Precautions Before You Start

Before diving into the exciting process of installing your new light fixture, it’s crucial to prioritize safety. Working with electricity can pose risks, but with the right precautions, you can ensure a smooth and safe installation. Here’s how to prepare yourself and your workspace.

### Turn Off the Power

The first step is to locate your circuit breaker and turn off the power to the area where you’ll be working. This is non-negotiable. No matter how tempting it may be to just “get it done quickly,” working with live wires is dangerous. After you’ve flipped the switch, double-check your work by testing the existing light fixture with a voltage tester to confirm that the power is indeed off.

### Gather the Right Tools

Having the proper tools on hand not only makes the job easier but also safer. Ensure you have a sturdy ladder, screwdrivers (both flathead and Phillips), wire strippers, pliers, and electrical tape. A safety goggles and rubber-soled shoes can also provide added protection, helping you to avoid slips and falls while working at height.

### Wear Protective Gear

Consider wearing protective gear such as gloves and safety glasses. Gloves will help prevent any cuts or scrapes from sharp edges, while safety glasses will protect your eyes from dust and debris. If you’re sensitive to dust or allergens, a mask can also come in handy, especially if you’re working in an older home.

### Assess Your Environment

Take a moment to assess your workspace. Make sure the area is well-lit, free of clutter, and that you have enough space to maneuver safely. If you’re using a ladder, ensure it’s placed on stable ground and is fully extended. A clean and organized environment will help you focus on the task at hand and reduce the risk of accidents.

### Read the Instructions

Before you start, carefully read the manufacturer’s instructions that come with your new light fixture. These guidelines often include specific safety tips and installation procedures tailored to the product, ensuring that you’re following the best practices for your particular fixture.

By taking these safety precautions seriously, you set the stage for a successful lighting installation. With the power off and your workspace prepared, you’re ready to transform your space and brighten your home with that stunning new fixture!

5. Turning Off the Power: Locating Your Circuit Breaker

How to install a new light fixture?
Credit : whatcanu.com

Before you embark on the journey of installing your new light fixture, one crucial step stands between you and a successful installation: turning off the power. Ensuring your safety is paramount, and the first order of business is to locate your circuit breaker. This compact yet powerful box, often found in a basement, utility room, or closet, is the heart of your home’s electrical system.

To find your circuit breaker, start by identifying the area of your home where the electrical panel resides. It’s typically a gray or metallic box mounted on the wall, featuring a door that swings open to reveal a series of switches or breakers. Each of these controls a specific area or circuit in your home, so it’s important to take a moment to familiarize yourself with its layout.

Once you’ve located your circuit breaker, open the door and inspect the switches. Look for a switch labeled for the room or area where you’ll be working—often, the labels will indicate which lights or outlets each breaker controls. If your circuit breaker doesn’t have clear labels, don’t worry; you can always turn off the main power switch to ensure all electricity is cut off, although this will affect the entire house.

After identifying the correct breaker, firmly switch it to the “off” position. It’s a good idea to keep a flashlight handy in case your workspace becomes dark during this process. To further ensure your safety, use a voltage tester to double-check that the power is indeed off before proceeding with the installation. By taking these precautions, you’re not only protecting yourself but also setting the foundation for a smooth and successful light fixture installation. Now that you’ve responsibly turned off the power, you’re ready to move on to the next steps in illuminating your space!

6. Removing the Old Light Fixture: Step-by-Step Instructions

Removing the old light fixture is a crucial step in your lighting upgrade journey. To begin, ensure your safety by turning off the power at the circuit breaker. This eliminates the risk of electric shock while you work. Once the power is off, it’s time to gather your tools—typically, you’ll need a screwdriver, a voltage tester, and possibly a ladder if the fixture is out of reach.

Next, use the voltage tester to double-check that the power is indeed off. Test the wires connected to the old fixture; if the tester lights up, turn off the power again and revisit your connections. Safety first!

Now, carefully remove the light bulb(s) from the old fixture. If your fixture has a globe or shade, gently unscrew or unclip it to avoid any breakage. With the shade removed, you should have clear access to the fixture’s mounting screws. Loosen these screws with your screwdriver, being cautious not to drop them.

Once the screws are removed, you can gently pull the fixture away from the ceiling. As you do so, take a moment to examine the wiring. You’ll typically find two or three wires: a black (or red) wire for the hot connection, a white wire for the neutral, and a green or bare wire for the ground. Carefully detach these wires by unscrewing the wire nuts or by unclipping them, making sure to note where each wire was connected to facilitate the installation of your new fixture.

After removing all connections, set the old fixture aside. Take a moment to clean the area around the electrical box, as dust and debris can accumulate over time. With the old fixture out of the way, you’re now ready to move on to the next step—installing your brand-new light fixture and transforming your space!

7. Preparing the Electrical Wiring for the New Fixture

How to install a new light fixture?
Credit : whatcanu.com

Before diving into the installation of your stunning new light fixture, it’s crucial to ensure that the electrical wiring is properly prepared. This step is foundational for the safety and functionality of your lighting, so take your time and follow these guidelines closely.

First, turn off the power at the circuit breaker to prevent any accidents while you work. It’s wise to use a voltage tester to double-check that the power is indeed off before touching any wires. Safety first!

Once you’ve confirmed the power is off, remove the old fixture, taking care to document how the existing wiring is connected. This will serve as a reference when you install the new fixture. With the old fixture detached, you’ll need to assess the existing wiring. Look for any signs of fraying, discoloration, or damage; if you notice anything concerning, it’s best to call a professional electrician to address these issues.

Next, prepare the wires for your new fixture. Strip about half an inch of insulation from the ends of the wires using wire strippers, being careful not to cut into the copper strands. You should see three types of wires: the hot wire (typically black or red), the neutral wire (usually white), and the ground wire (green or bare). If your new fixture comes with a ground wire, ensure it’s securely connected to the fixture’s ground point.

Finally, if your new light fixture requires a different setup (like a different number of wires or connections), refer to the manufacturer’s instructions. Each fixture may have unique requirements, so it’s essential to follow their guidelines for optimal performance and safety.

With the electrical wiring properly prepared, you’re now ready to proceed to the installation of your new light fixture, bringing you one step closer to illuminating your space beautifully!

8. Installing the New Light Fixture: A Detailed Guide

Now that you’ve safely removed the old fixture and prepared the electrical connections, it’s time to dive into the exciting part: installing your new light fixture! This step is where your vision for an illuminated space truly begins to take shape. Follow these detailed instructions to ensure a smooth installation process.

**1. Gather Your Tools and Materials:**
Before you start, make sure you have all the necessary tools at hand. You’ll need a screwdriver (both flat-head and Phillips), wire strippers, pliers, and a voltage tester. Additionally, have your new light fixture, mounting hardware, and wire nuts ready. It’s always a good idea to double-check that you have everything within reach so you won’t be scrambling mid-installation.

**2. Prepare the Fixture:**
Unbox your new light fixture and read through the manufacturer’s instructions. Many fixtures come with specific mounting hardware and installation guides tailored to their design. Familiarize yourself with these details and ensure you have all the components needed for assembly. If your fixture has adjustable arms or shades, now is the time to set them up according to your design preference.

**3. Connect the Wiring:**
Carefully lift the new fixture up to the ceiling bracket, aligning it with the electrical box. The colors of the wires will guide you: typically, the black or red wire is the hot wire, the white wire is neutral, and the green or bare wire is the ground. Using wire strippers, strip about half an inch of insulation off the ends of each wire. Twist together the corresponding wires—black to black, white to white, and ground to ground—using wire nuts to secure them firmly. Make sure there are no exposed wire ends, as this can cause a short circuit.

**4. Secure the Fixture:**
Once the wiring is connected, carefully tuck the wires back into the electrical box, ensuring they are not pinched or strained. Line up the fixture with the mounting bracket and secure it in place using the provided screws. If your fixture has a canopy, ensure it covers the junction box neatly and is level for a polished look.

**5. Attach Bulbs and Shades:**
After securing the fixture, it’s time to attach any light bulbs and shades as per your design. Be sure to use the correct wattage as specified by the manufacturer. If your fixture includes decorative elements or diffusers, follow the included instructions to attach these components seamlessly.

**6. Turn On the Power:**
With everything securely in place, it’s time to restore power to the circuit. Head back to your circuit breaker and switch the power back on. Before flipping the switch to test your new light fixture, double-check that everything is securely installed to avoid any accidents.

**7. Enjoy Your New Illumination:**
Finally, flip the switch and bask in the glow of your newly installed light fixture! Take a moment to admire how it transforms your space, creating both functionality and style. If necessary, adjust the fixture’s positioning or shades to achieve the desired ambiance.

By following these detailed steps, you can confidently install your new light fixture, bringing a fresh brilliance to your home. Remember, the right lighting can dramatically affect your space, enhancing both its beauty and functionality. Happy illuminating!

9. Connecting the Wires: Color-Coding and Techniques

When it comes to connecting the wires of your new light fixture, understanding color-coding and employing proper techniques is crucial for both functionality and safety. Before diving into the process, ensure you have the right tools at hand: wire strippers, electrical tape, and a voltage tester.

Begin by identifying the wires in your ceiling and the ones attached to your new fixture. Typically, you’ll encounter three types: black (or red) for the hot wire, white for the neutral wire, and green or bare for the ground wire. The black wire carries electricity from the power source, while the white wire returns the current back to the panel. The ground wire is a safety feature, redirecting any stray electricity to prevent shocks.

Once you’ve confirmed the proper identification of each wire, it’s time to prepare them for connection. Use your wire strippers to carefully remove about half an inch of insulation from the ends of each wire. Be cautious not to nick the wire itself, as this could compromise its integrity.

Next, align the corresponding wires from your fixture with those from the ceiling. Start with the black (or red) wires—twist them together clockwise until they are tightly secured. Follow this by connecting the white wires in the same manner. For the ground wires, if your fixture has a green or bare wire, connect it to the ground wire in the ceiling. If there is no ground wire present, you can attach the ground wire from the fixture to the mounting bracket of the light fixture, ensuring it has a solid connection.

After making all the connections, wrap each twisted pair with electrical tape to provide an extra layer of insulation and protection. This step is vital; it not only safeguards against potential short circuits but also ensures longevity for your connections.

Once everything is securely fastened and taped, gently tuck the wires back into the electrical box, taking care not to pinch or strain any of the connections. Finally, attach the light fixture to the mounting bracket according to the manufacturer’s instructions. With the wiring complete, you’re ready to restore power and see your new light fixture illuminate your space beautifully!

10. Securing the Fixture: Ensuring Stability and Safety

Securing the fixture is a crucial step in the installation process, as it directly impacts both the stability and safety of your new lighting. A well-mounted fixture not only enhances the aesthetic appeal of your space but also prevents potential hazards, such as electrical malfunctions or falling fixtures.

Begin by carefully positioning the fixture against the ceiling, aligning it with the electrical box. Make sure you have a clear view of the mounting bracket, which will serve as the anchor for your light. Most fixtures come with a mounting plate that requires you to attach it securely to the electrical box using the provided screws. It’s essential to use the correct screws that match the size and type of your electrical box—typically, these will be either 1″ or 2″ screws for standard installations.

Once the plate is in place, gently pull the fixture’s wiring through the center opening of the mounting bracket. Before proceeding, double-check that all wires are properly connected and insulated to avoid any risk of short-circuiting. Follow the manufacturer’s instructions to ensure that each wire is attached correctly: black to black (or live), white to white (or neutral), and green or copper to the grounding wire.

After securing the wiring, it’s time to attach the fixture to the mounting bracket. Depending on your light fixture, you may need to tighten screws or use clips to hold it firmly in place. Be sure to give the fixture a gentle tug once it’s installed to confirm that it is securely fastened.

Finally, always take a moment to step back and visually inspect your work, ensuring that the fixture is level and appropriately aligned. A well-secured light fixture not only looks professional but also contributes to a well-lit, safe environment in your home. With your fixture firmly in place, you are now ready to restore power and enjoy the warm glow of your newly installed lighting.

11. Turning the Power Back On: Testing Your New Light Fixture

After you’ve diligently followed each step of the installation process, it’s finally time for the moment of truth: turning the power back on and testing your new light fixture. This is where all your hard work pays off, and the excitement of seeing your space illuminated in a fresh, new way comes to life.

Before flipping the switch, take a moment to ensure everything is in order. Double-check that all wires are securely connected, and the fixture is firmly mounted. Safety first! Once you’re satisfied that everything looks good, it’s time to restore power. Head back to your circuit breaker and flip the switch for the corresponding room.

With your heart racing in anticipation, return to the light fixture. Take a deep breath, and reach for the light switch. As you flick it on, pay close attention to how the new fixture responds. Does it illuminate instantly with a warm glow, or is there a flicker of hesitation? If the light turns on as expected, you’ll likely feel a rush of satisfaction.

However, if it doesn’t light up, don’t panic! This could simply be a matter of a loose connection or an incorrect wiring setup. Turn the power off again, and carefully revisit your wiring connections, ensuring that each wire is tightly secured and in the right place.

Once you’ve confirmed that everything is as it should be, restore the power once more. When you finally flip that switch again, and the room is bathed in beautiful light, relish in your accomplishment. You’ve successfully transformed your space and created a welcoming atmosphere with your new light fixture! Take a moment to appreciate how the fixture enhances the overall aesthetic of the room and consider how it will impact your daily life. Whether it’s brightening up a cozy reading nook or providing essential light in a functional workspace, your new fixture is sure to make a significant difference.

12. Adjusting Light Levels: Dimming Options and Bulb Choices

When it comes to setting the perfect ambiance in your space, adjusting light levels is a pivotal consideration that should not be overlooked. The right lighting can dramatically transform a room, setting the mood for relaxation, productivity, or social gatherings. To achieve this, you have a variety of dimming options and bulb choices at your disposal.

**Dimming Options:**
Installing a dimmer switch is one of the simplest ways to gain control over your lighting. These devices allow you to adjust the brightness of your fixtures, giving you the flexibility to create the perfect environment for any occasion. Modern dimmers come in various styles, including rotary, slide, and smart dimmers that can be controlled via smartphone apps or voice commands. When choosing a dimmer, ensure it is compatible with the type of bulbs you plan to use, as traditional incandescent bulbs work well with most dimmers, while LED and CFL bulbs may require specific dimmable versions.

**Bulb Choices:**
The next step in adjusting light levels is selecting the right bulbs for your fixtures. LED bulbs are a popular choice due to their energy efficiency and long lifespan. They come in a variety of color temperatures, ranging from warm white (2700K) to cool daylight (5000K), allowing you to tailor the light to suit your space. For a cozy atmosphere, opt for warm white bulbs in living rooms and bedrooms. Conversely, brighter, cooler bulbs work well in kitchens and workspaces where clarity and focus are essential.

You might also explore smart bulbs that allow you to change colors and dimming levels directly from your smartphone or through voice commands. This versatility not only adds convenience but also allows for dynamic changes in your space, making it easy to adapt to different activities or moods.

By thoughtfully selecting your dimming options and bulb choices, you can illuminate your space in a way that enhances its beauty and functionality, bringing warmth and life to your home. With this combination, you’re well on your way to creating a lighting scheme that is both practical and visually appealing, ensuring that your new light fixture becomes a stunning focal point for years to come.

13. Common Mistakes to Avoid During Installation

When embarking on the journey of installing a new light fixture, it’s essential to be aware of potential pitfalls that can turn an exciting project into a frustrating ordeal. Here are some common mistakes to avoid, ensuring your installation goes smoothly and safely.

**1. Skipping the Safety Check:** Before you even think about unscrewing that old fixture, make sure to turn off the power at the circuit breaker. Many DIY enthusiasts underestimate the importance of this step. Forgetting to shut off the power could lead to serious injuries or even electrocution. Always double-check with a voltage tester to confirm that the wires are dead before touching them.

**2. Ignoring the Weight Limit:** Every light fixture has a weight limit determined by the mounting hardware and ceiling structure. Overloading can lead to sagging, or worse, the entire fixture falling off the ceiling. Always check the specifications of both your light fixture and the mounting bracket to ensure they are compatible and secure.

**3. Neglecting the Right Tools:** Using the wrong tools can lead to stripped screws, damaged wires, or even injury. Ensure you have all the necessary tools on hand—screwdrivers, wire strippers, pliers, and a ladder—and that they are in good condition. Investing in a quality toolkit can save you time and headaches during the installation process.

**4. Poor Wire Connections:** One of the most critical aspects of installing a light fixture is making secure wire connections. Many DIYers make the mistake of simply twisting wires together without properly securing them with wire nuts or electrical tape. Loose connections can lead to flickering lights, short circuits, or fire hazards. Always ensure that your wires are tightly twisted and that wire nuts are firmly in place.

**5. Not Considering Placement:** Before you mount your new light fixture, take a moment to think about its placement. Is it centered over a dining table, or is it providing adequate illumination for a workspace? Failing to consider the fixture’s functionality and aesthetics can leave your space poorly lit or looking unbalanced.

**6. Overlooking the Final Touches:** Once your fixture is installed, don’t rush to turn on the power. Take a moment to tidy up any visible wires, making sure everything is neatly tucked away and secured. Then, step back and admire your work. A well-installed fixture not only illuminates your space but can also serve as a stunning focal point.

By steering clear of these common mistakes, you’ll set yourself up for a successful light fixture installation. With careful planning and attention to detail, you’ll create a beautifully lit space that enhances your home’s ambiance.

14. Maintaining Your Light Fixture: Tips for Longevity

Once you’ve successfully installed your new light fixture, the next crucial step is ensuring its longevity through proper maintenance. A well-cared-for light fixture not only enhances the aesthetic of your space but also functions efficiently over time. Here are some practical tips to keep your fixture shining bright for years to come.

### Regular Dusting and Cleaning

Dust and grime can accumulate on light fixtures, dulling their shine and affecting their performance. Make it a habit to dust your fixture regularly with a soft, dry cloth. For more thorough cleaning, turn off the power and use a damp cloth or sponge with mild soap to gently wipe down surfaces. Be sure to avoid harsh chemicals that can damage finishes or materials. For intricate designs, a soft-bristle brush can help reach those tricky crevices.

### Check and Replace Bulbs as Needed

Regularly check the bulbs in your light fixture to ensure they are functioning correctly. If you notice any flickering or dimming, it might be time to replace them. When replacing bulbs, opt for those recommended by the manufacturer to maintain compatibility. Consider energy-efficient LED bulbs, which not only last longer but also reduce your energy consumption.

### Inspect Electrical Connections

While you shouldn’t need to frequently tamper with the electrical components, it’s wise to conduct periodic inspections. Look for signs of wear, such as frayed wires or loose connections. If you’re unsure, don’t hesitate to call a professional electrician to ensure everything is safe and secure.

### Avoid Overloading Circuits

Be mindful of the wattage limitations specified for your fixture. Overloading can lead to overheating, potentially causing damage to both the fixture and your home’s electrical system. Always adhere to the manufacturer’s recommendations and consider the total wattage of all bulbs used.

### Store Seasonal Decorations Safely

If your light fixture accommodates seasonal decorations, like hanging ornaments or garlands, ensure they’re stored safely when not in use. Avoid placing heavy items that could stress the fixture or wires. When decorating, use lightweight materials that won’t compromise the integrity of the fixture.

### Schedule Professional Maintenance

For complex fixtures, especially those that require specialized cleaning or maintenance, consider scheduling an annual check-up with a professional. They can offer insights and services that ensure your fixture remains in top condition.

By incorporating these maintenance tips into your routine, you’ll not only enhance the beauty of your space but also extend the lifespan of your light fixture. A little care goes a long way in keeping your lighting sparkling and functional!

15. Conclusion: Enjoying Your Newly Illuminated Space

As you stand back and admire your newly installed light fixture, there’s a palpable sense of satisfaction that envelops the room. The warm glow fills the space, transforming dull corners into inviting areas, and highlighting the unique features of your décor. Whether you chose a sleek modern pendant light or a vintage-inspired chandelier, the right fixture not only serves a functional purpose but also acts as a statement piece that reflects your personal style.

Now that the installation process is behind you, take a moment to revel in this achievement. Consider how the new lighting enhances the ambiance of your home — perhaps it creates a cozy reading nook in the living room, a stimulating workspace in your office, or a romantic setting in your dining area. The possibilities are endless, and the impact of good lighting cannot be overstated.

Don’t forget to experiment with different bulb types and brightness levels to find the perfect balance for your space. Dimming capabilities can further elevate the atmosphere, allowing you to adjust the mood according to the time of day or occasion. Plus, with the right maintenance, your fixture will continue to shine brightly for years to come.

In conclusion, installing a new light fixture is more than just a home improvement task; it’s an opportunity to express your creativity and enhance your living environment. Enjoy the newfound brightness and warmth in your space, and let your beautifully illuminated home inspire you and your guests for many gatherings to come. Embrace the change, and let the light guide you through those cozy evenings and vibrant days ahead.

As we conclude our step-by-step guide to installing a new light fixture, we hope you feel empowered to transform your space with the perfect illumination. Whether you’re updating a single room or enhancing your entire home, the right light fixture can dramatically alter the ambiance and functionality of your environment. By following the tips and techniques outlined in this post, you can confidently tackle this DIY project, bringing both style and brightness to your living areas. Remember, lighting is more than just a practical necessity; it’s an opportunity to express your personal taste and create a welcoming atmosphere. So gather your tools, unleash your creativity, and let your space shine like never before! We can’t wait to see the stunning results of your efforts—don’t forget to share your transformation with us!

What are the essential steps to a successful bathroom remodel?

Transforming your bathroom into a serene oasis or a stylish sanctuary is more than just a home improvement project; it’s an opportunity to enhance your daily routine and elevate your home’s aesthetic.

A well-executed bathroom remodel can significantly increase your property’s value while creating a space that reflects your personal style and meets your functional needs. Whether you envision a sleek modern look with clean lines and minimalist features or a cozy retreat adorned with rustic charm, the key to achieving your dream bathroom lies in careful planning and thoughtful execution. In this comprehensive guide, we’ll walk you through the essential steps for a successful bathroom remodel, from assessing your current layout and setting a realistic budget to selecting the right materials and fixtures. Get ready to unlock the full potential of your space and master the art of bathroom remodeling!

1. Introduction: The Importance of a Well-Designed Bathroom

What are the essential steps to a successful bathroom remodel?
Credit : whatcanu.com

When it comes to home design, the bathroom is often overlooked, yet it plays a crucial role in our daily lives. A well-designed bathroom is more than just a functional space; it serves as a sanctuary for relaxation and rejuvenation. Whether it’s the first place you visit each morning to prepare for the day or a calming retreat at the end of a long evening, a thoughtfully remodeled bathroom can significantly enhance your overall quality of life.

Imagine stepping into a serene oasis, where soft lighting casts a warm glow on beautifully tiled walls, and the gentle sound of water from a modern faucet creates a soothing atmosphere. A well-designed bathroom not only elevates the aesthetic appeal of your home but also adds value to your property. Potential buyers are often drawn to homes with stylish and functional bathrooms, making it a wise investment for those considering resale in the future.

Moreover, a well-planned bathroom remodel can improve functionality, making daily routines more efficient and enjoyable. From adding additional storage solutions to selecting fixtures that cater to your needs, every choice can contribute to a more organized and user-friendly space. In this blog post, we will explore essential steps to ensure your bathroom remodel not only meets your personal style but also enhances the overall functionality and comfort of your home. Let’s dive in and discover how to transform your bathroom into a space that reflects your taste and serves your lifestyle.

2. Setting Your Budget: How Much Should You Spend?

Setting your budget is one of the most critical steps in a successful bathroom remodel, yet it can also be the most daunting. Before you dive headfirst into selecting tiles, fixtures, and finishes, it’s essential to define how much you are willing to spend. A well-thought-out budget not only keeps your project on track financially but also helps you make informed decisions throughout the renovation process.

Start by evaluating your current financial situation. Consider how much you can comfortably allocate without straining your finances. Generally, a bathroom remodel can range from a few thousand dollars for a simple facelift to tens of thousands for a complete overhaul. On average, homeowners can expect to spend between $10,000 and $15,000 for a mid-range remodel, but this can vary widely based on factors such as location, size of the bathroom, and the extent of the changes you plan to make.

Next, identify your priorities. Are you looking to simply update the aesthetics, or do you need to address functional issues like plumbing or electrical hazards? Create a list of must-haves versus nice-to-haves. This approach will help you allocate funds more effectively and determine where you can splurge versus where you might need to save. For example, investing in high-quality fixtures can enhance both the look and longevity of your bathroom, while opting for less expensive materials in areas like cabinetry or decor can help you stay within your budget.

Don’t forget to include a contingency fund, typically around 10-20% of your total budget. Renovations often come with unexpected expenses, and having this cushion can prevent stress and keep your project moving smoothly.

Finally, research and gather estimates from contractors and suppliers to gauge realistic costs for your remodel. This will provide you with valuable insights into the market rates for materials and labor, ensuring your budget is both informed and practical. By taking the time to thoughtfully set your budget at the outset, you’ll pave the way for a successful bathroom remodel that meets your needs and reflects your personal style, all while keeping your finances in check.

3. Defining Your Style: Choosing the Right Aesthetic

What are the essential steps to a successful bathroom remodel?
Credit : whatcanu.com

Defining the style of your bathroom is a crucial step in the remodeling process, as it sets the tone for the entire space and reflects your personal taste. The bathroom is not just a functional area; it can be a sanctuary where you unwind after a long day. Therefore, taking the time to choose the right aesthetic will ensure that your remodel not only meets your needs but also brings you joy every time you step inside.

Start by exploring different design styles that resonate with you. Are you drawn to the sleek lines and minimalism of modern design, or do you find comfort in the rustic charm of farmhouse aesthetics? Perhaps the elegance of traditional designs appeals to your sense of history, or you lean towards an eclectic mix that showcases your personality. Take inspiration from magazines, online platforms like Pinterest, or even visits to showrooms and model homes.

Once you have a clearer vision, consider the elements that contribute to your chosen style. For a modern look, think about incorporating clean finishes, bold colors, and high-tech fixtures. If a spa-like retreat is what you envision, opt for soft, muted tones, natural materials such as wood and stone, and soothing lighting. Don’t forget the details—accessories like mirrors, towels, and artwork can make a significant impact in pulling the whole aesthetic together.

Additionally, keep practicality in mind. Your style should harmonize with the layout and functionality of the space. For instance, if you have a smaller bathroom, lighter colors and minimal clutter can create an illusion of more space. On the other hand, a larger bathroom might benefit from bolder color choices and statement pieces to fill the area effectively.

Ultimately, defining your style is about creating a cohesive vision that not only elevates the aesthetics of your bathroom but also enhances your daily routine. By thoughtfully selecting the right aesthetic, you’ll ensure that your remodel is not just beautiful but also a true reflection of who you are.

4. Planning the Layout: Maximizing Functionality and Flow

When it comes to a successful bathroom remodel, planning the layout is paramount. A well-thought-out layout not only enhances the aesthetic appeal of your space but also maximizes functionality and flow, ensuring that your bathroom meets the needs of everyone who uses it. Begin by assessing the current layout: take note of the existing plumbing, electrical outlets, and natural light sources. This foundational knowledge will help you make informed decisions about relocating fixtures, which can be costly and time-consuming.

Next, consider the traffic patterns within the bathroom. Aim for a design that allows for easy movement, preventing any bottlenecks where multiple users might converge. For instance, if you have a double vanity, ensure there is enough space between sinks to avoid crowding during busy mornings. Think about how often you’ll be using the space and what activities will take place. Will you need a separate area for applying makeup, or do you envision a luxurious soaking tub as the centerpiece? These considerations will guide your decisions on fixture placement.

Utilize design tools and software to visualize your layout options. Many programs allow you to drag and drop elements into a virtual space, giving you a clearer idea of how everything will fit together. Additionally, consider the height and accessibility of your fixtures. A lower countertop may be ideal for children, while higher vanities can accommodate taller users.

Don’t forget the importance of storage in your layout. Incorporate cabinets, shelving, or even built-in nooks to keep essentials organized and out of sight. A clutter-free environment not only looks better but also enhances the overall functionality of the bathroom.

Ultimately, the goal of planning your layout is to create a harmonious balance between form and function. By carefully considering the flow of the space, the needs of its users, and the practical elements involved, you can design a bathroom that is not only visually stunning but also a joy to use each day. With the right planning, your remodel can transform a basic bathroom into a serene retreat that perfectly suits your lifestyle.

5. Selecting the Right Materials: Durability vs. Design

What are the essential steps to a successful bathroom remodel?
Credit : whatcanu.com

When embarking on a bathroom remodel, one of the most critical decisions you’ll face is selecting the right materials. This choice often boils down to a delicate balance between durability and design, and it’s essential to find materials that not only elevate the aesthetic of your space but also withstand the rigors of daily use.

First, consider the environment of your bathroom. With high humidity levels, materials need to be moisture-resistant to prevent mold and mildew. For flooring, porcelain or ceramic tiles are excellent options due to their water resistance and durability, available in a myriad of styles to mimic the look of natural stone or wood. Additionally, these materials are easy to clean, making them a practical choice for busy households.

Next, think about countertops. While natural stones like granite and marble offer stunning visual appeal, they may require more maintenance and sealing to protect against water damage. On the other hand, engineered stones or quartz can provide a similar look with added durability, as they are non-porous and resistant to stains. This makes them ideal for a bathroom environment where spills are inevitable.

Don’t forget about cabinetry. Solid wood may have an elegant, timeless appeal, but it can warp in high humidity. Instead, opt for materials like plywood or medium-density fiberboard (MDF) that have been treated to resist moisture. These options offer the structural integrity needed while allowing for a variety of finishes that suit your design vision.

Lastly, select fixtures made from high-quality metals or finishes that are designed to resist corrosion and tarnishing. Chrome, brushed nickel, and oil-rubbed bronze can add a stylish touch without sacrificing longevity.

Ultimately, the materials you choose will set the tone for your bathroom’s design while ensuring that it stands the test of time. By thoughtfully considering both durability and design, you’ll create a sanctuary that is not only beautiful but also functional for years to come.

6. Choosing Fixtures and Fittings: The Heart of Your Bathroom

Choosing fixtures and fittings is arguably the most critical step in your bathroom remodel, as these elements serve as the heartbeat of the space, blending functionality with style. The right fixtures not only enhance the overall aesthetic but also make a significant impact on the usability of your bathroom.

Start with the sink and vanity. These are often the focal points of the room, so consider a design that reflects your personal style—whether it’s a sleek, modern look with a minimalist undermount sink or a more traditional vibe with a charming pedestal sink. Pay attention to the materials and finishes, as these will influence both the durability and the visual appeal. For instance, a quartz countertop can provide a contemporary touch while ensuring longevity.

Next, think about the toilet. While it may seem like a purely practical choice, today’s market offers a plethora of options that combine efficiency with elegance. From wall-mounted models that save space to eco-friendly designs that reduce water usage, the right toilet can elevate your bathroom’s functionality while contributing to its overall design theme.

Don’t overlook the importance of your shower and bathtub fixtures. A luxurious rainfall showerhead or a freestanding soaking tub can transform an ordinary bathroom into a spa-like retreat. Choose finishes that complement your other fixtures, whether you lean towards polished chrome for a modern edge or brushed nickel for a more timeless feel.

Finally, consider the smaller fittings, such as towel bars, cabinet handles, and lighting fixtures. These might seem like minor details, but they can significantly influence the overall cohesion of your design. Opt for styles and finishes that tie together all elements of your bathroom, creating a harmonious environment that is not only inviting but also functional.

By carefully selecting your fixtures and fittings, you not only enhance the aesthetic appeal of your bathroom but also ensure that it serves as a practical space for your daily routines. This thoughtful approach will leave you with a beautifully remodeled bathroom that feels both luxurious and personalized, making it a haven you’ll want to return to time and again.

7. Lighting Options: Brightening Up Your Space

What are the essential steps to a successful bathroom remodel?
Credit : whatcanu.com

When it comes to transforming your bathroom, lighting plays a pivotal role in creating the right ambiance and functionality. A well-lit bathroom not only enhances the aesthetic appeal but also improves the overall user experience. To truly master your space, consider a layered lighting approach that combines different types of fixtures, each serving a unique purpose.

Start with ambient lighting, which provides overall illumination for the room. Ceiling-mounted fixtures, such as flush mounts or chandeliers, are excellent options for this foundational layer. Select fixtures that complement your design style—whether it’s sleek and modern or rustic and charming. Opt for LED bulbs that mimic natural daylight to create a bright, welcoming atmosphere.

Next, incorporate task lighting around key areas, particularly near the vanity or mirror. Wall sconces flanking the mirror can eliminate harsh shadows and provide even lighting for grooming tasks. If space allows, consider adding a pendant light above the vanity for a touch of elegance. Remember to choose fixtures with adjustable brightness or install dimmer switches, allowing you to customize the light intensity based on the time of day or mood.

Finally, don’t overlook accent lighting to highlight architectural features or decorative elements. LED strip lights under shelves, backlit mirrors, or recessed lighting can add depth and drama to your bathroom design. This subtle lighting not only draws attention to specific areas but also creates a soothing atmosphere perfect for unwinding after a long day.

By thoughtfully selecting and layering your lighting options, you can brighten up your bathroom and elevate its overall design. With the right lighting, your space will not only be functional but also a serene sanctuary where you can relax and rejuvenate.

8. DIY vs. Hiring Professionals: What’s Best for You?

When it comes to a bathroom remodel, one of the most pressing decisions you’ll face is whether to tackle the project yourself or hire professionals. The choice between DIY and professional help can profoundly impact not only the final outcome of your remodel but also the journey you take to get there.

If you’re considering a DIY approach, take a moment to assess your skills and experience. Are you a seasoned handyman comfortable with plumbing and electrical work? Perhaps you’ve tackled smaller home improvement projects before and are ready to challenge yourself with a bathroom upgrade. The allure of saving money while infusing your personal touch into the space can be incredibly tempting. You have the freedom to choose materials that resonate with your style, plan your timeline, and work at your own pace. However, be prepared for the potential pitfalls: unexpected complications can arise, such as outdated plumbing, unforeseen structural issues, or a lack of proper tools that could turn a simple project into a lengthy, frustrating endeavor.

On the flip side, hiring professionals can alleviate stress and provide a level of expertise that’s hard to match. Experienced contractors and designers bring a wealth of knowledge about current trends, codes, and best practices, ensuring that your remodel not only looks great but is also functional and safe. They can help you navigate the complexities of permits, timelines, and budgets, allowing you to focus on the vision for your new space. While this option generally involves a higher upfront cost, the investment can pay off in both the quality of the work and the long-term durability of the remodel.

Ultimately, the decision between DIY and hiring professionals boils down to a careful consideration of your budget, skill set, and the scope of the project. If you’re leaning towards DIY, start with smaller tasks to build your confidence and gauge your comfort level. If you opt for professionals, be sure to research and select reputable contractors who align with your vision and have a proven track record. Whichever path you choose, remember that a successful bathroom remodel is about creating a space that reflects your style and meets your needs while also being functional and enduring.

9. Permits and Regulations: Navigating the Legalities

When embarking on a bathroom remodel, one of the most crucial yet often overlooked steps is navigating the maze of permits and regulations. Before you dive headfirst into demolition or design, it’s essential to familiarize yourself with the legal requirements that govern home renovations in your area.

Every region has its own set of building codes and regulations that dictate everything from plumbing and electrical work to structural changes. Failing to secure the necessary permits can lead to costly fines, delays, or even the need to undo completed work that doesn’t meet code. Start by researching local building departments or municipal websites to understand what permits are required for your specific project.

For instance, if you plan to relocate plumbing fixtures or install new electrical systems, you may need to apply for specific permits. In some cases, a licensed contractor may be required to sign off on your plans, ensuring that all work is up to code and inspected properly. This is especially important for safety and insurance purposes.

Additionally, some homeowners’ associations (HOAs) may have their own guidelines governing renovations. It’s wise to check with them to avoid any conflicts or violations.

While the prospect of permits may seem daunting, think of them as a roadmap to a successful remodel. They provide a framework that ensures your project not only complies with safety standards but also enhances the value of your home. By taking the time to understand and navigate these legalities, you can embark on your bathroom transformation with confidence, knowing that you are building a space that is both beautiful and compliant.

10. Sustainable Choices: Eco-Friendly Upgrades for Your Bathroom

In today’s world, making eco-friendly choices is not just a trend; it’s a responsibility. When it comes to bathroom remodeling, integrating sustainable upgrades can significantly reduce your environmental footprint while enhancing the overall aesthetics and functionality of your space. One of the simplest yet most impactful changes you can make is to opt for water-efficient fixtures. Low-flow toilets, showerheads, and faucets can dramatically cut water consumption without sacrificing performance, helping you save on utility bills while conserving this precious resource.

Next, consider the materials you choose for your remodel. Look for sustainable options such as bamboo or reclaimed wood for cabinetry and shelving. These materials not only add a unique, natural charm to your bathroom but also ensure that your renovations are eco-conscious. Similarly, selecting tiles made from recycled materials can help minimize waste while adding a stylish touch to your design.

Ventilation is another crucial aspect of a sustainable bathroom. Installing energy-efficient exhaust fans can improve air quality and prevent moisture buildup, which in turn reduces the risk of mold and mildew. Additionally, opting for LED lighting can brighten your space while using a fraction of the energy compared to traditional bulbs, creating a more sustainable atmosphere.

Finally, don’t overlook the importance of eco-friendly paints and finishes. Many modern paints are low in volatile organic compounds (VOCs), making them safer for your health and the environment. By choosing these products, you contribute to a more sustainable home while creating a fresh, vibrant space.

Incorporating these eco-friendly upgrades not only benefits the planet but also enhances your bathroom’s comfort and style. With thoughtful planning and sustainable choices, your bathroom remodel can be a reflection of your commitment to environmental stewardship.

11. Adding Storage Solutions: Keeping Clutter at Bay

When it comes to bathroom remodels, one of the most pivotal aspects to consider is storage. A beautifully designed bathroom can quickly become a cluttered mess if you don’t have the right solutions in place to keep it organized. Adding innovative storage options not only enhances the functionality of your space but also contributes to a serene and aesthetically pleasing environment.

Start by assessing your current bathroom layout and identifying areas where storage can be maximized. Consider incorporating built-in shelving, which can seamlessly blend into the wall design, offering a place to showcase decorative items or store everyday essentials without taking up valuable floor space. Wall-mounted cabinets are another smart choice; they provide ample storage while allowing you to maintain an open, airy feel.

Don’t overlook the potential of underutilized spaces, such as the area beneath the sink. Installing pull-out drawers or baskets can transform this often-neglected zone into a convenient storage haven for toiletries, cleaning supplies, and extra linens. Floating shelves can also serve as stylish solutions, providing both functionality and a platform for personal touches like plants or candles.

Additionally, think about incorporating multi-functional furniture. For instance, a stylish bench or stool can double as a storage box, perfect for stashing away towels or bath toys. Remember, the goal is to create a cohesive design that meets your storage needs while reflecting your personal style.

By thoughtfully integrating these storage solutions into your bathroom remodel, you’ll not only keep clutter at bay but also elevate the overall ambiance of your sanctuary. A well-organized bathroom helps create a calming atmosphere, making your daily routines feel more enjoyable and less chaotic.

12. Final Touches: Decor and Accessories to Enhance Your Space

As you approach the final stages of your bathroom remodel, the allure of the space is often determined by the decor and accessories you choose to incorporate. These finishing touches are not merely aesthetic; they can transform a utilitarian area into a personal sanctuary that reflects your unique style and enhances overall functionality.

Start by selecting a color palette that harmonizes with your bathroom’s existing features. Soft, muted hues can create a serene atmosphere, while bold colors can inject energy and personality into the space. Consider the impact of wall art, such as framed prints or canvas pieces that evoke a sense of calm or inspiration. A well-placed mirror can also serve as both a decorative element and a functional necessity, amplifying light and making the space feel more expansive.

Next, think about your choice of accessories. Luxurious towels, chic soap dispensers, and stylish storage solutions can elevate the everyday experience. Opt for materials that are not only visually appealing but also practical; for instance, consider moisture-resistant options for towels and decorative items. Incorporate greenery with small potted plants or fresh flowers to breathe life into the room while improving air quality.

Lighting is another critical component in the final touches of your bathroom remodel. Layered lighting, including ambient, task, and accent lights, can create a warm and inviting atmosphere. Dimmable fixtures allow for flexibility, enabling you to adjust the brightness based on the time of day or the mood you wish to create.

Lastly, don’t underestimate the power of scent. Candles, essential oil diffusers, or beautifully crafted soaps can provide a sensory experience that elevates your bathroom from a mere functional space to a personal retreat. By thoughtfully curating your decor and accessories, you’ll not only enhance the visual appeal of your newly remodeled bathroom but also create an environment that promotes relaxation and rejuvenation. Embrace these final touches, and watch as your bathroom transforms into a harmonious blend of style and comfort.

13. Common Mistakes to Avoid: Learning from Others’ Experiences

When embarking on a bathroom remodel, it’s easy to get caught up in the excitement of design possibilities and forget the lessons learned by those who have gone before you. Acknowledging common mistakes can save you not only time and money but also the frustration of dealing with issues that could have been avoided. Here are some key pitfalls to steer clear of, culled from the experiences of countless remodelers.

**Neglecting the Importance of Planning**
One of the most frequent missteps is diving into a remodel without thorough planning. Many homeowners underestimate the importance of taking the time to sketch out a detailed layout, measure dimensions, and consider the flow of the space. An ill-conceived design can lead to cramped quarters or awkwardly placed fixtures, making your once-dreamy bathroom feel more like a claustrophobic cave.

**Ignoring Budget Realities**
Budget overruns are another common hurdle in bathroom renovations. It’s easy to get swept up in high-end finishes and trendy fixtures, forgetting that every addition adds to the bottom line. Before you start shopping, set a realistic budget that includes not only materials and labor but also a buffer for unexpected costs. Stick to it as closely as possible, and keep track of expenditures throughout the project to avoid financial surprises.

**Overlooking Ventilation Needs**
A critical, yet often overlooked aspect of bathroom design is ventilation. Poor air circulation can lead to mold and mildew growth, especially in a humid environment. Homeowners may fail to install adequate exhaust fans or neglect to position them correctly, resulting in a space that deteriorates faster than anticipated. Prioritize ventilation during your remodel to maintain a healthy, fresh atmosphere.

**Choosing Style Over Functionality**
While aesthetics are undeniably important, never sacrifice functionality for the sake of style. A beautiful bathtub that barely fits in your space or a trendy faucet that is difficult to operate can lead to daily frustration. Aim for a balance between design and practical use; think about how you and your family will interact with the space daily.

**Skimping on Quality**
Lastly, the temptation to cut corners on materials can be a significant miscalculation. While it might seem cost-effective to purchase cheaper tiles or fixtures, these items often wear out more quickly and can result in higher replacement costs down the line. Invest in quality materials that will withstand the test of time and frequent use, ensuring your remodel not only looks good but stands up to everyday life.

By learning from the experiences of others, you can navigate your bathroom remodel with greater confidence and awareness. Avoiding these common mistakes will pave the way for a successful transformation that not only meets your aesthetic desires but also enhances the functionality and longevity of your bathroom space.

14. Staying Organized During the Remodel: Tips for a Smooth Process

Undertaking a bathroom remodel can feel like a daunting task, but staying organized is the key to a smooth and successful process. From the initial planning stages to the final touches, a well-structured approach will help you navigate the complexities of your project with confidence.

Start by creating a detailed checklist that outlines every step of the remodel. Break down the process into manageable tasks, such as selecting materials, scheduling contractors, and setting a timeline. This list will serve as your roadmap, keeping you focused and on track as you progress. Consider using project management apps or traditional planners to keep everything in one place.

Next, designate a specific area in your home to serve as a command center for your remodel. This space can house your materials, samples, and tools, making it easier to access everything you need without rummaging through different rooms. Keeping your workspace tidy will minimize chaos and improve efficiency as the project unfolds.

Communication is also crucial during a remodel. If you’re working with contractors, establish clear lines of communication and set regular check-ins to discuss progress and address any concerns. Don’t hesitate to share your vision and expectations—it’s vital that everyone is on the same page to avoid misunderstandings.

As the remodel progresses, maintain a running inventory of your supplies. Document what you have on hand and what needs to be ordered to prevent last-minute trips to the store or delays due to missing materials. This attention to detail can save you both time and money.

Finally, remember to be flexible. While organization is essential, unexpected challenges can arise during any remodel. Having a backup plan can help you stay calm and adapt to any changes without losing sight of your end goal.

By staying organized throughout your bathroom remodel, you’ll not only reduce stress but also create an environment that allows your vision to flourish—resulting in a beautifully transformed space that you’ll enjoy for years to come.

15. Conclusion: Enjoying Your Newly Remodeled Bathroom

As you step into your newly remodeled bathroom, the air is filled with a sense of satisfaction that comes from seeing your vision come to life. The transformation you’ve worked tirelessly to achieve is now a reality—a space that not only meets your functional needs but also reflects your personal style and taste. The fresh paint glistens under the soft glow of stylish fixtures, and the carefully chosen tiles create a harmonious flow that welcomes you.

This is more than just a renovation; it’s an investment in your daily routine and overall well-being. Imagine starting your day in a sanctuary that exudes relaxation and tranquility, where each element, from the plush towels to the soothing color palette, has been chosen with care. The new layout enhances not only the aesthetics but also the efficiency of your space, making even the simplest tasks feel like a luxury.

As you soak in the ambiance, take a moment to appreciate the little details—perhaps the way the morning light filters through a beautifully framed window or the gentle sound of water cascading from a modern faucet. These thoughtful touches create an inviting atmosphere that encourages you to unwind after a long day.

Moreover, your remodeled bathroom is a conversation starter, a showcase of your exquisite taste for guests who visit. It stands as a testament to your commitment to improving your home and enhancing your lifestyle.

In the end, a successful bathroom remodel is not just about the materials or design; it’s about creating a space that feels like an escape, a personal retreat where you can rejuvenate and recharge. So, embrace your new oasis and enjoy the countless moments of peace and comfort it will bring to your life for years to come.

In conclusion, embarking on a bathroom remodel can be an exciting yet daunting journey, but with the right approach, it can also be a highly rewarding experience. By following the essential steps outlined in this guide, from careful planning and budgeting to selecting the perfect fixtures and finishes, you can transform your bathroom into a sanctuary that reflects your style and meets your needs. Remember, every detail counts, and taking the time to consider layout, functionality, and aesthetics will ensure that your newly remodeled space is not only beautiful but also practical for years to come. We hope you’re inspired to take the plunge and start creating the bathroom of your dreams. Happy remodeling!