How to install a new dishwasher?

Installing a new dishwasher can seem like a daunting task, especially if you’re not particularly handy around the house.

However, with the right guidance and a little bit of confidence, you can transform this seemingly complex project into a straightforward and rewarding experience. In this step-by-step guide, we’ll walk you through everything you need to know to install your new dishwasher like a pro. From gathering the essential tools and materials to understanding the plumbing and electrical connections, we’ll equip you with practical tips and insider knowledge to ensure a smooth installation. Say goodbye to the hassle of waiting for a professional and hello to the satisfaction of tackling a home improvement project yourself. Get ready to enjoy the convenience of your new appliance while saving time and money with our comprehensive installation guide!

1. Introduction: Why DIY Dishwasher Installation?

How to install a new dishwasher?
Credit : whatcanu.com

Installing a new dishwasher may seem daunting to many homeowners, but taking the DIY route can be both rewarding and cost-effective. Why should you consider installing your dishwasher yourself? For starters, it empowers you to learn essential home improvement skills that can save you money on professional installation fees. In a world where convenience often comes at a premium, tackling this project on your own can provide a sense of accomplishment and independence.

Moreover, understanding the ins and outs of your kitchen appliances can lead to a better appreciation of how they function. You’ll gain valuable insights into plumbing, electrical connections, and the overall mechanics of your home, which can come in handy for future repairs or upgrades. DIY installation also allows for greater control over the process—choosing the right materials, customizing connections to suit your kitchen layout, and ensuring everything is set up to your exact specifications.

Additionally, with a plethora of resources available online, including instructional videos, forums, and detailed guides, learning how to install your dishwasher has never been easier. You can work at your own pace, revisit steps as necessary, and even ask questions from a community of fellow DIYers. So, roll up your sleeves and prepare to dive into this rewarding project—by the end, you’ll not only have a fully functional dishwasher, but you’ll also have the confidence and knowledge that comes with mastering a new skill. Let’s get started!

2. Safety First: Tools and Materials You’ll Need

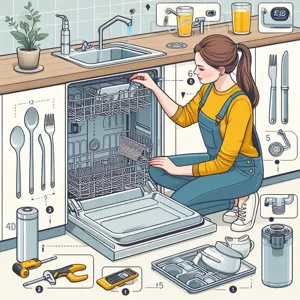
Before diving into the installation process, it’s essential to prioritize safety and gather the right tools and materials. Taking the time to prepare ensures a smoother installation and minimizes potential hazards. Here’s a comprehensive list of what you’ll need to tackle the job like a pro.

**Essential Tools:**

1. **Screwdriver Set:** A mix of flathead and Phillips screwdrivers will help you tackle various screws that hold your dishwasher in place.

2. **Adjustable Wrench:** This tool is crucial for tightening and loosening the water supply line and other plumbing connections.

3. **Plumber’s Tape:** Also known as Teflon tape, this is vital for ensuring a watertight seal on all threaded connections.

4. **Level:** To make sure your dishwasher sits evenly, a level will help you avoid any unwanted tilting that can lead to leaks.

5. **Drill and Drill Bits:** If your installation requires new holes for mounting or securing the dishwasher, a power drill will be necessary.

6. **Pliers:** These are handy for gripping and turning various components, especially in tight spaces.

7. **Bucket or Towel:** In case of water spillage during the installation, having a bucket or towel on hand will save you from unwanted messes.

**Materials:**

1. **Water Supply Line:** Ensure you have a new, flexible water supply line that fits your dishwasher and is compatible with your plumbing.

2. **Drain Hose:** A proper drain hose is essential for allowing wastewater to flow from your dishwasher to the sink or disposal.

3. **Power Cord:** If your new dishwasher doesn’t come with a built-in power cord, you’ll need to purchase one that matches your electrical requirements.

4. **Mounting Brackets:** Some dishwashers come with these, but if not, you may need to buy them separately to secure your unit properly.

5. **Installation Manual:** While not a physical tool, your dishwasher’s installation manual will be your best friend during this process, providing specific instructions tailored to your model.

By ensuring you have the right tools and materials at your disposal, you set the stage for a successful and efficient dishwasher installation. Remember, safety always comes first—so put on your safety goggles, keep your workspace tidy, and prepare to transform your kitchen with your new appliance!

3. Preparing Your Kitchen: Clearing the Space

How to install a new dishwasher?
Credit : whatcanu.com

Before diving into the installation process of your new dishwasher, it’s essential to prepare your kitchen and clear the space effectively. A clutter-free environment not only makes the task easier but also ensures safety as you navigate around potentially sharp tools and heavy equipment.

Start by removing any obstacles from the area surrounding your old dishwasher. This includes emptying the appliance itself—ensure that all dishes, utensils, and cleaning supplies are removed, giving you a clear view of the space. Next, clear away any items from the countertops and adjacent cabinetry that might hinder movement. If your dishwasher is located under the counter, take the time to empty any cabinets below or beside it; this will provide ample room to maneuver and prevent accidental damage to your belongings.

Once the area is cleared, take a moment to sweep or vacuum the floor. Not only will this make the workspace more pleasant, but it will also help you avoid slipping on dust or debris as you work. If your kitchen floor is particularly slippery, consider laying down a non-slip mat to provide better traction during the installation process.

Additionally, gather all the tools and materials you’ll need for the installation. This might include a screwdriver, adjustable wrench, pliers, and a bucket to catch any water that may spill during disconnection. Having everything within arm’s reach will streamline the process and allow you to focus on the task at hand without unnecessary interruptions.

Lastly, ensure that you have access to the necessary plumbing and electrical connections. This may involve moving other appliances or furniture out of the way. If your new dishwasher requires additional electrical work or plumbing adjustments, it’s wise to consult a professional beforehand. With your kitchen prepared and a clear path to work, you’re ready to tackle the installation with confidence and ease.

4. Understanding Your Dishwasher: Key Components and Features

Before diving into the installation process, it’s essential to familiarize yourself with your dishwasher’s key components and features. Understanding these elements will not only ease your installation but also enhance your overall experience with the appliance.

First, let’s take a look at the **control panel**, usually located on the front or top edge of the door. This is where you’ll find buttons or a touchscreen to select wash cycles, adjust settings, and monitor the status of your dishwasher. Familiarizing yourself with these functions will help you navigate the machine effortlessly once it’s up and running.

Next, identify the **spray arms**. Most dishwashers have one or two spray arms that rotate to distribute water during the wash cycle. These arms are critical for ensuring your dishes come out sparkling clean, so check for any obstructions or debris before you start the installation.

Another important component is the **filter**. Located at the bottom of the dishwasher, the filter traps food particles and prevents them from recirculating onto your clean dishes. Understanding how to remove and clean the filter will not only extend the lifespan of your dishwasher but also maintain its cleaning efficiency.

The **drainage system** is another crucial feature. It usually consists of a drain pump and hose that expels dirty water after each cycle. Make sure to familiarize yourself with this system, as proper installation is key to preventing leaks or drainage issues in the future.

Lastly, don’t overlook the **power supply** and **water supply connections**. Knowing where these are located and how they interact with your dishwasher is vital for a successful installation. The electrical and plumbing connections must be secure and compatible with your home’s systems to ensure your dishwasher operates safely and efficiently.

By understanding these key components and features, you’ll not only simplify the installation process but also set yourself up for a successful and hassle-free experience with your new dishwasher.

5. Disconnecting the Old Dishwasher: Step-by-Step Instructions

How to install a new dishwasher?
Credit : whatcanu.com

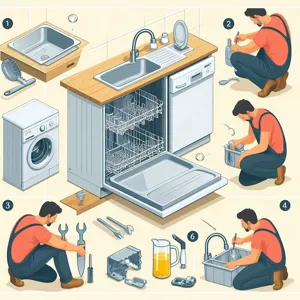
Disconnecting your old dishwasher may seem daunting, but with a few simple steps, you can do it like a pro. Before diving in, ensure you have all necessary tools on hand: a screwdriver, adjustable wrench, bucket, and towels to catch any spills. Here’s a step-by-step guide to help you safely remove the old appliance.

**Step 1: Turn Off the Power and Water Supply**
Start by turning off the power to the dishwasher at your circuit breaker. This is crucial to avoid any electrical hazards during the disconnection process. Next, locate the water supply valve under your sink and turn it off as well.

**Step 2: Remove the Lower Dish Rack**
Take out the lower dish rack from the dishwasher to give yourself more space to work. This will also help prevent any accidental damage to your dishes during the disconnection.

**Step 3: Disconnect the Drain Hose**
Look for the drain hose, typically located at the back of the dishwasher. Using your screwdriver, loosen the clamp holding the hose in place, then gently pull the hose away from the dishwasher. Keep a bucket or towel handy to catch any residual water that may spill out.

**Step 4: Unscrew the Water Supply Line**
Next, locate the water supply line connected to the dishwasher. Using your adjustable wrench, carefully unscrew the line. Be prepared for a small amount of water to drip out; your bucket will be helpful here!

**Step 5: Remove the Mounting Brackets**
Most dishwashers are secured to the countertop or cabinets with mounting brackets. Open the dishwasher door and locate these brackets, which are generally found at the top. Use your screwdriver to remove any screws holding the brackets in place. Once detached, you can gently pull the dishwasher away from the cabinetry.

**Step 6: Disconnect the Electrical Wiring**
Finally, locate the electrical junction box, usually located at the bottom of the dishwasher. Carefully remove the cover plate and disconnect the wiring by unscrewing the wire nuts. Make sure to note how the wires are connected, as you’ll need this information for your new installation.

**Step 7: Safely Remove the Dishwasher**
With everything disconnected, it’s time to remove the dishwasher. Carefully slide it out from its position, taking care not to damage the surrounding cabinetry or flooring.

Once you’ve successfully removed the old dishwasher, you’re one step closer to installing your new appliance. Remember, patience and caution are your best friends in this process!

6. Inspecting Water and Electrical Connections

Before you can bring your new dishwasher to life, it’s crucial to inspect the water and electrical connections meticulously. This step is not just a formality; it’s a safeguard that ensures your appliance operates efficiently and safely.

Begin by locating the water supply line and shutoff valve, which is typically found under the kitchen sink. Turn on the water to check for any leaks or drips. A steady stream means you’re good to go, but if you spot any moisture around the fittings, it’s essential to tighten the connections or replace any worn-out gaskets. Remember, a small leak can lead to significant water damage over time, so it’s better to be cautious.

Next, turn your attention to the electrical connections. Ensure that the power supply is compatible with your new dishwasher’s requirements. Most modern dishwashers will need a dedicated circuit, so check the circuit breaker and confirm that it’s not overloaded. Use a voltage tester to verify that the outlet is working correctly before plugging in your appliance.

Additionally, take a moment to inspect the wiring and connections for any signs of fraying or damage. If you’re uncertain, don’t hesitate to consult a professional electrician to ensure everything is up to code. A little diligence now can save you a lot of headaches later, allowing you to enjoy the convenience of your new dishwasher with peace of mind.

With the water and electrical connections verified, you’ll be well on your way to completing the installation process like a pro!

7. Positioning Your New Dishwasher: Tips for Alignment

How to install a new dishwasher?
Credit : whatcanu.com

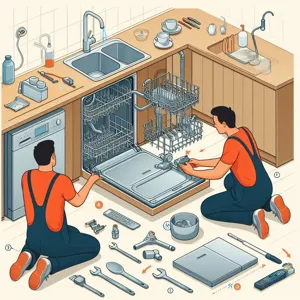
Positioning your new dishwasher correctly is crucial for both functionality and aesthetics, ensuring it operates efficiently while seamlessly integrating into your kitchen space. Start by carefully sliding the dishwasher into its designated space, typically located between the kitchen cabinets. Before doing so, check that all hoses and the power supply are readily accessible and not obstructed.

Once in position, use a level to check the alignment of the dishwasher. It should sit flush with the surrounding cabinetry without any noticeable gaps. If necessary, adjust the dishwasher’s legs to achieve the correct height. Most models feature adjustable feet that can be raised or lowered with ease, allowing you to achieve that coveted level alignment.

Next, ensure that the door swings open freely without hitting adjacent cabinets or countertops. This will not only enhance the usability of the appliance but also prevent potential damage to both the dishwasher and your kitchen fixtures. If your model includes customizable panels or trim kits, now is the time to install these to create a polished, integrated look.

Finally, take a step back and evaluate the overall appearance. A well-positioned dishwasher should look like a natural part of your kitchen, with smooth lines and a cohesive aesthetic. With these tips for alignment in mind, you’ll ensure that your new dishwasher is not just functional but also a stylish addition to your home!

8. Connecting the Water Supply Line

Connecting the water supply line is a crucial step in the installation process, and taking the time to do it correctly will ensure your dishwasher operates efficiently without leaks. To begin, you will need a few essential tools: an adjustable wrench, Teflon tape, and a bucket or towel for any potential spills.

First, locate the water supply valve, usually found under your kitchen sink. Before you start, make sure to turn off the water supply to avoid any surprises. It’s a good idea to place a bucket or towel beneath the valve to catch any residual water that may spill out when you disconnect the existing hose.

Next, use the adjustable wrench to loosen and remove the existing supply line from the valve. Once detached, inspect the connection point for any signs of wear or damage. If everything looks good, wrap Teflon tape around the threads of the new water supply line. This will create a watertight seal, preventing leaks once everything is connected.

Now, attach the new water supply line to the valve by hand, ensuring it’s snug but not overly tight. Follow this by reattaching the other end of the line to the dishwasher’s water inlet, which is typically located on the lower right side of the appliance. Again, use the adjustable wrench to secure this connection, taking care not to overtighten, as this could damage the fittings.

Once both connections are secure, it’s time to turn the water supply back on. Do this slowly and watch closely for any leaks at both connection points. If you see any water seeping out, turn off the valve immediately and double-check your connections.

With the water supply line securely connected and leak-free, you’re one step closer to enjoying the convenience of your new dishwasher. Make sure to take a moment to clean up any tools or spills before moving on to the next step in your dishwasher installation process!

9. Electrical Hookup: Hardwiring vs. Plugging In

When it comes to the electrical hookup for your new dishwasher, understanding the difference between hardwiring and plugging in is essential for a successful installation. Both methods have their own set of advantages, and your choice will largely depend on your kitchen’s existing setup and local electrical codes.

**Hardwiring** involves connecting the dishwasher directly to your home’s electrical system. This method typically requires a dedicated circuit and can provide a more permanent solution. Hardwired dishwashers usually come with a flexible conduit that contains three wires: a hot wire, a neutral wire, and a ground wire. This setup is particularly beneficial for those who want a clean look without visible cords. However, it’s crucial to ensure that you meet the necessary electrical requirements and restrictions, so consulting a professional electrician may be wise if you are unsure.

On the other hand, **plugging in** your dishwasher is often the simpler and more straightforward option. Many modern dishwashers are designed to be connected to a standard three-prong outlet. This method allows for easy removal and replacement, making it ideal for renters or those who plan to change appliances frequently. If your dishwasher comes with a power cord, all you need to do is locate an accessible outlet that matches the voltage requirements of your appliance. Ensure that the outlet is in a convenient but safe location, typically within the cabinetry, so it remains hidden from view.

Regardless of the method you choose, ensure you follow safety precautions. Turn off the power at the circuit breaker before starting any electrical work and, if necessary, consult your dishwasher’s manual for specific instructions related to electrical connections. By understanding the implications of hardwiring versus plugging in, you can make an informed decision that ensures your new dishwasher operates safely and efficiently, setting the stage for many years of hassle-free dishwashing.

10. Securing the Dishwasher to the Cabinet

Securing your new dishwasher to the cabinet is a crucial step that ensures stability and prevents any unintended movement during operation. This process not only enhances safety but also contributes to the longevity of your appliance.

Begin by locating the mounting brackets, which are typically found at the top edges of the dishwasher. These brackets will be used to anchor the dishwasher securely to the underside of your countertop. Before you start, double-check that the dishwasher is leveled properly; this will prevent any vibrations that could lead to wear and tear.

Once you’ve confirmed that your dishwasher is level, align the mounting brackets with the countertop. Using a drill, carefully drive screws into the brackets, ensuring they penetrate the cabinet above without compromising the integrity of the wood. Be cautious not to overtighten, as this can warp the dishwasher frame or damage the cabinet.

For added security, consider using shims if there are any gaps between the dishwasher and the cabinet. These small, wedge-shaped pieces help to create a snug fit and provide extra support. After securing the brackets, give the dishwasher a gentle tug to ensure it’s firmly in place.

Finally, take a moment to inspect the surrounding area. Ensure that there are no water lines or electrical cords pinched between the appliance and the cabinet, as this could lead to future issues. By taking the time to secure your dishwasher properly, you can enjoy the peace of mind that comes with a well-installed appliance, ready to tackle your dishwashing needs efficiently and reliably.

11. Testing for Leaks: Ensuring a Proper Seal

Once your new dishwasher is securely installed and connected to the water supply, it’s time for one of the most crucial steps: testing for leaks. Ensuring a proper seal is essential not only for the longevity of your appliance but also for the protection of your kitchen from water damage. A small leak can lead to significant issues if left unchecked, so take this step seriously.

Start by turning on the water supply valve that connects to your dishwasher. Once you’ve done that, run a short cycle on your dishwasher while keeping a close eye on the area around the door and the connections at the back. Look for any signs of dripping or pooling water, which could indicate a faulty seal or a loose connection.

Don’t rush this process—allow the dishwasher to run through its cycle completely. After it finishes, check the floor beneath the appliance for any signs of moisture. A dry floor means you’ve installed your dishwasher correctly, while any wet spots may require your immediate attention. If you do spot a leak, you may need to tighten the hose connections or reapply sealing tape to ensure a snug fit.

Additionally, using a paper towel or cloth to wipe down the edges of the door can help you spot any leaks that might not be immediately visible. If you notice any dampness on the towel after running the cycle, that’s a clear signal that you need to inspect the door gasket for wear or misalignment.

By taking the time to thoroughly test for leaks, you can enjoy peace of mind knowing that your new dishwasher is working efficiently and safely. Remember, an ounce of prevention is worth a pound of cure; addressing any leaks now can save you from costly repairs down the line.

12. Leveling Your Dishwasher: Importance of Stability

Leveling your dishwasher is a crucial step that can significantly impact its performance and longevity. An unlevel dishwasher can lead to a host of problems, including improper drainage, leaks, and even damage to your kitchen cabinetry. When your dishwasher is not stable, it may wobble during operation, causing loud noises and vibrations that can be unsettling. Moreover, an unlevel unit can affect how effectively the spray arms distribute water, leading to poorly cleaned dishes.

To ensure your dishwasher functions optimally, start by checking the leveling legs located at the bottom of the appliance. Most dishwashers are equipped with adjustable legs that allow you to raise or lower each corner to achieve a perfectly level surface. Using a bubble level, place it on the top edge of the dishwasher door. If the bubble is off-center, adjust the legs accordingly. Turn the legs clockwise to raise the unit and counterclockwise to lower it.

After making adjustments, recheck the level until the bubble sits perfectly centered. Once you confirm your dishwasher is level from side to side and front to back, secure it to the countertop or cabinetry, if applicable, to prevent any movement over time. Remember, taking the time to properly level your dishwasher not only ensures better performance but also extends its lifespan, making this step a vital part of your installation process. In the end, a stable dishwasher means cleaner dishes and a hassle-free experience for years to come!

13. Final Connections: Drain Hose Installation

Once your dishwasher is securely positioned and leveled, it’s time to tackle the crucial task of connecting the drain hose. This step ensures that dirty water is efficiently removed from your dishwasher during the wash cycle, preventing any backflow or leaks that could cause a mess in your kitchen.

Begin by locating the drain hose, typically made of durable plastic. You’ll find one end of the hose connected to the dishwasher itself, while the other end will need to be attached to your kitchen’s plumbing system. If your dishwasher has an air gap—a small device mounted on the countertop or sink—it’s essential to connect the drain hose to the air gap before proceeding to the sink drain.

Next, check the manufacturer’s instructions for your specific model. Most dishwashers require the drain hose to be routed upwards, creating a “high loop” that helps prevent wastewater from siphoning back into the appliance. You can achieve this by securing the hose to the underside of your countertop with a zip tie or clamp, making sure it forms a gentle curve without any sharp bends.

Once the hose is positioned correctly, attach the free end to the sink drain or garbage disposal. If connecting to a garbage disposal, ensure that the knockout plug is removed before insertion. This will allow water to flow freely from your dishwasher into the disposal. Use a hose clamp to secure the connection tightly, ensuring there are no leaks.

After everything is connected, it’s time for a quick check. Run your dishwasher on a short cycle while monitoring the drain area for any signs of leaks. This step is crucial, as it allows you to address any issues before completing the installation. If everything looks good, congratulations—you’ve successfully completed the drain hose installation! Your dishwasher is now ready to tackle your dirty dishes, giving you one more reason to enjoy the convenience of modern kitchen appliances.

14. Running Your First Cycle: What to Watch For

After successfully installing your new dishwasher, the moment has finally arrived to run your first cycle. This is an exciting step, but it’s essential to approach it with care to ensure everything is functioning correctly. Before hitting the start button, take a moment to double-check a few key elements.

First, ensure that all connections—water supply, drainage, and power—are secure. A loose hose can lead to leaks, while improper electrical connections might pose safety risks. Once you’ve confirmed everything is in order, load the dishwasher according to the manufacturer’s instructions, placing items in a way that promotes optimal water flow and cleanliness.

As you set the cycle, choose a standard wash program to start. This will give you a good baseline for the machine’s performance. Pay attention to how the dishwasher sounds during the initial cycle. A few operational noises are normal, but any strange grinding, loud banging, or persistent beeping may indicate an issue that needs addressing.

While the dishwasher runs, it’s a good idea to keep an eye on the exterior for any leaks. Inspect around the base and under the sink where the drainage hose connects. If you see any water pooling or dripping, it’s crucial to stop the cycle immediately and troubleshoot the problem. Additionally, listen for abnormal vibrations that could signal an imbalanced load or improper installation.

Finally, once the cycle completes, open the door and check the cleanliness of your dishes. If everything comes out sparkling clean, you can breathe a sigh of relief and celebrate your successful installation! However, if you notice residual food particles or cloudy glassware, it may be time to adjust your loading technique or explore the dishwasher’s settings for optimized performance. Running your first cycle is a crucial step in ensuring your new appliance is ready to serve you well for years to come. Happy washing!

15. Conclusion: Troubleshooting Common Installation Issues

### Conclusion: Troubleshooting Common Installation Issues

Now that you’ve successfully navigated the installation of your new dishwasher, it’s essential to be prepared for any hiccups that might arise in the process. Even the most meticulous DIY enthusiasts can encounter challenges, and knowing how to troubleshoot these issues can save you time and frustration.

One common problem is the dishwasher not filling with water. If this occurs, double-check that the water supply valve is fully open and inspect the inlet hose for any kinks or blockages. A clogged filter can also prevent water from entering, so don’t hesitate to clean or replace it as necessary.

Another frequent issue is the dishwasher leaking. If you notice puddles forming around the base, take a moment to inspect the door seal for wear and tear, as well as ensuring that the drain hose is securely connected and not pinched. Additionally, verify that the dishwasher is level; an uneven installation can lead to unwanted leaks.

Finally, be attentive to unusual noises during operation. While some sound is normal, loud grinding or banging may indicate that something is amiss. Check to see if any utensils or items have been left inside that could be obstructing the spray arms, or ensure that the dishwasher is properly secured to the cabinetry to minimize vibrations.

By keeping these troubleshooting tips in mind, you can address common installation issues with confidence. Remember, even if things don’t go perfectly, a little patience and problem-solving can lead to a smoothly operating dishwasher that will serve you well for years to come. Enjoy the benefits of your new appliance, and take pride in knowing that you’ve tackled the installation like a pro!

In conclusion, installing your new dishwasher doesn’t have to be an overwhelming task—armed with the right tools and our step-by-step guide, you can tackle it like a pro! By following the outlined instructions, you not only save money on installation fees but also gain a sense of accomplishment that comes from completing a DIY project. Remember to take your time, double-check your connections, and consult the manufacturer’s manual for any specific requirements. Soon enough, you’ll be enjoying the convenience of a sparkling clean kitchen without the hassle. We’d love to hear about your installation experience, so feel free to share your tips or ask any questions in the comments below. Happy dishwashing!

How to install a new light fixture?

Transforming the ambiance of your home can be as simple as changing a light fixture.

Whether you’re looking to brighten up a dim corner, create a cozy atmosphere in your living room, or add a touch of elegance to your dining area, the right lighting can make all the difference. In this comprehensive guide, we’ll walk you through the entire process of installing a new light fixture, from selecting the perfect design that complements your decor to the practical steps of wiring and mounting. With just a few tools and a little bit of patience, you’ll be able to enhance your space with a fresh glow. So grab your toolkit, and get ready to illuminate your home as we delve into the art of light fixture installation—your space is about to shine brighter than ever!

1. Introduction: The Importance of Lighting in Your Space

How to install a new light fixture?
Credit : whatcanu.com

Lighting plays a crucial role in defining the ambiance and functionality of any space. Whether you’re transforming a cozy corner in your living room or enhancing the workspace in your kitchen, the right light fixture can make all the difference. It’s not just about illumination; it’s about creating an atmosphere that reflects your personal style and meets your everyday needs.

Good lighting can elevate the aesthetics of a room, highlighting its best features while providing essential illumination for tasks at hand. It can make a small room feel larger, a dull space feel vibrant, and a stark area feel warm and inviting. Think about how the soft glow of a pendant light can create an intimate dining experience, or how a bright chandelier can add a touch of elegance to a foyer.

Moreover, effective lighting has practical benefits as well. It can increase safety and security by eliminating dark corners that may hide potential hazards or intruders. By strategically placing light fixtures, you can enhance visibility and comfort, allowing you to navigate your space with ease at any hour of the day.

In this guide, we’ll take you through the steps of installing a new light fixture, empowering you to harness the transformative power of lighting. Whether you’re a seasoned DIY enthusiast or a first-time installer, our clear instructions and helpful tips will ensure that you can illuminate your space with confidence and flair. Let’s dive in and brighten up your home!

2. Choosing the Right Light Fixture for Your Room

Choosing the right light fixture for your room is a vital step in illuminating your space effectively and enhancing its overall aesthetic. The light fixture you select should not only complement the existing decor but also serve the practical purposes of the room. Start by considering the function of the space. For example, a cozy living room may benefit from warm, ambient lighting, while a kitchen requires bright, focused light for meal prep and cooking.

Next, think about the style that resonates with you and fits the room’s theme. Are you drawn to modern minimalism, rustic charm, or perhaps a vintage flair? Chandeliers can add a touch of elegance to dining areas, while sleek pendant lights work beautifully over kitchen islands. Additionally, wall sconces can contribute to the ambiance without taking up valuable floor space in smaller rooms.

Size matters, too. A fixture that is too large can overwhelm a small space, while one that is too small can get lost in a larger room. As a rule of thumb, consider the dimensions of your room when selecting a fixture: the diameter of the chandelier or light fixture in inches should equal the sum of the room’s length and width in feet. This simple formula helps ensure that your choice will be visually proportional.

Finally, don’t overlook the importance of the light bulb itself. The type of bulb you choose—whether LED, incandescent, or fluorescent—will impact not only the quality of light but also energy efficiency and longevity. Pay attention to the color temperature as well; warmer tones create a cozy atmosphere, while cooler tones can invigorate and energize.

Taking the time to thoughtfully select the right light fixture will transform your room into a beautifully illuminated space that reflects your personal style while meeting your lighting needs.

3. Tools and Materials Needed for Installation

How to install a new light fixture?
Credit : whatcanu.com

Before diving into the exciting world of light fixture installation, it’s essential to gather the right tools and materials to ensure a smooth and safe process. Here’s a detailed list of what you’ll need, along with some handy tips to help you prepare for the task ahead.

**Tools:**

1. **Screwdriver Set**: Both flathead and Phillips screwdrivers are indispensable for removing old fixtures and securing the new ones. Consider using a magnetic screwdriver to prevent screws from falling during installation.

2. **Wire Strippers**: These are crucial for exposing the ends of the wires if they are covered with insulation. A good pair will make your connections clean and secure.

3. **Voltage Tester**: Safety first! Before you start working with electrical components, use a voltage tester to ensure that the power is off in the wiring area. This tool will provide peace of mind while you work.

4. **Drill and Drill Bits**: A power drill can simplify the process of mounting your new fixture, especially if you need to create pilot holes for screws.

5. **Ladder**: Depending on the height of your ceiling, a sturdy ladder will help you reach the fixture safely and comfortably.

6. **Pliers**: Needle-nose pliers are helpful for tightening wire connectors or securing any loose wires.

**Materials:**

1. **New Light Fixture**: Choose a fixture that complements your space and meets your lighting needs. Make sure it’s compatible with your existing electrical setup.

2. **Wire Connectors**: These small but vital components will help you securely connect the wires from your new fixture to the existing wiring. It’s often recommended to use wire nuts for a safe and effective connection.

3. **Electrical Tape**: This is a handy safety measure for wrapping exposed wires and ensuring that your connections are insulated.

4. **Mounting Hardware**: Most light fixtures come with the necessary mounting hardware, but make sure you have everything you need, including screws and anchors, especially if you’re mounting on drywall or other materials.

5. **Instruction Manual**: Don’t forget to have the manual for your new light fixture on hand! It typically contains specific instructions for installation, including wiring diagrams and safety warnings.

With these tools and materials at your disposal, you’re well-equipped to tackle the installation of your new light fixture. Remember to take your time, follow safety protocols, and enjoy the transformative effect your new lighting will have on your space!

4. Safety First: Preparing for Installation

Before diving into the exciting process of installing your new light fixture, it’s crucial to prioritize safety. Proper preparation can prevent accidents and ensure a smooth installation. Start by gathering the necessary tools and materials: a screwdriver, wire strippers, electrical tape, a voltage tester, and your new fixture, of course. A sturdy ladder is also essential if the fixture is mounted high on the ceiling.

Once you have your tools at hand, the very first step is to turn off the power at the circuit breaker. This might seem like a no-brainer, but it’s a critical step that ensures no electricity is flowing to the existing fixture while you work. Take a moment to confirm that the power is indeed off by using a voltage tester on the wires; this little device will give you peace of mind and help you avoid any electrical shocks.

Next, protect your workspace by laying down a drop cloth or old towels beneath the area where you’ll be working. This will catch any debris or dust that may fall during the installation, keeping your space tidy. If you’re working in a particularly high or hard-to-reach place, consider having a friend or family member nearby to assist you, ensuring you have someone to help stabilize your ladder or hand you tools as needed.

Lastly, don’t forget to wear safety goggles and gloves. While it may seem excessive, these small precautions can protect you from any unexpected accidents, such as falling debris or sharp edges. With safety measures firmly in place, you’re now ready to embark on the installation journey, armed with the knowledge that you’ve taken the necessary steps to keep yourself safe.

5. Turning Off the Power: How to Find Your Circuit Breaker

How to install a new light fixture?
Credit : whatcanu.com

Before diving into the installation of your new light fixture, ensuring your safety is paramount. The first step in this crucial process is turning off the power to the existing fixture, and that begins with locating your circuit breaker. This may sound straightforward, but a little guidance can make all the difference, especially if you’re unfamiliar with your home’s electrical layout.

Start by making your way to your home’s electrical panel, usually found in a basement, garage, or utility room. The panel may be a metal box mounted on the wall, often with a door that swings open to reveal rows of circuit breakers. Take a moment to familiarize yourself with the panel’s layout. Each breaker is labeled, indicating which area of the house it controls. If you’re unsure which breaker powers the old fixture, you may need to do a bit of detective work.

To identify the correct breaker, you can turn on the existing light fixture and then head to the panel. As you flip each breaker off, pay attention to the light – when it goes dark, you’ve found the right one! Once you’ve identified the correct circuit, switch it to the off position and confirm that the fixture is no longer receiving power.

For added safety, it’s wise to label your breaker box if it isn’t already labeled. This will save you time and effort in future projects and ensure you can quickly find the right breaker when needed. After you’ve confidently turned off the power, it’s a good practice to test the fixture with a voltage tester to guarantee there is no electricity flowing to the wires. With the power securely off, you can proceed with your installation, knowing you’ve taken the necessary precautions to work safely.

6. Removing the Old Light Fixture: Step-by-Step Instructions

Removing the old light fixture can seem daunting, but with the right approach, it’s a straightforward task that paves the way for your stunning new addition. Before you begin, ensure you have the necessary tools at hand: a screwdriver, a voltage tester, and possibly a pair of wire cutters. Safety is paramount, so let’s dive into the step-by-step process.

**Step 1: Turn Off the Power**
Safety first! Head to your circuit breaker and switch off the power to the light fixture you’ll be replacing. It’s a good idea to double-check that the power is off by using a voltage tester on the wires. This will give you peace of mind while you work.

**Step 2: Remove the Light Bulbs**
Once you’ve confirmed that the electricity is off, carefully remove any light bulbs from the fixture. This will lighten the load and make handling the fixture easier. Store the bulbs in a safe place to avoid breakage.

**Step 3: Detach the Fixture from the Ceiling**
Most light fixtures are secured with screws or mounting brackets. Using your screwdriver, carefully unscrew the fixture from the ceiling. If there’s any resistance, make sure you haven’t overlooked any hidden screws. Once the fixture is loose, gently lower it to inspect the wiring.

**Step 4: Disconnect the Wires**
You’ll typically find three wires connected to the fixture: a black (or red) wire, a white wire, and a green or bare wire. Carefully disconnect these wires by either unscrewing the wire nuts or loosening the screws that hold them in place. It’s a good practice to take a photo of the wiring setup before you disconnect anything, as this will help you when you install the new fixture.

**Step 5: Remove the Mounting Bracket**
After disconnecting the wires, you’ll need to take down the mounting bracket attached to the electrical box in the ceiling. This is often held in place by screws, so use your screwdriver to remove it.

**Step 6: Clean Up**
With the old fixture removed, take this opportunity to clean the area around the electrical box. Dust and debris can accumulate over time, and a clean space will ensure better installation of the new fixture.

Congratulations! You’ve successfully removed the old light fixture and are one step closer to transforming your space with a new, stylish illumination. As you prepare to install the new fixture, keep these steps in mind to ensure a smooth transition.

7. Understanding Electrical Wiring: A Beginner’s Guide

How to install a new light fixture?
Credit : whatcanu.com

### 7. Understanding Electrical Wiring: A Beginner’s Guide

Before diving into the installation of your new light fixture, it’s crucial to grasp the basics of electrical wiring. While it may seem intimidating at first, understanding a few key concepts can empower you to approach the task with confidence and safety.

Start by familiarizing yourself with the essential components of your home’s electrical system. The most common wiring colors you’ll encounter include black (or red) for hot wires, white for neutral wires, and green or bare copper for ground wires. These colors are not just for aesthetics; they serve important functions that ensure your electrical system operates safely.

Next, take a moment to locate your circuit breaker panel. It’s your first line of defense against electrical mishaps. Before you begin any work, turn off the circuit that powers the existing light fixture. This step is non-negotiable; safety should always come first. Use a non-contact voltage tester to double-check that the power is truly off.

Once the power is disconnected, inspect the wiring in the existing fixture. You might find a combination of wires: the hot wire, neutral wire, and possibly a ground wire. Take note of how they are connected, as this will guide you when installing your new fixture. If you’re unsure, don’t hesitate to take a photo for reference.

When you’re ready to proceed, carefully remove the old fixture, ensuring that you untwist the wire connections gently. This is where your confidence will grow—by seeing how the wires are connected and realizing that it’s just a matter of connecting like with like. The new fixture will typically come with instructions, so follow those closely for any specific wiring requirements.

Finally, once your new light fixture is secured and connected correctly, restore power at the circuit breaker and flip the switch. The moment the new fixture illuminates your space is not just a reward for your hard work; it’s a testament to your newfound understanding of electrical wiring. Remember, if you ever feel uncertain or overwhelmed, consulting a professional electrician is always a wise choice. Your safety is paramount, and sometimes it’s best to leave complex tasks to the experts.

8. Installing the New Light Fixture: A Detailed Process

Once you’ve selected the perfect light fixture to elevate your space, it’s time to get into the nitty-gritty of installation. This stage is where your vision truly comes to life, transforming the ambiance of your room. Follow these detailed steps to ensure a smooth installation process:

1. **Prepare Your Workspace**: Start by clearing the area beneath the existing light fixture. Lay down a drop cloth to protect your flooring and ensure that you have ample space to work. Gather all necessary tools, including a screwdriver, wire stripper, voltage tester, and ladder. Always double-check that your new fixture comes with all the required mounting hardware.

2. **Turn Off the Power**: Safety first! Locate your circuit breaker and switch off the power to the existing light fixture. To ensure there’s no electrical hazard, use a voltage tester to confirm that the wires are not live. This step is crucial for preventing any potential accidents or shocks while you work.

3. **Remove the Old Fixture**: Carefully detach the old light fixture from the ceiling. This typically involves unscrewing the mounting bracket and disconnecting the wires. As you remove the fixture, take note of how the wires are connected—this will help guide you in connecting the new fixture. If you’re unsure, a quick photo with your phone can serve as a handy reference.

4. **Prepare the New Fixture**: Before installation, assemble your new light fixture according to the manufacturer’s guidelines. This may involve attaching bulbs, shades, or other decorative elements. Make sure everything is secure and ready for mounting.

5. **Connect the Wires**: Following the instructions that came with your new fixture, connect the wires from the fixture to the corresponding wires in the ceiling. Typically, this involves twisting the black (live) wire from the fixture to the black wire in the ceiling, the white (neutral) wires together, and grounding it with the green or bare wire. Use wire nuts to secure each connection and ensure that no bare wire is exposed.

6. **Mount the New Fixture**: Once the wiring is secured, it’s time to mount the fixture to the ceiling. Align it with the mounting bracket, and gently push any excess wiring back into the electrical box. Use screws to secure the fixture in place, following the manufacturer’s instructions for proper installation.

7. **Install Light Bulbs and Test**: With the fixture securely mounted, insert the appropriate light bulbs. Once everything is in place, return to your circuit breaker and switch the power back on. Test your new light fixture to ensure it’s working correctly. If it doesn’t illuminate, double-check your wiring connections to troubleshoot any issues.

8. **Final Touches**: With the light fixture functioning properly, take a moment to clean up your workspace. Dispose of any packaging materials and tools, and enjoy the fresh glow of your newly installed light fixture. Consider adjusting the brightness with dimmable bulbs or smart lighting options for added versatility.

By following these detailed steps, you’ll not only enhance the aesthetic of your space but also gain a sense of accomplishment from your DIY project. Enjoy your beautifully illuminated room!

9. Connecting Wires: Tips for Safe and Secure Connections

Connecting wires is a crucial step in the installation of your new light fixture, and it’s essential to approach this task with both care and precision to ensure safety and functionality. Before diving into the process, it’s imperative to turn off the power at the circuit breaker to avoid any electrical hazards. Once you’ve confirmed that the power is off, gather your tools: a wire stripper, a voltage tester, and some wire nuts.

Begin by removing the existing fixture and carefully inspecting the wiring. You should see three types of wires: the hot wire (usually black or red), the neutral wire (typically white), and the ground wire (green or bare copper). It’s helpful to organize these wires visually so you can clearly identify which ones need to be connected to your new fixture.

When connecting wires, always follow the color-coded system: twist the hot wires together, pairing the black from your fixture with the black from the ceiling. Then, do the same for the neutral wires, connecting white to white. Ground wires are connected last; secure them to the fixture’s ground wire or a grounding screw on the mounting bracket. Ensure that each twist connection is tight and secure, as loose connections can lead to flickering lights or, worse, electrical fires.

After making your connections, it’s a good idea to use a voltage tester to double-check that everything is safe before powering the circuit back on. Once you’ve verified that there are no exposed wires and that all connections are insulated with wire nuts, you can gently tuck the wires into the electrical box and mount your new light fixture according to the manufacturer’s instructions.

Remember, if at any point you feel uncertain about the wiring process, it’s always wise to consult with or hire a professional electrician to ensure that your installation is safe and up to code. With the right approach, your new light fixture will not only brighten your space but will also be installed securely and safely.

10. Securing the Fixture: Ensuring Stability and Safety

Securing your new light fixture is a crucial step that ensures both stability and safety in your home. After you’ve successfully connected the wiring, it’s time to focus on mounting the fixture securely to the ceiling or wall. Begin by aligning the fixture with the mounting bracket, ensuring that any screws or clips designed to hold it in place are easily accessible.

Before you proceed, double-check that the mounting bracket is firmly attached to the electrical box. If the electrical box wobbles or feels loose, it’s imperative to address this issue first. A sturdy mount is essential for preventing accidents or damage, particularly for heavier fixtures.

Once you are confident that everything is secure, carefully position the fixture against the ceiling. If it has a canopy, make sure it covers the electrical box completely to prevent any exposed wiring. Use the included screws to fasten the fixture to the mounting bracket, ensuring that they are tightened adequately but not overly so, as this could strip the threads or damage the fixture.

As you work, it’s important to keep your hands steady and check for level alignment. An uneven fixture can not only look unappealing but can also place undue stress on the wiring, leading to potential electrical issues down the line. Use a level tool if necessary to ensure that everything is straight.

After the fixture is secured, take a moment to gently tug on it to confirm that it is firmly in place. If it holds steady, you’ve successfully completed this phase of the installation! This attention to detail will not only enhance the aesthetic appeal of your space but also provide peace of mind knowing that your light fixture is safe and secure. With the fixture now in place, you’re just a switch flick away from illuminating your space beautifully!

11. Restoring Power: How to Turn the Electricity Back On

Restoring power after installing a new light fixture is a crucial step that marks the culmination of your hard work. Once you’ve ensured that the fixture is securely mounted and all electrical connections are properly made, it’s time to breathe life back into your newly illuminated space.

Start by locating your circuit breaker panel, which is typically found in a basement, utility room, or closet. Before you flip the switch back on, take a moment to double-check that all tools and materials are cleared from the installation area. It’s essential to ensure that everything is clean and free of any debris, as this will help prevent any accidents when the power is restored.

Identify the circuit breaker that corresponds to the area where you installed your new light fixture. Most panels are clearly labeled, but if yours isn’t, you may need to turn off and on a few breakers to find the correct one. Once you’ve identified the right breaker, firmly switch it back to the ‘on’ position.

As you do this, remain vigilant for any unusual sounds or smells. If you hear a pop or notice any burning odors, turn the breaker off immediately and double-check your connections. A simple mistake can lead to a short circuit, so it’s better to be cautious.

Now, with the power restored, it’s time to test your new light fixture. Flip the wall switch and bask in the glow of your hard work. If the light illuminates as intended, you’ve successfully completed the installation! If not, revisit your wiring connections to ensure everything is in order.

Lastly, take a moment to tidy up your workspace and dispose of any old fixtures or packaging materials. Enjoy the fresh ambiance your new light fixture brings to your space, and revel in the satisfaction of having accomplished this illuminating task!

12. Testing Your New Light Fixture: What to Look For

Once you’ve successfully installed your new light fixture, it’s time for the moment of truth: testing it to ensure everything is functioning as it should. This step is crucial, as it not only confirms that your hard work has paid off but also ensures that the fixture is safe and effective in illuminating your space.

Start by flipping the switch to turn on your new fixture. Observe the light closely. Is it illuminating the room as you envisioned? Take note of the brightness and the quality of the light. Does it cast a warm, inviting glow, or is it harsh and unflattering? If the light seems dim or overly bright, you may need to consider swapping out the bulb for a different wattage or type to achieve the desired ambiance.

Next, check for any flickering or unusual noises. Flickering could indicate a loose connection or the need for a different bulb, while buzzing sounds might suggest an issue with the fixture itself or the electrical wiring. If you notice any of these issues, it’s best to turn the power off and double-check your connections to ensure everything is secure.

Additionally, pay attention to the fixture’s placement. Walk around the room to see how the light interacts with the space. Are there any dark corners that could benefit from additional lighting? Does the fixture create any unwanted shadows? This is your opportunity to adjust the height or angle of the fixture if it’s adjustable, or to consider adding supplementary lights for a more balanced illumination.

Lastly, allow your fixture to run for a short period and monitor how it behaves over time. This will help you identify any potential overheating issues. If everything checks out, congratulations! You’ve successfully illuminated your space and created a beautiful focal point in your home. With your new light fixture shining brightly, you can now enjoy the enhanced atmosphere and style it brings to your environment.

13. Troubleshooting Common Installation Issues

Even the most meticulous DIY enthusiasts can encounter a few bumps in the road when installing a new light fixture. Troubleshooting common installation issues is essential to ensure your lighting project goes smoothly and safely. Here are some of the most frequent problems you might face, along with tips to resolve them.

**1. The Light Fixture Won’t Turn On:**
If your new light fixture isn’t illuminating, the first step is to check the power supply. Ensure that the circuit breaker is switched on and that you have replaced any blown fuses. Next, verify that all connections are secure—loose wires can easily disrupt the flow of electricity. If you’ve done all this and the fixture still doesn’t work, consider testing the bulb in a different fixture to rule out a faulty light bulb.

**2. Flickering Lights:**
A flickering light can be more than just an annoyance; it could indicate a deeper electrical issue. Check to make sure the bulb is tightly screwed in. If that doesn’t resolve the flicker, inspect the wiring connections in the junction box. Corroded or loose connections can cause fluctuations in power. If your fixture is compatible with a dimmer switch, ensure the bulb type is compatible as well, as some LED bulbs don’t work well with older dimmer systems.

**3. Uneven Lighting:**
If your new fixture isn’t providing the desired amount of light, it may be positioned incorrectly or the wrong type of fixture for the space. Consider the wattage and lumens of the bulb you’re using—an underpowered bulb could be the culprit. Additionally, assess the height and angle of the fixture; sometimes simply adjusting its position can enhance light distribution.

**4. Noise from the Fixture:**
Humming or buzzing sounds from your fixture can be frustrating. This is often caused by incompatible dimmer switches or a faulty ballast in fluorescent fixtures. If you suspect the dimmer is the issue, try replacing it with a compatible one or switch to standard switches to see if that eliminates the noise. If the problem persists with a fluorescent fixture, you may need to replace the ballast.

**5. Incorrect Fixture Size:**
Sometimes, the size of your new fixture can feel out of place, either dwarfing the room or overwhelming it. If you find that your new light fixture isn’t proportional to the space, take a moment to evaluate the room’s dimensions. Consider swapping it out for a size that better complements your decor and the scale of the room.

By addressing these common issues head-on, you can ensure that your new light fixture not only shines brightly but also enhances the beauty and functionality of your space. Remember, safety is paramount, so if you encounter complex wiring problems or persistent issues, don’t hesitate to consult a professional electrician. With a little patience and problem-solving, you’ll have your space illuminated just the way you envision!

14. Final Touches: Enhancing Your Space with Light

Once your new light fixture is securely installed and shining bright, it’s time to consider the final touches that will truly enhance your space. Lighting is not just about functionality; it plays a pivotal role in setting the mood and atmosphere of a room. Here are some simple yet effective ways to elevate your newly illuminated area.

First, think about the color of your bulbs. Soft white or warm LED bulbs create a cozy ambiance, perfect for living rooms and bedrooms, while bright white or daylight bulbs work well in kitchens and workspaces, promoting clarity and focus. Experiment with different bulb options to find the perfect hue that complements your decor and personal style.

Next, consider adding dimmers. A dimmer switch allows you to adjust the brightness of your new fixture, giving you control over the ambiance depending on the time of day or the occasion. Whether you want bright light for a lively gathering or a soft glow for a romantic dinner, dimmers give you that versatile flexibility.

Additionally, think about layering your lighting. While your new fixture may serve as the centerpiece, incorporating other light sources can create depth and interest. Table lamps, floor lamps, or even wall sconces can provide supplementary light, enhancing the overall aesthetic and functionality of the space.

Don’t forget to consider decorative elements that can enhance the light itself. Mirrors can reflect light, making your space feel larger and brighter. Placing a strategically positioned mirror across from your light fixture can double the effect of your new installation.

Finally, add personal touches that resonate with your style. Whether it’s a beautiful lampshade, decorative bulbs, or even a few accents around the base of your fixture, these details will tie your design together and make the space feel uniquely yours.

By focusing on these final touches, you can transform your newly installed light fixture from a mere necessity into a stunning focal point that enhances both your space and your experience within it. Happy illuminating!

15. Conclusion: Enjoying Your Newly Illuminated Room

Congratulations! After following the steps outlined in this guide, you have successfully transformed your space with a new light fixture. Stepping back to appreciate your handiwork is not just a moment of pride; it’s the beginning of a new chapter in how you experience your room. The gentle glow of your freshly installed fixture creates an inviting atmosphere that enhances both the aesthetics and functionality of the space.

As you bask in the warm light, take a moment to notice how the illumination has altered the dynamics of the room. Perhaps the colors on your walls now shine brighter, or the texture of your furniture becomes more pronounced under the new lighting. Whether it’s a cozy dining area, a vibrant living room, or a serene bedroom, your choice of fixture has undoubtedly added a personal touch that reflects your style.

Moreover, consider the various ways you can maximize your new lighting. Experiment with dimmers to adjust the ambiance according to the time of day or occasion. Layer your lighting by adding complementary sources, such as floor lamps or wall sconces, to create depth and warmth. You may even find joy in arranging your decor to highlight the new fixture, turning it into a focal point that draws the eye.

Lastly, don’t forget to share your achievement! Showcase your newly illuminated room on social media or with friends and family. Your project may inspire others to embark on their own lighting upgrades. So, sit back, relax, and enjoy the transformed atmosphere that your new light fixture brings—because a well-lit room is not just about visibility; it’s about setting the mood for countless memories to come.

As we wrap up our guide on installing a new light fixture, we hope you feel empowered to transform your space with newfound brilliance. Whether you’re looking to create a cozy ambiance in your living room or a bright workspace in your home office, the right lighting can truly elevate the atmosphere of any room. By following our step-by-step instructions, you can confidently tackle this DIY project and enjoy the satisfaction of a job well done. Remember, the process may take a little time and patience, but the end result—a beautifully illuminated space that reflects your personal style—will be well worth the effort. So gather your tools, unleash your creativity, and let your home shine with warmth and elegance! Happy illuminating!