The kitchen is the heart of every home, a space where culinary creativity flourishes and cherished memories are made around shared meals.
Yet, selecting the right kitchen appliances can often feel overwhelming, with an endless array of options available to suit every cooking style, aesthetic preference, and budget. From sleek refrigerators that keep your ingredients fresh to powerful ovens that inspire gourmet creations, the choices you make can significantly impact both the functionality and ambiance of your kitchen. In this ultimate guide, we’ll navigate the essential factors to consider when choosing the perfect kitchen appliances for your home, offering insights into energy efficiency, design, and innovative features. Whether you’re a seasoned chef or a casual cook, our comprehensive tips will help you create a kitchen that not only meets your culinary needs but also reflects your personal style and elevates your home’s overall charm. Get ready to transform your cooking space into a haven of efficiency and elegance!
1. Understanding Your Cooking Needs

When it comes to choosing the perfect kitchen appliances for your home, the first step is to understand your cooking needs. This foundational assessment will not only guide your purchasing decisions but also ensure that your kitchen becomes a space that truly meets your culinary aspirations.
Begin by reflecting on your cooking habits. Are you a casual cook who enjoys preparing simple meals, or are you an enthusiastic home chef who loves experimenting with complex recipes? Take note of the types of dishes you frequently prepare. If you often find yourself whipping up hearty stews or baking artisan bread, you may require specific appliances that can handle these tasks with ease. On the other hand, if you prefer quick, healthy meals, consider investing in appliances that prioritize efficiency, such as a high-quality blender or a multi-cooker.
Next, think about the size of your household and the frequency with which you entertain. A family of five will have different appliance requirements compared to a single person or a couple. Larger families might need a bigger oven or a dishwasher with a higher capacity, while those who enjoy hosting dinner parties might benefit from an additional refrigerator or a wine cooler to keep beverages chilled for guests.
Don’t forget to factor in the available space in your kitchen. Measure your countertops, cabinets, and floor space to ensure that your new appliances will fit comfortably without crowding the room. Consider the aesthetic as well—do you prefer modern stainless steel finishes, classic white appliances, or perhaps a bold color that makes a statement? Your cooking needs should align with your kitchen’s design to create a harmonious cooking environment.
Lastly, take note of any dietary restrictions or specific cooking styles that may influence your choices. For instance, if you’re vegan or gluten-free, you might want appliances that offer versatility for preparing a wide range of plant-based dishes or specialized baking equipment for gluten-free recipes.
By taking the time to understand your cooking needs, you lay the groundwork for making informed decisions that will enhance your culinary experience and elevate your kitchen’s functionality. This thoughtful approach ensures that every appliance you choose serves a purpose and contributes to creating the perfect kitchen environment for you and your family.
2. Assessing Your Kitchen Space
Before diving into the world of kitchen appliances, it’s essential to take a step back and assess your kitchen space thoroughly. This initial evaluation is more than a mere formality; it lays the foundation for all your subsequent decisions. Your kitchen is not just a functional area; it’s the heart of your home, where culinary creativity meets daily life, making it crucial to ensure that your chosen appliances fit seamlessly.
Start by measuring your available space. Utilize a tape measure to gauge the length and width of counters, as well as the height of cabinets. Take note of any architectural features, such as windows, doors, and outlets, which can influence appliance placement. Create a scale drawing of your kitchen layout, marking the dimensions of the space and the current appliances you have. This visual representation will help you identify what can be replaced, what needs to stay, and where new appliances can be integrated without overcrowding the space.
Consider the flow of your kitchen. Is there enough room to move comfortably between the fridge, stove, and sink? The classic kitchen work triangle—comprising these three key areas—should be efficient to minimize unnecessary steps while cooking. If your kitchen is on the smaller side, look for compact appliances that maximize functionality without sacrificing style. For larger kitchens, you might have the luxury of opting for more substantial, multi-functional appliances that can add both form and flair.
Additionally, think about your cooking habits and lifestyle. Do you frequently entertain guests or cook large meals? If so, you may require larger appliances, such as a double oven or an oversized refrigerator. Conversely, if you prefer quick meals or often dine out, you might prioritize space-saving designs or smaller units.
Lastly, don’t forget about aesthetics. As you assess your kitchen space, consider how new appliances will complement your existing decor and color scheme. Whether you’re drawn to sleek stainless steel, retro chic, or vibrant colors, ensuring that your appliances harmonize with your kitchen’s overall design will create a cohesive and inviting atmosphere.
By meticulously assessing your kitchen space, you can choose the perfect appliances that not only meet your cooking needs but also enhance the overall functionality and style of your home. This thoughtful approach ensures that your kitchen remains a joyful and efficient space for years to come.
3. Types of Kitchen Appliances: An Overview
When it comes to outfitting your kitchen, understanding the various types of kitchen appliances available is crucial to making informed decisions that suit your culinary needs and lifestyle. Kitchen appliances can be broadly categorized into three main types: major appliances, small appliances, and specialty appliances. Each category serves a distinct purpose and can significantly enhance your kitchen’s functionality.
**Major Appliances** are the backbone of any kitchen. These are the large, often built-in units that provide essential cooking, refrigeration, and cleaning functions. Think of your refrigerator, stove, oven, dishwasher, and microwave. These appliances are typically the most significant investment in your kitchen and should be chosen based on size, energy efficiency, and style. For instance, an energy-efficient refrigerator not only helps you save on utility bills but also contributes to a more sustainable home.
**Small Appliances** are the versatile tools that add convenience to your cooking and food preparation. These can range from blenders and toasters to coffee makers and food processors. Though smaller in size, they play a vital role in streamlining your cooking processes. When selecting small appliances, consider factors such as storage space, ease of use, and how frequently you plan to use them. If you’re a smoothie enthusiast, investing in a high-quality blender can elevate your morning routine.
**Specialty Appliances** cater to specific culinary tasks and can take your cooking skills to the next level. These include items like sous vide machines, bread makers, and air fryers, which allow you to prepare a variety of dishes with precision and creativity. While these appliances can be an indulgence, they can also inspire you to try new recipes and cooking techniques, making your kitchen a hub of culinary exploration.
In summary, understanding the different types of kitchen appliances is essential for creating a functional and efficient cooking environment. By carefully evaluating your needs and preferences, you can choose the perfect combination of major, small, and specialty appliances that will not only enhance your cooking experience but also add value to your home.
4. Energy Efficiency: Why It Matters
When selecting kitchen appliances, energy efficiency should be at the forefront of your decision-making process. Not only does an energy-efficient appliance reduce your carbon footprint, but it also translates into significant savings on your utility bills over time. With rising energy costs and increasing environmental concerns, the appeal of eco-friendly appliances is more relevant than ever.
Energy-efficient appliances are designed to use less electricity and water, minimizing waste without compromising performance. For instance, an Energy Star-rated refrigerator can consume up to 15% less energy than standard models, while energy-efficient dishwashers can save hundreds of gallons of water each year. This means that investing in these appliances not only benefits the planet but also contributes to a more sustainable home.
Moreover, many states and municipalities offer rebates and incentives for purchasing energy-efficient appliances, making them even more financially attractive. The initial investment may be slightly higher for these models, but the long-term savings and reduced environmental impact are well worth it.
When shopping for appliances, look for the Energy Star label or other certification marks that indicate energy performance. Additionally, consider the appliance’s size and capacity; an appliance that is too large for your needs can waste energy, while one that is too small may require more frequent use, defeating its purpose.
Incorporating energy-efficient appliances into your kitchen not only helps you save money and reduce your environmental impact but also enhances the overall functionality and comfort of your home. As you embark on your appliance shopping journey, remember that making energy-conscious choices today can lead to a healthier planet and a more economical lifestyle tomorrow.
5. Key Features to Look for in Major Appliances
When it comes to selecting major kitchen appliances, understanding the key features that can enhance your cooking experience and meet your household needs is essential. These appliances are significant investments, and knowing what to prioritize can make all the difference in functionality, efficiency, and style.
**Energy Efficiency**: One of the first features to consider is energy efficiency. Look for appliances that come with the ENERGY STAR label, as they are designed to consume less energy without sacrificing performance. Energy-efficient models not only help reduce your utility bills but also contribute to a more sustainable environment.
**Size and Capacity**: The size of your appliances should align with the dimensions of your kitchen and your cooking habits. For example, if you frequently cook for large gatherings, a spacious refrigerator with ample storage or a double oven may be ideal. Conversely, if your kitchen is on the smaller side, compact models could provide the functionalities you need without overwhelming your space.
**Smart Technology**: Embracing the latest technology can significantly enhance your kitchen experience. Smart appliances allow you to control settings remotely via smartphone apps, making it easier to manage cooking times or check your refrigerator’s contents while you’re at the grocery store. Features like Wi-Fi connectivity, voice activation, and integrated sensors can streamline your cooking processes and add convenience to your daily routines.
**Durability and Build Quality**: Since kitchen appliances undergo daily use, investing in high-quality materials and reliable construction is crucial. Stainless steel finishes are not only stylish but also resistant to wear and tear, making them a popular choice for modern kitchens. Check for warranties and customer reviews to gauge the long-term durability of the appliances you’re considering.
**Ease of Use and Maintenance**: Look for appliances with user-friendly interfaces and intuitive controls. Features such as self-cleaning ovens, dishwasher cycles that are easy to navigate, and refrigerators with adjustable shelving can simplify your kitchen tasks. Additionally, consider how easy it is to clean and maintain each appliance, as this will save you time and effort in the long run.
**Aesthetic Appeal**: Finally, don’t overlook the aesthetic aspect of your kitchen appliances. They should complement your overall kitchen design and reflect your personal style. From sleek modern finishes to classic retro designs, there’s a wide range of options available to help you create the kitchen of your dreams.
By focusing on these key features when shopping for major kitchen appliances, you can ensure that your selections not only meet your practical needs but also enhance the beauty and functionality of your culinary space. Investing time in research will pay off in the long run, making your kitchen a more enjoyable place to cook and gather.
6. The Importance of Style and Design
When choosing kitchen appliances, the importance of style and design cannot be overstated. Your kitchen is often considered the heart of your home, a space where culinary creativity flourishes and family gatherings occur. As such, the appliances you select should not only be functional but also complement the overall aesthetic of your kitchen.
Start by considering the architectural style of your home. Whether you’re leaning towards a modern, minimalist vibe or a cozy, rustic charm, the design of your appliances should harmonize with your existing decor. For instance, sleek stainless steel appliances effortlessly enhance a contemporary kitchen, while retro-inspired models can add a touch of nostalgia to a vintage-themed space.
Color also plays a significant role in the impact of your kitchen’s design. Neutral shades like white, black, or stainless steel provide versatility, while bold colors like red or blue can serve as striking focal points. Think about how the appliance colors will interact with your cabinetry, countertops, and flooring. A well-coordinated palette can elevate your kitchen’s aesthetic and create a cohesive look.
Moreover, don’t overlook the details. The handles, knobs, and finishes of appliances can significantly influence the overall style. A brushed nickel finish might lend an air of sophistication, while a matte black surface can exude sleek modernity. Pay attention to these elements to ensure that every piece in your kitchen tells a cohesive story.
Finally, consider the scale and proportion of your appliances. Oversized models can dominate a small kitchen, while petite appliances may look lost in a spacious area. Striking the right balance can enhance both functionality and visual appeal, creating an inviting space that encourages cooking and entertaining.
In summary, the style and design of your kitchen appliances are crucial in creating an atmosphere that reflects your personal taste and enhances your home’s overall aesthetic. By carefully selecting appliances that harmonize with your kitchen’s design, you can achieve a beautiful and functional space that you’ll love for years to come.
7. Budgeting for Your Kitchen Appliances
When it comes to choosing kitchen appliances, budgeting is a crucial step that sets the foundation for your shopping experience and ultimately determines the quality of the appliances you can invest in. Before you even step foot into a showroom or browse online retailers, take a moment to outline your financial parameters. This isn’t just about setting a total spending limit; it’s about categorizing your needs and wants to make informed decisions.
Start by listing the appliances you require. Are you looking for a refrigerator, oven, dishwasher, or a combination of these? Once you have your list, research the average costs associated with each item. Keep in mind the features that matter most to you—energy efficiency, size, and design. High-end models may come with a hefty price tag, but they often offer longer warranties, better performance, and advanced technology that can justify the initial investment.
Next, consider potential costs beyond just the purchase price. Installation fees, delivery charges, and even extended service plans can add to your overall expenditure. Don’t forget to factor in the cost of maintenance and operational expenses, like energy consumption and water usage, which can significantly impact your monthly budget.
Additionally, explore financing options if you find yourself drawn to a more expensive model. Many retailers offer payment plans that can make high-quality appliances more accessible. However, be cautious of interest rates and terms to ensure you’re making a sound financial decision.
Ultimately, budgeting for kitchen appliances requires a balanced approach—one that aligns your culinary dreams with your financial reality. By meticulously planning your budget, you’ll not only avoid overspending but also set the stage for creating a kitchen that is both functional and a joy to use for years to come.
8. Reading Reviews and Ratings
When it comes to selecting the perfect kitchen appliances for your home, reading reviews and ratings is an essential step that should never be overlooked. In today’s digital age, consumers have a wealth of information at their fingertips, and tapping into this collective wisdom can significantly influence your purchasing decision.
Start by exploring reputable websites that specialize in appliance reviews. These sites often provide detailed comparisons, expert insights, and user experiences, giving you a comprehensive overview of each product’s performance. Pay attention to both the star ratings and the written reviews; while a high rating might catch your eye, the comments can reveal potential drawbacks or standout features that numbers alone cannot convey.
Moreover, consider the context of the reviews. A five-star rating might reflect an appliance’s performance in a professional kitchen but could fall short in a home environment. Look for reviews from individuals who have similar cooking habits or kitchen sizes as yours. This can help ensure that the appliance will meet your specific needs.
Don’t forget to check multiple sources before making a decision. Consumer reviews on retail websites, social media feedback, and industry expert articles can vary widely, providing you with a well-rounded view. Engaging in conversations on forums or social media platforms can also yield valuable insights, as you can ask questions and get real-time feedback from other users.
Ultimately, reading reviews and ratings not only empowers you to make informed choices but also helps you identify appliances that are truly worth the investment. By doing your homework, you can avoid buyer’s remorse and select kitchen appliances that enhance your culinary experience and stand the test of time in your home.
9. The Benefits of Smart Appliances
In today’s fast-paced world, smart appliances are revolutionizing the way we interact with our kitchens, offering an incredible blend of convenience, efficiency, and innovation. These technologically advanced devices leverage the power of the internet and smart technology to enhance your cooking and food preparation experience, making them a worthy investment for any modern home.
One of the most significant benefits of smart appliances is their ability to streamline meal preparation. Imagine being able to preheat your oven remotely while you’re still at the grocery store, ensuring that dinner is ready the moment you walk through the door. With smart ovens and microwaves equipped with Wi-Fi connectivity, you can control cooking settings from your smartphone, access a plethora of recipes, and even receive notifications when your dish is done.
Energy efficiency is another key advantage. Smart refrigerators, for example, can monitor your food inventory and suggest recipes based on what you have at home, helping to minimize food waste and save you money. Many smart appliances are designed to optimize energy usage, allowing you to track consumption patterns and adjust settings for maximum efficiency. This not only benefits your wallet but also contributes to a more sustainable lifestyle.
Moreover, smart appliances often come with enhanced safety features. For instance, smart cooktops can automatically shut off when not in use or alert you if they detect overheating, providing peace of mind, especially in busy households. Some appliances even integrate with home security systems, allowing you to monitor your kitchen while you’re away.
Incorporating smart appliances into your kitchen also means embracing innovation and staying ahead of the curve. As technology continues to evolve, these devices are becoming increasingly intuitive, offering voice control capabilities and compatibility with virtual assistants like Alexa or Google Assistant. This hands-free approach to managing your kitchen tasks frees up time for you to focus on what truly matters—enjoying meals with family and friends.
Ultimately, the benefits of smart appliances extend far beyond mere convenience; they enhance your cooking experience, promote energy efficiency, and provide an extra layer of safety in the kitchen. As you consider the best appliances for your home, embracing smart technology could be the key to a more efficient, enjoyable, and connected culinary journey.
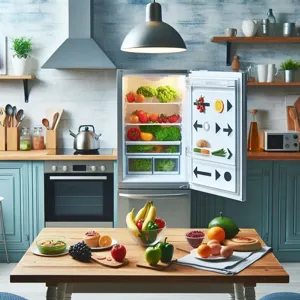
10. Compatibility with Existing Kitchen Décor
When selecting kitchen appliances, it’s crucial to consider their compatibility with your existing kitchen décor. After all, the kitchen is often the heart of the home, a space where aesthetics and functionality must come together harmoniously. Your choice of appliances can significantly influence the overall ambiance and style of the room, so it’s worth taking the time to ensure they complement your current setup.
Start by assessing the color palette of your kitchen. If you have a modern, sleek design with cool tones, stainless steel appliances may enhance the contemporary feel. Conversely, if your kitchen boasts warm wood accents and cozy, rustic elements, vintage-inspired appliances in soft hues or matte finishes can create a charming, cohesive look.
Next, consider the finishes of your cabinetry and countertops. Are they glossy, matte, or textured? The texture and sheen of your appliances should align with these surfaces to create a balanced aesthetic. For instance, if your countertops are made of natural stone with a rough finish, opting for appliances that feature a brushed or matte finish will create a more harmonious environment.
Additionally, think about the style of your kitchen—whether it’s traditional, industrial, farmhouse, or minimalist. Each style has its own set of design cues, and choosing appliances that echo these cues will help reinforce the theme. A farmhouse kitchen, for example, might benefit from large, retro-style refrigerators and traditional ranges, while an industrial kitchen may look better with bold, stainless steel appliances with visible mechanics.
Lastly, don’t forget the layout. Large appliances should not only fit in the designated spaces but also allow for easy movement and accessibility. If your kitchen has an open concept, ensure that your appliances look good from every angle and enhance the overall flow of the space.
By taking the time to choose appliances that align with your kitchen’s décor, you’ll not only enhance the visual appeal of the space but also create a cohesive environment that reflects your personal style and enhances your cooking experience.
11. Maintenance and Warranty Considerations
When selecting kitchen appliances, maintenance and warranty considerations are often overlooked yet play a pivotal role in ensuring the longevity and performance of your investments. After all, your kitchen is the heart of your home, and keeping it running smoothly requires more than just picking the shiniest, most feature-rich gadgets.
First, consider the maintenance needs of each appliance. Some models may require regular cleaning, descaling, or filter changes to maintain efficient operation. For instance, if you’re investing in a high-end espresso machine, be prepared for daily cleaning rituals and occasional deep cleans to keep it in peak condition. Conversely, simpler appliances like slow cookers may have minimal upkeep, making them easier to integrate into a busy lifestyle.
Next, turn your attention to warranties. A robust warranty can save you from unexpected repair costs and provide peace of mind. Examine the terms closely—look for coverage on parts and labor, the duration of the warranty, and what specific issues are included. Some brands even offer extended warranty options for an additional fee. If you’re purchasing a high-ticket item like a refrigerator or oven, it’s wise to invest in a model that comes with a comprehensive warranty, especially considering the complexity of these appliances.
Additionally, consider the manufacturer’s reputation for customer service. A brand with a history of responsive support can make all the difference when you encounter an issue. Read customer reviews to gauge the experiences others have had with warranty claims and maintenance support.
Finally, think ahead about how your chosen appliances will fit into your lifestyle. Are you someone who cooks daily and needs appliances that can stand up to heavy usage? Or do you prefer convenience and are looking for low-maintenance options? By aligning your choice of appliances with your maintenance preferences and understanding warranty protections, you can ensure that your kitchen remains both functional and enjoyable for years to come.
12. Where to Buy: Retail vs. Online Options
When it comes to purchasing kitchen appliances, one of the crucial decisions you’ll face is where to buy them—whether to venture into a retail store or to explore the vast world of online shopping. Each option presents its own set of advantages and challenges, making it essential to assess your needs and preferences before making a choice.
**Retail Stores: The Hands-On Experience**
Shopping at a physical retail store offers a unique experience that online shopping simply cannot replicate. Stepping into a showroom allows you to see and touch the appliances firsthand, giving you a better sense of their size, design, and functionality. You can open refrigerator doors, test the buttons on a range, and even observe how various finishes look under different lighting conditions. Furthermore, the opportunity to speak with knowledgeable sales staff can provide valuable insights and recommendations tailored to your specific cooking habits and kitchen space.
Additionally, buying from a retail store often means immediate availability. You can take your new appliance home the same day, avoiding the long wait times associated with online orders. Many retailers also offer delivery and installation services, ensuring that your new purchase is set up correctly and ready for use.
**Online Shopping: Convenience at Your Fingertips**
On the other hand, online shopping presents unparalleled convenience. You can browse an extensive selection of appliances from the comfort of your home, comparing prices, features, and customer reviews with just a few clicks. This freedom allows you to take your time and make informed decisions without the pressure of a sales environment.
E-commerce platforms often provide access to exclusive deals and discounts that you may not find in physical stores. Moreover, online retailers frequently have a broader selection of brands and models, including hard-to-find items that may not be available locally. However, purchasing online does come with its own challenges. You’ll need to rely on product descriptions and customer reviews, as you won’t have the chance to see the appliance in person before buying. Additionally, consider shipping costs and delivery times, which can vary significantly depending on the retailer.
**Making the Decision**
Ultimately, the choice between retail and online shopping boils down to your personal preferences and circumstances. If you value hands-on experience and immediate gratification, a retail store may be your best bet. However, if convenience, variety, and potentially better pricing are more important to you, then exploring online options might be the way to go. Whichever route you choose, taking the time to research and compare will ensure that you find the perfect kitchen appliances to elevate your culinary space.
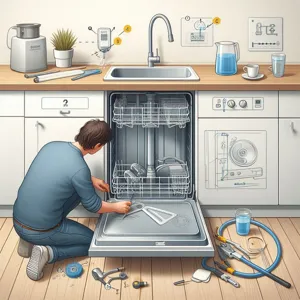
13. Installation Tips for New Appliances
Installing new kitchen appliances can be an exciting yet daunting task. Proper installation is key not only to ensure optimal performance but also to prolong the lifespan of your appliances. Here are some essential tips to help you navigate the installation process smoothly.
**1. Read the Manual:** Before you even unbox your new appliance, take a moment to read the user manual. Each appliance comes with specific installation instructions, safety precautions, and installation requirements unique to that model. Familiarizing yourself with these guidelines can save you time and prevent potential mishaps.
**2. Gather the Right Tools:** Ensure you have all the necessary tools at hand. Depending on the appliance, you may need screwdrivers, a level, pliers, or even a drill. Having everything prepared beforehand will make the installation process more efficient and less stressful.
**3. Check for Compatibility:** Before installing, double-check that your new appliance is compatible with your current setup. For instance, if you’re replacing a dishwasher, ensure the plumbing and electrical connections are appropriate for the new model. Measure the space available to guarantee a proper fit, accounting for any additional clearance needed for opening doors or drawers.
**4. Prepare the Space:** Clear out the area where the new appliance will be installed. This not only gives you ample room to work but also protects your floors and existing cabinetry from scratches or damage during installation.
**5. Level It Up:** Once the appliance is in place, use a level to ensure it sits evenly. An unlevel appliance can lead to inefficient operation, especially for refrigerators and dishwashers. Adjust the legs or feet of the appliance as necessary to achieve a perfectly level position.
**6. Secure Connections:** For appliances that require plumbing or electrical connections, ensure everything is securely fastened. If you’re not confident in handling electrical or plumbing tasks, it’s wise to consult with a professional. A small mistake can lead to significant issues down the line.
**7. Test Functionality:** After installation, run a quick test to check that everything is functioning correctly. For example, turn on your oven or run a cycle on your dishwasher to ensure they operate as expected. This step can help you catch any potential issues early on.
**8. Keep Documentation:** Finally, store the user manual and any warranty information in an easily accessible location. This will be invaluable should you encounter any issues in the future or require maintenance.
By following these installation tips, you can enjoy your new kitchen appliances with confidence, knowing they are set up for optimal performance. A well-installed appliance not only enhances your cooking experience but also adds convenience and efficiency to your daily routine.
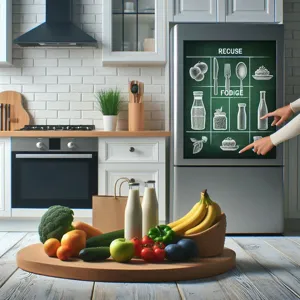
14. Eco-Friendly Appliance Options
In today’s environmentally conscious world, making sustainable choices in your kitchen is not just a trend—it’s a commitment to a healthier planet. Eco-friendly kitchen appliances are designed not only to reduce your carbon footprint but also to enhance energy efficiency and minimize waste. When selecting appliances for your home, consider options that are energy-efficient, water-saving, and made from sustainable materials.
Start by looking for appliances with the ENERGY STAR label, which indicates that they meet strict energy efficiency guidelines set by the U.S. Environmental Protection Agency. These appliances consume less electricity and water than their conventional counterparts, helping you save on utility bills while reducing greenhouse gas emissions. For example, ENERGY STAR-rated refrigerators use up to 15% less energy than standard models, and dishwashers can use as little as 3.5 gallons of water per cycle.
Another great eco-friendly option is induction cooktops. Unlike traditional electric or gas stoves, induction cooktops use electromagnetic energy to directly heat pots and pans, leading to faster cooking times and less wasted energy. Additionally, many manufacturers are now producing ovens that incorporate eco modes, allowing you to bake and roast using less energy without sacrificing performance.
Don’t forget about sustainable materials! Look for appliances made from recycled or recyclable materials, which can significantly reduce the environmental impact of manufacturing new products. Brands are increasingly prioritizing sustainability in their designs, so you can find stylish and modern appliances that are also environmentally responsible.
Lastly, consider appliances that promote zero-waste cooking. For instance, composting appliances can help you manage food scraps efficiently, turning waste into valuable fertilizer for your garden. By investing in eco-friendly kitchen appliances, not only do you enhance your cooking experience, but you also contribute to a more sustainable future. Embrace the green revolution in your kitchen, and make choices that reflect your commitment to the planet while enjoying the benefits of modern technology.
15. Final Thoughts: Making Your Choice with Confidence
As you embark on the exciting journey of selecting the perfect kitchen appliances for your home, it’s essential to remember that this decision is more than just a purchase—it’s an investment in your lifestyle and culinary experiences. The right appliances can transform your kitchen into a hub of creativity and efficiency, enhancing not only the way you cook but also how you enjoy time with family and friends.
Final thoughts on this process should center around the importance of thorough research and personal reflection. Take the time to assess your cooking habits, the size of your kitchen, and your budget. Consider how frequently you entertain guests. Do you need a double oven for those holiday gatherings, or perhaps a compact dishwasher for a smaller kitchen? Each choice should align with your unique needs and preferences.
Additionally, don’t underestimate the value of customer reviews and expert opinions. Hearing from fellow homeowners about their experiences can provide invaluable insights into the performance and reliability of different brands and models. And remember to consider energy efficiency; not only will it benefit the environment, but it will also save you money in the long run.
Finally, trust your instincts. While it’s important to take advice into account, your kitchen is a personal space that reflects your taste and lifestyle. Choose appliances that not only meet your functional requirements but also resonate with your aesthetic sensibilities. Whether you’re drawn to sleek modern designs or classic finishes, let your style shine through.
In closing, equip yourself with knowledge, listen to your intuition, and embrace the excitement of making your kitchen truly your own. With confidence in your choices, your kitchen will soon become a cherished space where delicious meals and lasting memories are made. Happy cooking!
As we conclude our ultimate guide to choosing the perfect kitchen appliances for your home, we hope you feel empowered and inspired to make informed decisions that elevate both your cooking experience and your kitchen’s aesthetic. From selecting energy-efficient models to balancing functionality with sleek design, each choice plays a pivotal role in creating a space that reflects your personal style and meets your culinary needs. Remember, investing in the right appliances not only enhances your kitchen’s functionality but also adds value to your home. So take your time, explore your options, and enjoy the journey of transforming your kitchen into the heart of your home. Happy cooking!