There’s something undeniably magical about a freshly baked pizza, with its golden crust, bubbling cheese, and tantalizing toppings that dance together in perfect harmony.
While ordering from your favorite pizzeria is always tempting, nothing can quite compare to the satisfaction of crafting your own pizza masterpiece right in the comfort of your kitchen. Whether you’re a novice cook or a seasoned culinary enthusiast, mastering the art of homemade pizza can elevate your dining experience to a whole new level. In this post, we’ll unveil 10 insider secrets that will help you create the perfect pizza at home, from selecting the finest ingredients and mastering the dough to achieving that ideal crispy crust. Get ready to unleash your inner pizzaiolo and impress family and friends with your delicious creations that rival any traditional pizzeria!
1. Understanding the Basics: Pizza Dough Essentials

Crafting the perfect pizza at home begins with a solid understanding of its foundation: the dough. The dough is not just a vehicle for your toppings; it’s the very heart of your pizza, influencing its flavor, texture, and overall experience. To create that delectable crust that you crave, you’ll need to master a few essential elements.
First, let’s talk about the ingredients. The simplest pizza dough requires just four core components: flour, water, yeast, and salt. However, the type of flour you choose can significantly impact your results. For a traditional Neapolitan-style pizza, look for “00” flour, which is finely milled and has a higher protein content, yielding a beautifully chewy and crisp crust. If you prefer a more robust flavor, consider using bread flour, which will also provide a great rise due to its gluten strength.
Next, understanding the fermentation process is crucial. Allowing your dough to rise slowly, ideally in the refrigerator for 24 to 72 hours, will develop complex flavors and a light, airy texture. This process, known as cold fermentation, not only enhances the taste but also makes the dough easier to stretch and shape.
Kneading is another key step in dough preparation. The goal is to develop the gluten, which gives the dough its elasticity. A good rule of thumb is to knead until the dough is smooth and elastic, roughly 10 minutes by hand or about 5 minutes in a stand mixer. Pay attention to the feel of the dough; it should spring back when you poke it.
After kneading, it’s time for the first rise. Place your dough in a lightly oiled bowl, cover it with a damp cloth, and let it rest until it doubles in size. This usually takes about 1 to 2 hours at room temperature. Once risen, punch it down to release the air and divide it into smaller portions, depending on the size of pizzas you wish to create.
Finally, remember that the way you shape your dough can also affect the final product. Gently stretch the dough with your hands or use a rolling pin if you prefer a thinner crust. Avoid overworking the dough at this stage to preserve the air pockets formed during fermentation, which will contribute to that irresistible lightness.
By mastering these basic dough essentials, you’re well on your way to creating a pizza that rivals those found in the finest pizzerias. With the right ingredients and techniques, you’ll transform simple components into a deliciously satisfying homemade masterpiece.
2. Choosing the Right Flour: Types and Their Impact
The foundation of any great pizza starts with the dough, and the choice of flour plays a pivotal role in achieving that perfect crust. While it may seem like a simple ingredient, the type of flour you select can dramatically affect the texture, taste, and overall quality of your homemade pizza. Let’s explore the various types of flour and how each contributes to your pizza-making success.
**All-Purpose Flour:** This is the most widely used flour and can yield good results for pizza dough. It has a moderate protein content, typically around 10-12%, which helps create a tender crust with a slight chew. If you’re just starting out, all-purpose flour is a reliable option, providing a good balance between ease of use and quality.
**Bread Flour:** For those seeking a chewier, more robust crust, bread flour is the way to go. With a higher protein content (around 12-14%), this flour promotes gluten development, resulting in a dough that rises beautifully and holds its shape well. The end result is a crust that’s crisp on the outside yet soft and airy on the inside—ideal for deep-dish or Neapolitan-style pizzas.
**00 Flour:** Often hailed as the gold standard for Italian pizza, 00 flour is finely milled and has a lower protein content (around 8-10%). It’s perfect for making traditional Neapolitan pizza, allowing for a delicate, yet stretchable dough that cooks quickly in high-temperature ovens. Using 00 flour can elevate your pizza-making game, giving you that authentic Italian flair right in your kitchen.
**Whole Wheat Flour:** For a healthier twist, consider whole wheat flour. It adds a nutty flavor and increases the nutritional value of your pizza. However, because of its coarser texture and lower gluten-forming capability, it’s best to blend whole wheat flour with all-purpose or bread flour to maintain the dough’s elasticity and rise.
**Semolina Flour:** This coarse flour is often used as a dusting agent for pizza peels to prevent sticking, but it can also be incorporated into the dough for added texture and flavor. Semolina flour has a higher protein content, giving the crust a unique bite and a slightly golden color when baked.
When choosing the right flour, consider not only the type but also the specific pizza style you aim to create. Each flour brings its distinct characteristics to the dough, influencing everything from texture to taste. So, experiment with different blends and find the perfect combination that suits your palate. With the right flour in your arsenal, you’re one step closer to crafting the perfect pizza at home.
3. Perfecting Your Dough Technique: Kneading and Rising

When it comes to crafting the perfect pizza at home, the foundation of your masterpiece lies in the dough. Perfecting your dough technique is an art that requires patience, practice, and a touch of culinary intuition. The two critical stages in this process are kneading and rising, each playing a vital role in achieving that coveted crispy yet chewy crust.
Kneading is where the magic begins. As you combine your flour, water, yeast, and salt, the goal is to develop the gluten structure that will give your pizza its strength and elasticity. Start by mixing your ingredients until they form a rough ball, then turn the dough out onto a lightly floured surface. Use the heel of your hand to push the dough away from you, then fold it back on itself. Repeat this motion, turning the dough a quarter turn after each knead. You’re looking for a smooth, elastic texture that springs back when poked. This process usually takes about 8 to 10 minutes, and don’t be afraid to add a little more flour if the dough feels too sticky.
Once your dough is kneaded to perfection, it’s time for the rising process, which is equally essential. transfer your dough to a lightly oiled bowl and cover it with a damp cloth or plastic wrap to create a warm, humid environment that encourages fermentation. This is where the yeast works its magic, producing carbon dioxide that causes the dough to expand. Allow the dough to rise for at least one hour, or until it has doubled in size. For those who want to elevate their pizza experience, consider a longer, cold fermentation in the refrigerator, which can impart a deeper flavor and a chewier texture. This can be done by letting the dough rest for 24 to 72 hours, allowing the flavors to develop further as the gluten relaxes.
As you embark on your dough-making journey, remember that practice makes perfect. Each batch will teach you something new about the dough’s behavior, the environment, and how to adjust your technique. With a little patience and the right kneading and rising methods, you’ll be well on your way to creating a pizza that rivals your favorite pizzeria, right in the comfort of your own kitchen.
4. Secrets to the Perfect Pizza Sauce: Recipes and Tips
When it comes to crafting the perfect pizza, the foundation of flavor lies in the sauce. A well-balanced, delicious pizza sauce not only elevates your pie but also complements the toppings, creating a harmonious blend of tastes. Here, we unveil the secrets to achieving that perfect pizza sauce, complete with recipes and essential tips to guide you.
### **The Base: Tomatoes Matter**
Start with high-quality tomatoes; they are the heart of your sauce. San Marzano tomatoes are a favorite among pizza aficionados for their rich flavor and natural sweetness. If fresh tomatoes are in season, consider using ripe, juicy varieties for a vibrant sauce. For a quick and convenient option, canned tomatoes with no added preservatives or sugar will do the trick. Just remember to drain any excess liquid to avoid a soggy crust.
### **A Simple Recipe to Get You Started**
Here’s a basic recipe that you can easily modify to suit your taste:
**Ingredients:**
– 1 can (28 oz) of whole peeled San Marzano tomatoes
– 2 tablespoons of extra virgin olive oil
– 2 cloves of garlic, minced
– 1 teaspoon of dried oregano
– 1 teaspoon of sugar (to balance acidity)
– Salt and pepper to taste
– Fresh basil leaves (optional)
**Instructions:**
1. **Blend the Tomatoes**: In a blender or food processor, puree the tomatoes until smooth. You can leave it slightly chunky for a more rustic feel.
2. **Sauté**: In a saucepan, heat the olive oil over medium heat. Add the minced garlic and sauté for about a minute, just until fragrant—be careful not to let it brown.
3. **Combine and Simmer**: Pour in the blended tomatoes, add oregano, sugar, and salt and pepper. Allow the sauce to simmer for 20-30 minutes to develop flavors, stirring occasionally. If you’re using fresh basil, add it in the last few minutes of cooking for a burst of freshness.
### **Tips for the Ultimate Flavor**
– **Herbs and Spices**: Experiment with fresh herbs like basil, thyme, or parsley to give your sauce a unique twist. A pinch of red pepper flakes can introduce a delightful heat, while a splash of balsamic vinegar can add depth.
– **Don’t Overcook**: The key to a great pizza sauce is to let the flavors meld without overcooking the tomatoes. You want to retain some acidity to balance the richness of the cheese and toppings.
– **Taste and Adjust**: Always taste your sauce as it simmers. This is your chance to tweak the flavors. If it’s too acidic, add a bit more sugar; if it needs brightness, a splash of lemon juice can work wonders.
– **Cool Before Using**: Allow your sauce to cool before spreading it on the dough. This helps maintain the integrity of the crust and avoids sogginess.
With these tips and recipes in your back pocket, you’ll be on your way to creating a pizza sauce that not only tastes fantastic but also has your family and friends coming back for more. Remember, the perfect pizza is a blend of passion, patience, and a pinch of creativity!
5. Selecting the Best Cheese: Varieties and Combinations
When it comes to crafting the perfect pizza, the choice of cheese can elevate your creation from good to unforgettable. Selecting the right cheese—or a delightful combination of cheeses—is essential for achieving that iconic gooey, melty texture and rich flavor that pizza lovers crave.
Start with the classic: **mozzarella**. Known for its excellent melting properties, mozzarella is the gold standard for pizza. Fresh mozzarella, with its creamy texture and subtle flavor, adds an artisanal touch to your pie, while low-moisture mozzarella provides that classic stretch and a slight chewiness when baked. For a richer taste, consider mixing in some provolone, which offers a sharp and tangy note that complements mozzarella beautifully.
But don’t stop there! Explore the world of **cheese combinations** to create a unique flavor profile. Adding **parmesan** can bring a nutty, salty element that enhances the overall taste. A sprinkle of **fontina** can introduce a creamy richness that pairs well with earthy toppings like mushrooms. For those who like a touch of boldness, consider incorporating **gorgonzola** or **feta** for a pungent kick that contrasts wonderfully with sweet tomato sauce.
Another secret to perfecting your cheese selection is to think about the **moisture content**. Cheeses with lower moisture, such as aged gouda or cheddar, can provide a delightful crunch when baked, while higher moisture cheeses can contribute to a luscious, gooey texture. Balancing these elements will help you create a pizza that not only tastes incredible but also has the perfect texture.
Finally, don’t forget to consider the **toppings**! The cheese you select should harmonize with the other flavors on your pizza. For example, if you’re loading up on spicy pepperoni, pairing it with a mild mozzarella and a sharp provolone can create a delightful contrast. Experiment with different combinations to find your signature blend.
In conclusion, choosing the right cheese or combination of cheeses is a crucial step in crafting the perfect pizza at home. With the right selection, you’ll create a mouthwatering masterpiece that keeps everyone coming back for more. So grab your cheese of choice, sprinkle it generously, and watch as your homemade pizza transforms into a cheesy, melty work of art!
6. Fresh vs. Dried Herbs: Enhancing Flavor
When it comes to crafting the perfect pizza at home, the choice between fresh and dried herbs can significantly impact the flavor profile of your pie. Each type brings its own unique characteristics, and understanding these differences can elevate your pizza-making game to new heights.
**Fresh Herbs**: Fresh herbs are often touted for their vibrant flavor, aromatic qualities, and bright colors. Basil, for instance, is the classic herb for pizza. When you toss fresh basil leaves onto your hot cheese and sauce, they release essential oils that create a fragrant burst of flavor. The key with fresh herbs is to add them towards the end of the baking process or even after the pizza comes out of the oven. This ensures that their delicate flavors and vibrant colors are preserved, providing a fresh contrast to the rich, melted cheese. Additionally, consider trying fresh oregano, thyme, or even parsley to introduce different nuances to your pizza.
**Dried Herbs**: While fresh herbs have their place, dried herbs offer a concentrated flavor that can be equally delightful. The drying process intensifies the herb’s essence, making it a powerful flavor enhancer. Dried oregano is a staple in many pizza sauces and is particularly beloved for its robust, earthy flavor that complements tomato sauce beautifully. Similarly, dried basil can add depth without the risk of wilting or losing flavor during baking. The key to using dried herbs effectively lies in timing; adding them at the beginning of the cooking process allows their flavors to meld into the sauce and dough, creating a harmonious base for your toppings.
**Combining Both**: For the ultimate flavor explosion, consider using a combination of fresh and dried herbs. Start with dried herbs in your sauce to build a strong foundation, and finish with fresh herbs as a vibrant garnish. This layering technique not only enhances the complexity of flavors but also adds visual appeal to your pizza, making it a feast for both the eyes and the palate.
In summary, whether you opt for the lively essence of fresh herbs or the concentrated punch of dried herbs, each choice has its merits. Experimentation is key—don’t be afraid to mix and match to find the perfect balance that suits your taste buds. After all, the secret to the perfect pizza lies not just in the crust or the cheese, but in the herbs that bring it all together.
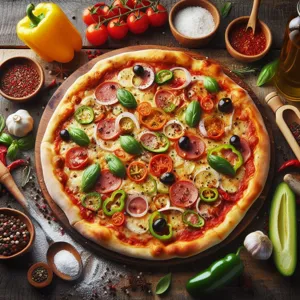
7. Toppings 101: Balancing Flavors and Textures
When it comes to pizza, toppings can make or break your culinary creation. The art of choosing toppings is not just about what you enjoy; it’s about creating a harmonious balance of flavors and textures that will elevate your homemade pizza to pizzeria perfection.
Start with the basics: the sauce and cheese form the foundation of your pizza. From there, consider how each topping contributes to the overall experience. A good rule of thumb is to combine different flavors—think savory, sweet, spicy, and even a touch of acidity. For instance, pairing creamy mozzarella with spicy pepperoni brings a delightful contrast, while adding fresh basil introduces a burst of freshness that cuts through the richness.
Texture is equally important. A perfect pizza should have a variety of textures that keep each bite exciting. For example, the crunch of bell peppers or onions adds a satisfying crispness, while sautéed mushrooms lend a tender, earthy quality. Don’t forget about the importance of moisture levels; wet toppings like fresh tomatoes or marinated artichokes can make your crust soggy if not balanced properly. To counteract this, opt for drier ingredients or consider pre-cooking moisture-heavy toppings to reduce their water content.
Finally, experiment with unconventional toppings to surprise your taste buds. Think outside the traditional pepperoni and mushroom combo—try adding figs for a sweet twist, prosciutto for a salty kick, or even a drizzle of balsamic glaze for a tangy finish. The key is to keep it balanced; too many strong flavors can overwhelm the palate, while a well-thought-out selection will leave your guests craving more.
In the end, the perfect pizza is a symphony of flavors and textures that not only satisfies your cravings but also sparks joy in every bite. So, don your apron, unleash your creativity, and let your taste buds guide you as you master the art of pizza toppings!
8. The Importance of Preheating: Getting Your Oven Ready
When it comes to crafting the perfect pizza at home, one of the most crucial steps that often gets overlooked is the preheating of your oven. Think of preheating as the warm-up routine before a big game; it sets the stage for everything that follows. A well-prepped oven is essential for achieving that golden, crispy crust that pizza lovers crave.
Ideally, you want to preheat your oven to its maximum temperature—usually between 475°F to 500°F (245°C to 260°C)—at least 30 minutes before you slide your pizza in. This allows the heat to distribute evenly throughout the oven, creating a consistent cooking environment. But it’s not just about the temperature; it’s also about the type of surface you’re baking on. Consider using a pizza stone or a steel; these materials retain heat exceptionally well and help to create a beautifully browned crust.
As the oven heats up, it also ensures that the cheese melts perfectly and the toppings cook through without becoming soggy. A hot oven is your best ally in achieving that classic pizzeria-style pie. So, while you may be tempted to rush through this step in excitement to taste your creation, remember that a well-preheated oven is the secret to a pizza that’s crisp on the outside and irresistibly chewy on the inside. Make preheating a non-negotiable part of your pizza-making routine, and you’ll be well on your way to impressing friends and family with your culinary skills!
9. Cooking Tools You Need: Pizza Stones, Peels, and More
When it comes to crafting the perfect pizza at home, having the right tools can make all the difference. While it’s certainly possible to create a delicious pie with basic kitchen equipment, investing in a few essential cooking tools will elevate your pizza-making game to professional levels.
**Pizza Stone**: The cornerstone of your pizza toolkit, a pizza stone is designed to absorb moisture and distribute heat evenly, resulting in a crispy crust that rivals your favorite pizzeria. Place it in your oven while preheating to ensure it’s hot enough to create that perfect crust. If you’re feeling adventurous, consider using a baking steel, which can offer even better heat retention and conductivity.
**Pizza Peel**: A pizza peel is a wide, flat tool that allows you to slide your pizza in and out of the oven with ease. Opt for a wooden peel for transferring your uncooked pizza, as it provides a non-stick surface for easy maneuvering. For removing the pizza once it’s cooked, a metal peel works best, as its slim edge can easily slide under the crust.
**Pizza Cutter**: Once your masterpiece is baked to perfection, you’ll need a reliable pizza cutter to slice through the delicious layers of cheese and toppings. A traditional wheel cutter is effective, but a rocker-style cutter can deliver clean, even slices with a single motion, ensuring that each piece looks as good as it tastes.
**Oven Thermometer**: Achieving the ideal baking temperature is crucial for a perfect pizza. While most ovens have built-in thermometers, they can often be inaccurate. A standalone oven thermometer will help you monitor the heat more precisely, ensuring your pizza bakes evenly and thoroughly.
**Rolling Pin**: Although many purists prefer hand-stretching their dough, a rolling pin can be a handy tool for those looking for a more controlled approach. It helps you achieve a uniform thickness, which is essential for even cooking.
**Dough Scraper**: This simple tool is invaluable for handling sticky dough. It allows you to cut, divide, and shape your dough without making a mess. Plus, it’s great for transferring ingredients and cleaning your work surface.
By equipping yourself with these essential tools, you’ll be well on your way to mastering the art of homemade pizza. Each piece of equipment plays a vital role, allowing you to focus on what really matters: creating delicious, mouthwatering pizzas that will impress your family and friends. Happy pizza making!
10. Mastering Cooking Methods: Oven vs. Grill vs. Fire
When it comes to crafting the perfect pizza at home, the cooking method you choose plays a crucial role in the final product. Each method—oven, grill, and open fire—offers unique advantages that can elevate your pizza-making game, so understanding these techniques is essential for achieving that coveted pizzeria-quality pie.
**Oven:** The classic choice for many home cooks, a conventional oven provides consistent heat and is perfect for baking traditional pizzas. Preheat your oven to the highest setting, ideally around 475°F to 500°F. For the best results, invest in a pizza stone or steel; these tools retain heat and create a beautifully crisp crust. Remember to let your stone heat up for at least 30 minutes before sliding in your pizza. The even heat distribution of an oven allows for a perfectly cooked pizza, with a golden, bubbly crust and evenly melted cheese.
**Grill:** Grilling pizza can add a delightful smokiness that you just can’t replicate in an oven. Whether you’re using a gas or charcoal grill, the key is to achieve high, direct heat. Preheat your grill to medium-high, and use a pizza stone or a cast-iron skillet to prevent sticking and ensure even cooking. The grill’s open flames will give your crust a charred, crispy texture while keeping the toppings fresh and vibrant. Be prepared for a little trial and error as you learn how to manage the heat, but the results are definitely worth it.
**Open Fire:** For those adventurous souls willing to go the traditional route, cooking pizza over an open fire can be a rewarding experience. This method requires a pizza oven or a fire pit with a grill grate, but the results are astounding. The intense heat from the flames creates an exceptional crust with a unique flavor. The key here is to control the fire, ensuring it’s not too hot to burn the pizza while still achieving that perfect blistered finish. Cooking over an open flame requires a bit of skill and patience, but the joy of pulling a perfectly charred pizza from the flames is an unparalleled experience.
Ultimately, mastering these cooking methods is about experimentation and finding what works best for your taste and equipment. Whether you prefer the convenience of an oven, the rustic charm of a grill, or the thrill of an open fire, embracing these techniques will unlock a world of flavor and texture in your homemade pizzas, ensuring each bite is a slice of heaven.
11. Timing is Everything: Baking for the Perfect Crust
When it comes to crafting the perfect pizza at home, timing can make or break your crust. Achieving that ideal balance between a crispy exterior and a soft, chewy interior requires careful attention to both your oven settings and the baking duration. Preheating your oven to its highest temperature is crucial; most home ovens can reach around 475°F to 500°F. This high heat mimics the intense temperatures of traditional wood-fired pizza ovens, allowing for a quick bake that locks in moisture and flavor.
Once your oven is preheated, it’s time to carefully slide your assembled pizza onto a preheated pizza stone or baking sheet. The initial few minutes are critical, as they set the foundation for your crust. Watch closely as the edges begin to puff and bubble; this is a sign that the Maillard reaction is working its magic, giving you those golden-brown spots that are the hallmark of a well-baked pizza.
Keep a close eye on the timer, as baking typically takes anywhere from 10 to 15 minutes, depending on the thickness of your crust and the toppings you’ve chosen. If you prefer a crispy bottom, consider rotating your pizza halfway through the baking process to ensure even cooking. Remember, every oven is different, so don’t hesitate to adjust your timing and temperature based on your previous experiences.
Finally, once your pizza is bubbling and beautifully browned, allow it to rest for a few minutes before slicing. This brief wait not only prevents burns but also gives the cheese and toppings a moment to settle, ensuring a perfect bite every time. Mastering the timing of your bake will elevate your homemade pizza from good to extraordinary, leaving your friends and family clamoring for another slice.
12. Experimenting with Styles: Neapolitan, Chicago, and Beyond
When it comes to pizza, one of the most exciting aspects is the vast array of styles to explore. Each regional variant offers a unique experience, allowing you to expand your culinary repertoire while satisfying your pizza cravings. Let’s take a closer look at some of the most popular styles you might want to try your hand at crafting in your own kitchen.
**Neapolitan Pizza:** Originating from Naples, this traditional style is characterized by its soft, chewy crust and minimalistic toppings. Made with just flour, water, salt, and yeast, Neapolitan dough is typically hand-stretched to create a thin base that puffs up beautifully in a hot oven. Top it with San Marzano tomatoes, fresh mozzarella, a drizzle of olive oil, and a sprinkle of basil for the quintessential Margherita pizza. The key to Neapolitan success is cooking at extremely high temperatures, ideally in a wood-fired oven, to achieve that signature char and flavor.
**Chicago Deep-Dish:** If you’re in the mood for something hearty and filling, Chicago deep-dish pizza is a fantastic option. Unlike its Neapolitan counterpart, this style features a thick, buttery crust that lines a deep pan, creating a sturdy vessel for layers of cheese, toppings, and a chunky tomato sauce on top. The beauty of deep-dish pizza is in its assembly; consider experimenting with a variety of fillings—from classic pepperoni to inventive combinations like spinach and artichoke or sausage and roasted peppers.
**New York-Style:** Known for its large, foldable slices and crispy, yet chewy crust, New York-style pizza is a crowd-pleaser that’s perfect for a casual night in. This style is all about balance—think a perfect ratio of sauce to cheese, with toppings that complement rather than overwhelm. Try your hand at making a classic cheese pizza or venture into more adventurous territory with toppings like prosciutto, arugula, or even a drizzle of truffle oil.
**Sicilian Pizza:** If you love a thick, airy crust, Sicilian pizza is a must-try. Typically baked in a rectangular pan, Sicilian pizza features a focaccia-like dough that rises to create an airy texture. Topped with a robust tomato sauce and a generous layer of cheese, this style often includes toppings like olives, anchovies, or even potatoes for added flair. The golden crust is the perfect contrast to the rich flavors of the toppings, making each bite an indulgent treat.
**Beyond the Classics:** Don’t be afraid to think outside the box! Pizza lends itself well to experimentation, so why not try international flavors? Create a Thai-inspired pizza with peanut sauce, chicken, and fresh cilantro, or a Mediterranean version topped with feta, olives, and artichokes. The possibilities are endless, and each experiment brings you one step closer to discovering your next favorite flavor combination.
Incorporating diverse pizza styles into your home cooking not only keeps things exciting but also allows you to impress your friends and family with your culinary creativity. So grab your rolling pin, fire up the oven, and let your imagination run wild as you explore the wonderful world of pizza!
13. Common Mistakes to Avoid: Troubleshooting Your Pizza
Crafting the perfect pizza at home can be a delightful endeavor, but even the most passionate pizza makers can fall prey to common pitfalls. Understanding these mistakes and knowing how to troubleshoot them can elevate your homemade creations from mediocre to mouthwatering.
One of the most frequent issues is using the wrong type of flour. While all-purpose flour is a convenient choice, it often lacks the protein content needed for that perfect chewy crust. Instead, opt for bread flour or, for an authentic Neapolitan touch, ’00’ flour. These flours provide the ideal gluten structure, giving your crust that sought-after texture and flavor.
Another common mistake is overloading your pizza with toppings. While it can be tempting to pile on every ingredient you have, this can lead to a soggy crust and uneven cooking. Remember, less is often more. Aim for a balanced distribution of toppings that allows each ingredient to shine and ensures even cooking.
Temperature is crucial in pizza-making, yet many home cooks underestimate its importance. Baking pizza at a high temperature—ideally around 475°F to 500°F—creates that perfect crispy crust. If your oven doesn’t heat up enough, you might end up with a pale and doughy base. Preheating your pizza stone or baking sheet is also essential, as it helps to mimic the high heat of a traditional pizza oven.
Don’t forget about the dough. Allowing it to rise for too long can lead to over-fermentation, resulting in a crust that’s too chewy or dense. Conversely, under-kneading your dough can leave it tough and unable to stretch properly. Aim for a well-balanced approach: a good rise time of 1-2 hours should do the trick, followed by a gentle knead to develop that perfect structure.
Lastly, don’t skip the finishing touches! A drizzle of good-quality olive oil or a sprinkle of fresh herbs after baking can elevate your pizza to a whole new level. Paying attention to these common mistakes and their solutions will not only enhance your pizza-making skills but also ensure that each creation is a delicious masterpiece, ready to impress family and friends. So roll up your sleeves, keep these tips in mind, and let the pizza-making magic begin!
14. Adding a Personal Touch: Unique Topping Ideas
When it comes to crafting the perfect pizza at home, adding a personal touch can elevate your creation from ordinary to extraordinary. While classic toppings like pepperoni and mozzarella have their charm, stepping out of the box with unique combinations can surprise and delight both your taste buds and those of your guests. This is where creativity meets culinary adventure, allowing you to showcase your personality and preferences through your pizza.
Consider experimenting with unconventional cheeses, such as tangy goat cheese or creamy burrata, to add depth and richness to your pie. For those who enjoy a sweet and savory twist, try topping your pizza with figs or pears paired with prosciutto and a drizzle of balsamic reduction. The contrast of flavors will create a memorable experience that keeps everyone coming back for more.
Don’t shy away from vegetables that offer a bit of flair. Roasted Brussels sprouts, caramelized onions, or even pickled jalapeños can add unexpected textures and tastes. For the meat lovers, think outside the pepperoni box—spicy chorizo, tender pulled pork, or even a hearty corn beef can bring a new dimension to your pizza.
If you’re feeling adventurous, consider global influences. A Thai-inspired pizza topped with peanut sauce, shredded chicken, and fresh cilantro can transport your taste buds to faraway lands. Or go for a Mediterranean flair with toppings like feta, kalamata olives, and artichoke hearts for a burst of flavor that evokes sun-drenched coasts.
Lastly, don’t forget about sauces! While tomato sauce is a classic, experimenting with pesto, barbecue sauce, or even a white garlic sauce can create a delightful base for your unique toppings. The sky’s the limit when it comes to crafting a pizza that truly reflects your culinary style and preferences. So gather your favorite ingredients, unleash your creativity, and enjoy the process of making a personalized pizza masterpiece that’s bound to impress!
15. Final Tips for Presentation and Serving: Making it Instagram-Worthy
When it comes to pizza, presentation is just as crucial as the flavor—especially if you want to share your culinary masterpiece on Instagram! A beautifully presented pizza not only enhances the dining experience but also makes for a stunning visual that can impress friends and followers alike. Here are some final tips for elevating your homemade pizza from delicious to drool-worthy.
**Color and Texture:** Start by ensuring a vibrant contrast of colors. Fresh basil leaves, ripe tomatoes, and creamy mozzarella can transform a simple pie into a feast for the eyes. Consider adding colorful toppings like bell peppers, red onions, or arugula to create a visually appealing mosaic. Remember, food that looks good often tastes good too!
**The Perfect Slice:** When it’s time to serve your pizza, the way you slice it matters. A clean cut not only enhances the visual appeal but also makes it easier for your guests to enjoy. Use a sharp pizza cutter or a chef’s knife, and aim for equal-sized pieces for a polished look.
**Garnish for Glory:** Take your presentation up a notch by garnishing your pizza with a drizzle of olive oil, a sprinkle of coarse sea salt, or fresh herbs just before serving. A light dusting of grated Parmesan or crushed red pepper flakes can add a pop of color and extra flavor, making your pizza even more enticing.
**Serve on Stylish Dishware:** The plate you choose can elevate your pizza’s appeal significantly. Opt for a rustic wooden board, a classic white platter, or a colorful ceramic dish that complements the colors of your pizza. Consider serving individual slices on small plates for a more intimate dining experience.
**Lighting and Angles:** When it’s time to snap that Instagram shot, lighting is key. Natural light works wonders, so try to shoot your pizza near a window during the day. Experiment with different angles—overhead shots showcase the full pizza, while side angles highlight those gooey cheese pulls.
**The Finishing Touches:** Finally, don’t forget the little details that make your pizza truly Instagram-worthy. Arrange your pizza with a side of dipping sauce, a fresh salad, or a glass of wine to create a full culinary scene.
By keeping these final tips in mind, you can ensure that your homemade pizza not only tastes incredible but also looks like a work of art, ready to be shared with the world! So grab your phone, take that picture, and get ready for the likes to roll in.
As we wrap up our exploration of the 10 secrets to crafting the perfect pizza at home, we hope you feel inspired and equipped to embark on your own pizza-making adventures. From selecting the finest ingredients to mastering the art of dough stretching, each step is a chance to unleash your creativity and satisfy your cravings. Remember, the joy of pizza lies not just in the final product but in the process itself—sharing laughs, experimenting with flavors, and savoring each delicious slice with loved ones. So preheat that oven, roll out your dough, and let your culinary imagination run wild. Your perfect pizza awaits, and we can’t wait to hear about your delicious creations! Happy baking!
——————————