Car – How to Drive Safely in Winter Conditions?

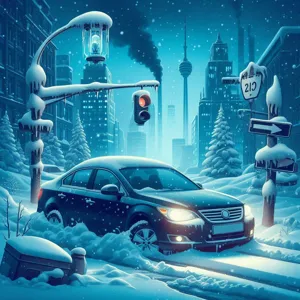
As winter blankets the landscape in a shimmering layer of snow and ice, the beauty of the season is often accompanied by the challenges of driving in harsh conditions.

Navigating slick roads and reduced visibility can turn even the simplest trip into a test of skill and caution. With winter weather posing significant risks, it’s crucial to equip yourself with the knowledge and strategies necessary for safe driving during these chilly months. In this comprehensive guide, we’ll explore essential tips for mastering winter driving, from understanding your vehicle’s winter capabilities to implementing best practices for maintaining control on icy roads. Whether you’re commuting to work, heading out for holiday festivities, or embarking on a weekend getaway, these insights will empower you to tackle winter driving challenges with confidence and keep yourself and others safe on the road.

1. Understanding Winter Driving Hazards

Car - How to Drive Safely in Winter Conditions?
Credit : whatcanu.com

Winter driving brings a unique set of challenges that can catch even the most experienced drivers off guard. Understanding these hazards is the first step toward mastering safe driving in icy and snowy conditions.

As temperatures drop and precipitation falls, roads can quickly transform into treacherous surfaces. Black ice, often invisible to the naked eye, forms when moisture freezes, creating a slick layer that can lead to dangerous skids. This invisible hazard is particularly common in shaded areas and bridges, where the temperature can be significantly lower than surrounding surfaces.

Snow accumulation presents another challenge, as it can obscure lane markings and create uneven road conditions. Driving on packed snow can be manageable, but as it turns to slush and melts, the risk of hydroplaning increases. Understanding the varying states of snow and ice will help you adapt your driving techniques accordingly.

Visibility is also significantly compromised during winter months. Snow flurries, sleet, and heavy rain can reduce your ability to see other vehicles and road signs, making it essential to keep your windshield wipers in good condition and your headlights clear. Additionally, the shorter daylight hours in winter mean that many drivers will be navigating in low-light conditions, further emphasizing the need for vigilance.

Finally, it’s important to recognize the impact of cold weather on your vehicle. Battery performance can diminish, tires can lose pressure, and fluids can thicken, all of which can affect your vehicle’s performance on the road. Regular vehicle maintenance is crucial to ensure that your car is equipped to handle winter’s demands.

By understanding these winter driving hazards, you empower yourself to make informed decisions behind the wheel. Awareness of the challenges ahead will not only enhance your driving skills but also promote safer roads for everyone during the winter months.

2. Preparing Your Vehicle for Winter Conditions

Preparing your vehicle for winter conditions is a critical step in ensuring your safety on the road. As temperatures drop and snow begins to fall, taking the time to equip your vehicle for the challenges ahead can make all the difference. Start by checking your tires; they are your only contact with the road, so consider investing in winter tires that provide better traction in icy and snowy conditions. Look for tires with deeper treads and a rubber compound designed to remain flexible in cold weather.

Next, ensure your battery is up to the task. Cold weather can significantly reduce battery performance, so have it tested to confirm it’s in good condition. If your battery is more than three years old, it might be wise to replace it proactively. Don’t forget to inspect your windshield wipers and replace them if they show signs of wear. Clear visibility is crucial, and using winter wiper blades can help tackle those heavy snowfalls.

Additionally, check your fluids. Make sure your antifreeze is at the correct level to prevent your engine from freezing and ensure your windshield washer fluid is rated for low temperatures to keep your view clear. If you live in an area prone to severe winter weather, consider keeping an emergency kit in your vehicle. This kit should include items like a blanket, flashlight, first aid supplies, non-perishable snacks, and a shovel.

Finally, don’t overlook the importance of having a full gas tank. Keeping your tank at least half full can prevent your fuel lines from freezing and provides you with extra weight for better traction. By taking these proactive steps to prepare your vehicle, you can navigate winter roads with confidence and peace of mind, ready to face whatever the season throws your way.

3. Essential Winter Tires: Why They Matter

Car - How to Drive Safely in Winter Conditions?
Credit : whatcanu.com

When winter descends, transforming roads into icy lanes and snow-laden paths, the importance of equipping your vehicle with the right tires cannot be overstated. Essential winter tires are specifically designed to tackle the unique challenges that cold-weather driving presents. With deeper treads and specialized rubber compounds, these tires provide superior traction on slippery surfaces, significantly enhancing your vehicle’s grip and responsiveness.

Unlike all-season tires, which can stiffen and lose flexibility in frigid temperatures, winter tires remain pliable, allowing for better contact with the road. Their unique tread patterns are engineered to channel slush, snow, and water away from the tire surface, helping to prevent hydroplaning and improving stability. This means that whether you’re navigating through a thick snowstorm or maneuvering on icy patches, winter tires are your best defense against skidding and loss of control.

Moreover, many drivers underestimate the impact that proper winter tires can have on braking distances. Studies show that vehicles equipped with winter tires can stop up to 30% shorter than those with all-season ones on snow and ice. This could mean the difference between maintaining control and a potential accident.

Investing in a quality set of winter tires not only enhances your safety but also boosts your confidence behind the wheel during the harsh winter months. As you prepare for the winter driving season, consider making the switch to these essential tires. Your vehicle—and your peace of mind—will thank you.

4. Checking Your Vehicle’s Fluids and Battery

Before hitting the winter roads, one of the most crucial steps in ensuring your vehicle’s performance is to check its fluids and battery. Cold temperatures can significantly affect your car’s essential systems, making it imperative to pay extra attention to these components.

Start with your engine oil; in colder months, you may need to switch to a lighter oil that flows more easily in frigid temperatures. This small adjustment can enhance your engine’s efficiency and ensure smooth starts, even on the frostiest mornings. Next, inspect your coolant levels. A proper mix of antifreeze and water is vital to prevent freezing and overheating during extreme weather fluctuations.

Don’t forget about your windshield washer fluid, either. In winter, you should opt for a fluid specifically designed to withstand low temperatures and effectively combat road grime and salt. This will help maintain clear visibility, a crucial factor for safe driving in snowy or icy conditions.

The battery is another essential component to check thoroughly. Cold weather can reduce battery efficiency, leading to potential starting issues. Inspect the battery terminals for corrosion and ensure they’re clean and tight. If your battery is more than three years old, consider having it tested at a local shop to determine its capacity to hold a charge.

Additionally, check all other fluids, including brake fluid, power steering fluid, and transmission fluid. A well-maintained vehicle will not only perform better in winter conditions but will also provide you with peace of mind during your travels. By taking these proactive measures, you can navigate the icy roads with confidence, knowing your vehicle is in optimal condition.

5. Creating a Winter Emergency Kit

Car - How to Drive Safely in Winter Conditions?
Credit : whatcanu.com

A well-prepared winter emergency kit can be a lifesaver when unexpected challenges arise on the road. As winter storms can bring treacherous conditions and even cause accidents, having the right supplies on hand can make all the difference in staying safe until help arrives. Start by choosing a sturdy, waterproof container to house your kit, ensuring that it remains protected from the elements.

Begin with the essentials: a first aid kit stocked with band-aids, antiseptic wipes, and necessary medications. Next, include warm blankets and extra clothing, such as hats, gloves, and scarves, to shield against the biting cold. A flashlight with extra batteries is crucial for illuminating dark surroundings, while non-perishable snacks and bottled water will sustain you if you find yourself stranded for an extended period.

Don’t forget practical tools and supplies: a snow shovel for clearing the way, a ice scraper for removing frost from your windows, and a set of jumper cables to help restart a dead battery. Additionally, keep a bag of sand or kitty litter handy for added traction on slippery surfaces. A whistle can also be an invaluable tool for signaling for help if needed.

Finally, to be fully prepared, make sure to include a fully charged portable phone charger to maintain communication with loved ones or roadside assistance services. Regularly check and update your kit as needed, especially as winter progresses or if you use any of the items. By creating a comprehensive winter emergency kit, you’ll not only ease your mind but also enhance your readiness for whatever winter throws your way.

6. Tips for Maintaining Visibility in Snow and Ice

Driving in winter conditions can be treacherous, and one of the key factors in staying safe is maintaining visibility in snow and ice. When the flurries start to fall, it’s crucial to ensure that your view of the road ahead is as clear as possible. Here are some essential tips to help you keep your visibility sharp during those wintry drives.

First and foremost, always ensure your windshield wipers are in good working condition. The last thing you want is to be caught in a snowstorm with worn-out blades that smear snow and ice across your view. Invest in a quality set of winter wiper blades designed to handle the harsh conditions. Additionally, keep your windshield washer fluid topped off with a solution that’s rated for freezing temperatures—this will help you clear away any accumulated slush quickly.

Next, don’t neglect your headlights and taillights. In snowy conditions, visibility can drop significantly, so it’s important to ensure all your lights are functioning and clean. Ice and grime can accumulate quickly, blocking light output and making it harder for other drivers to see you. A quick wipe down before you hit the road can make a significant difference.

Utilize your defrosters and heaters strategically. Snow and ice can cause your windows to fog up from the inside, reducing visibility. Turn on your car’s defroster to keep the glass clear, and if necessary, crack a window to help equalize the temperature inside and out. This small adjustment can prevent the dreaded fog from obscuring your view.

Lastly, adjust your driving habits for the conditions. Reducing speed is crucial in snowy or icy weather, as it gives you more time to react if visibility worsens or if you encounter slippery patches. Keep a safe distance from the vehicle in front of you, as braking distances increase in winter conditions.

By taking these proactive steps, you can maintain clear visibility in snow and ice, making your winter driving experience safer and more manageable. Remember, the key to mastering challenging conditions is preparation—and that starts with ensuring you can see the road ahead.

7. Adjusting Your Driving Techniques for Winter Conditions

Car - How to Drive Safely in Winter Conditions?
Credit : whatcanu.com

When winter weather strikes, the road can transform from a familiar route to a treacherous journey in the blink of an eye. Adjusting your driving techniques for winter conditions is not just a precaution—it’s a necessity for ensuring your safety and the safety of others on the road. The key is to adapt your driving style to the challenges posed by snow, ice, and reduced visibility.

First and foremost, slowing down is essential. Reduced speeds give you more time to react to unexpected obstacles and changes in road conditions. Remember, even if the speed limit is 60 mph, that doesn’t mean it’s safe to drive at that speed when winter weather is present. In fact, you should aim to drive significantly below the speed limit when conditions are poor.

Next, focus on increasing your following distance. In dry conditions, a safe distance may be three seconds behind the car in front of you, but in winter weather, this gap should be extended to at least six seconds. This extra space provides ample room to stop in case the vehicle ahead suddenly brakes or skids.

Turning and braking require a gentle touch during winter driving. Sudden movements can lead to loss of traction and control, so make all turns slowly and deliberately. When braking, use a light foot and consider pump-braking in slippery conditions instead of slamming on your brakes, which can cause your wheels to lock and your vehicle to skid.

Moreover, ensure your headlights are on, even during the day. This simple adjustment significantly enhances your visibility to other drivers and helps you see the road ahead more clearly in low-light conditions, such as during snowstorms or heavy overcast skies.

Lastly, keep an eye on weather forecasts and road conditions before you set out. If conditions are particularly severe, don’t hesitate to postpone your trip. Your safety is far more important than arriving on time.

By implementing these driving techniques, you’ll be better equipped to handle the unique challenges of winter roads, ensuring a safer journey for yourself and fellow travelers.

8. Understanding Black Ice: How to Recognize and React

Understanding black ice is crucial for winter driving safety, as it can be one of the most deceptive and dangerous conditions you’ll encounter on the road. Unlike regular ice, which appears frosty and can be seen on the surface, black ice is often nearly invisible, blending seamlessly with the asphalt. It typically forms when temperatures hover around freezing, especially during the night when moisture in the air condenses and freezes on the road. Early morning drives or late-night excursions are particularly risky, as the road may look wet but can actually be coated with a thin layer of this treacherous ice.

To recognize black ice, be vigilant for subtle signs. Look for areas where the road appears darker than its surroundings—this is often an indication of a slick layer of ice. Bridges and overpasses are notorious spots for black ice; they cool down faster than other road surfaces, so be especially cautious when driving over these structures. If you notice other drivers swerving or braking suddenly, take that as a warning sign to decrease your speed and stay alert.

Reacting appropriately to black ice can mean the difference between a safe drive and a dangerous situation. The golden rule is to stay calm. If you find yourself on black ice, avoid sudden movements; do not slam on the brakes or jerk the steering wheel. Instead, gently lift your foot off the accelerator and steer into the direction of the slide. This technique helps regain control of your vehicle. If you do start to skid, remember to steer in the same direction you want the front of the car to go, and remain steady on the wheel.

Preparing for winter driving also means equipping your vehicle with proper tires and having emergency supplies on hand. With awareness and careful reactions, you can navigate black ice and other challenging winter conditions, ensuring your safety and that of others on the road.

9. The Importance of Maintaining Safe Following Distances

Maintaining safe following distances is crucial when it comes to winter driving, where road conditions can be unpredictable and treacherous. As snow and ice accumulate on the pavement, your vehicle’s stopping distance can increase significantly—sometimes by as much as four to ten times compared to dry conditions. This means that what might feel like a comfortable buffer during milder weather can quickly turn into a dangerous situation when the roads are slick and slippery.

To ensure you maintain a safe distance, start by following the “three-second rule” as a baseline. On dry roads, this guideline suggests that you should stay at least three seconds behind the vehicle in front of you. However, during winter, especially when conditions are poor, it’s wise to extend that distance to at least six or even eight seconds. This extra time allows for reaction in case the vehicle ahead suddenly brakes, or if you encounter unexpected obstacles like patches of ice or snowdrifts.

To gauge your following distance, pick a fixed point along the road, such as a sign or a tree. When the vehicle ahead of you passes that point, start counting seconds. If you reach the point before you’ve counted to your designated number, you should increase your distance.

Remember, visibility is often reduced during winter storms; snow can fall heavily, and fog can roll in unexpectedly, making it even harder to react in time. By keeping a safe following distance, you not only give yourself the space needed to brake safely but also project a sense of caution and responsibility to other drivers. This simple yet effective strategy can be a game-changer, significantly reducing the likelihood of accidents and ensuring a safer journey for you and your passengers.

10. How to Handle Skids and Loss of Control

When winter storms paint the roads with a treacherous layer of ice and snow, knowing how to handle skids and a loss of control can make the difference between a close call and a serious accident. As you navigate through these challenging conditions, it’s essential to remain calm and confident, allowing your instincts to guide you in the right direction.

First and foremost, if you find yourself skidding, resist the urge to slam on the brakes; this can exacerbate the situation. Instead, gently ease off the accelerator and steer in the direction you want the front of your car to go. This technique—known as “steering into the skid”—allows your tires to regain traction and helps realign your vehicle with the road.

Understanding the dynamics of your vehicle is equally important. Rear-wheel drive cars, for example, are more prone to skids, so if you’re behind the wheel of one, be particularly aware of how it responds to slippery surfaces. Front-wheel drive vehicles tend to offer better control, but they too can lose traction. Familiarize yourself with your vehicle’s handling in different conditions, ideally in a safe, controlled environment.

Anticipating potential skidding scenarios also plays a crucial role in winter driving. Keep a safe distance from the car in front of you, allowing ample space to react if they suddenly brake. Slow, gradual turns are key—sharp movements can lead to loss of control, so take it easy on the steering wheel.

Lastly, equip your vehicle with the right winter tires. These tires are designed to offer better grip on icy and snowy roads, significantly reducing your chances of skidding. Pair this with proper tire pressure checks, as cold temperatures can deflate tires, further compromising your control.

By mastering these techniques and staying composed, you can navigate the icy roads with confidence, ensuring both your safety and the safety of those around you. Remember, preparation and awareness are your best allies in conquering winter driving challenges.

11. Navigating Hills and Slopes Safely

Navigating hills and slopes during winter can be one of the most daunting challenges for drivers, especially when snow and ice blanket the road. Mastering this skill is crucial for ensuring your safety and that of others on the road. Here are some essential tips to help you tackle these tricky terrains with confidence.

First and foremost, approach hills with caution. As you near an incline, assess the road ahead. If you see other vehicles struggling or sliding, it’s wise to slow down and consider an alternate route. When you do decide to ascend, maintain a steady speed without accelerating rapidly. Sudden bursts of power can lead to wheel spin, which is especially dangerous on icy surfaces. Instead, use a gear that allows for a consistent speed—this will provide better traction and help you climb smoothly.

As you ascend, keep your eyes on the summit. If you see a steep drop or a sharp turn at the top, prepare to reduce your speed before reaching the crest. Remember, what goes up must come down. When descending, shift into a lower gear to help control your speed, rather than relying solely on your brakes. This technique helps prevent your brakes from overheating and losing effectiveness, especially on slick surfaces.

Always avoid sudden maneuvers, whether you’re going up or down a hill. Quick turns or lane changes can lead to loss of control, particularly if your tires are biting into ice or packed snow. If you begin to slide, remain calm and steer gently in the direction you want to go. Sudden corrections can lead to oversteering, which may worsen the situation.

Lastly, don’t forget to keep your vehicle well-maintained for winter conditions. Ensure your tires are suitable for snow and ice, with adequate tread depth. Keep your windshield wipers in good condition and your fluid reservoirs filled with winter-grade products to ensure maximum visibility.

By practicing these strategies and remaining attentive, you can navigate hills and slopes safely during the winter months, turning a potentially perilous journey into a manageable one. Your confidence and preparedness will not only keep you safe but also contribute to a more secure road environment for everyone.

12. Dealing with Other Drivers: Staying Safe on the Road

When winter weather strikes, the roads become a shared challenge that tests the skills and patience of every driver. Dealing with other drivers in these conditions requires heightened awareness and a strategic approach to safety. First and foremost, it’s essential to maintain a safe following distance. This buffer zone gives both you and the drivers around you enough time to react to sudden stops or skidding that can occur on icy roads.

Anticipate the actions of others; not every driver will adapt their habits to the winter conditions. Some may still accelerate too quickly or brake too hard, leading to potential accidents. Be cautious when approaching intersections, where black ice can form unnoticed, and always be prepared for the unexpected—like a driver who misjudges their stopping distance and comes to a halt much closer than you’d expect.

Consider using your lights to increase visibility, particularly during heavy snowfall or low-light conditions. This simple action can make a significant difference, helping you stand out in a sea of white. Additionally, signaling your intentions well in advance can help prevent misunderstandings with drivers who may be more focused on their own challenges than on the road ahead.

It’s also wise to remain calm and composed. Winter driving can provoke frustration, especially when encountering reckless behavior from other motorists. However, reacting with aggression can escalate situations unnecessarily. Instead, focus on defensive driving techniques: stay alert, obey speed limits, and be ready to yield to others if they make erratic moves.

Lastly, if conditions become too treacherous, don’t hesitate to make the responsible decision to pull over to a safe location until the weather improves. Remember, ensuring your safety and the safety of others on the road should always be your top priority during winter driving. By staying aware and practicing patience, you can navigate the challenges of winter roads more effectively, helping to keep yourself and those around you safe.

13. Planning Your Routes: Avoiding Dangerous Areas

When winter weather strikes, planning your routes becomes an essential skill for safe driving. This isn’t just about knowing the fastest way to your destination; it’s about being strategic in avoiding potentially treacherous conditions. Before you even turn the key in your ignition, take a moment to review weather forecasts and road conditions. Many local news stations and websites provide real-time updates on road closures, black ice, or heavy snowfall in certain areas, allowing you to adjust your route accordingly.

Utilize mapping apps that offer live traffic updates, as they can alert you to hazardous conditions or accidents along your planned path. These tools can help you identify safer alternatives, whether that means opting for a well-maintained highway instead of a winding back road or choosing a route that avoids known trouble spots like steep hills or poorly plowed neighborhoods.

Additionally, consider the time of day you’ll be driving. Daylight can be your ally, allowing you to navigate more safely and spot potential hazards like icy patches or snowdrifts. If you must travel after dark, be extra vigilant in your route planning; familiarize yourself with the roads you’ll be taking and identify places where you can safely pull over if conditions worsen.

Lastly, don’t hesitate to reach out to locals or consult community forums for tips on which routes are best during winter months. This collective knowledge can be invaluable, helping you avoid areas known for their winter driving challenges. By taking the time to plan your routes carefully, you’re not only safeguarding your journey but also ensuring peace of mind as you navigate the often unpredictable winter landscape. Remember, a little foresight can go a long way in keeping you safe on the roads this winter.

14. When to Avoid Driving Altogether

Driving during winter can present a myriad of challenges, and while preparation can greatly enhance your safety on the road, there are times when the best decision is to simply avoid driving altogether. Recognizing these instances can protect not only you but also other road users.

First and foremost, if severe weather warnings are issued, heed them. Heavy snowfall, ice storms, or blizzard conditions can render roads treacherous, making even seasoned drivers feel vulnerable. If local authorities advise against travel, take that advice seriously. Check weather apps or local news stations for real-time updates on conditions, and remember that forecasts can change rapidly.

Additionally, if you find yourself in a situation where visibility is severely compromised—whether due to heavy snow, fog, or a combination of both—consider postponing your trip. When you can’t see clearly, it becomes nearly impossible to react appropriately to other vehicles, pedestrians, or changing road conditions.

Another critical factor is your personal comfort level with driving in adverse conditions. If you’re not confident in your ability to manage your vehicle on slippery roads or if you feel fatigued, it’s wise to stay off the roads. Fatigue can impair your reaction time and decision-making, increasing the risk of an accident.

Lastly, consider the time of day. Nighttime driving during winter can be particularly hazardous due to lower visibility and the likelihood of icy patches forming. If you can plan your travel during daylight hours, you’ll enhance your ability to navigate safely.

In summary, recognizing when to avoid driving altogether can be as crucial as any driving skill you possess. Prioritize safety by assessing weather conditions, your own comfort level, and the time of day—sometimes the safest choice is to stay home and wait for conditions to improve.

15. Conclusion: Staying Safe and Confident on Winter Roads

As we wrap up our exploration of essential tips for safe winter driving, it’s important to remember that confidence on the road stems from preparation, knowledge, and awareness. Winter weather can be unpredictable, transforming familiar routes into treacherous paths. However, by embracing the strategies outlined in this guide, you can navigate these challenges with greater ease and assurance.

Start by ensuring your vehicle is winter-ready—this means having the right tires, a well-functioning battery, and essential fluids that can withstand freezing temperatures. Equip your car with a winter emergency kit that includes items like blankets, a flashlight, food, and a first-aid kit. This preparedness can make all the difference should you encounter unexpected situations.

Furthermore, adopting safe driving practices—such as maintaining a safe following distance, reducing speed, and avoiding sudden maneuvers—will enhance your control over the vehicle. Remember, it’s not just about reaching your destination; it’s about getting there safely.

Lastly, keep an eye on weather forecasts and road conditions before heading out. If the weather looks particularly brutal, don’t hesitate to adjust your plans. Staying informed will help you make better decisions and allow you to avoid dangerous situations altogether.

With these tips in hand, you can approach winter driving with a sense of confidence and safety. Each journey taken with caution not only protects you but also ensures that you arrive at your destination ready to tackle whatever life has in store, regardless of the weather. Embrace the winter season, drive safely, and enjoy the beauty that comes with it!

As we wrap up our exploration of essential tips for safe winter driving, we hope you feel empowered to tackle the challenging conditions that come with the season. From mastering the art of handling icy roads to understanding the importance of maintaining your vehicle, each step plays a crucial role in keeping you safe on the road. Remember, preparation and awareness are your best allies when winter weather strikes. By applying the strategies outlined in this post, you can confidently navigate through snow and ice, ensuring not just your safety but also that of your passengers and fellow drivers. So bundle up, drive carefully, and embrace the beauty of winter—just with a little extra caution! Safe travels, and may your journeys be clear and uneventful this winter season.

What are the best ways to make homemade ice cream?

As the sun blazes and temperatures rise, nothing quite compares to the joy of indulging in a bowl of creamy, homemade ice cream.

There’s a certain magic in the process—transforming simple ingredients like fresh cream, sugar, and your favorite flavors into a delightful frozen treat that cools you down and brings a smile to your face. Whether you’re craving classic vanilla, adventurous salted caramel, or fruity sorbet, making ice cream at home allows you to customize every scoop to your liking. In this ultimate guide, we’ll take you through the essentials of homemade ice cream-making, from choosing the right tools and ingredients to mastering churn techniques and creative flavor combinations. Get ready to chill out and learn how you can turn your kitchen into an ice cream parlor, perfect for hot summer days or any occasion that calls for a sweet, creamy escape!

1. Introduction to Homemade Ice Cream

What are the best ways to make homemade ice cream?
Credit : whatcanu.com

There’s something undeniably magical about ice cream. The creamy texture, the delightful flavors, and the sheer joy of indulging in a scoop (or two) on a hot summer day can bring a smile to anyone’s face. But have you ever considered taking that joy to the next level by making your own homemade ice cream? This guide will take you on a delicious journey into the world of crafting your very own frozen treats, right from the comfort of your kitchen.

Homemade ice cream isn’t just a nostalgic nod to childhood summers; it’s an opportunity to unleash your creativity and tailor flavors to suit your taste buds. Imagine swirling together your favorite ingredients—be it rich chocolate, fresh fruits, or even unexpected spices. The best part? You have complete control over the quality and freshness of every component that goes into your ice cream. No preservatives, no artificial flavors, just pure, decadent goodness.

In this ultimate guide, we’ll explore the basics of ice cream making, from selecting the right equipment to understanding the science behind the freezing process. Whether you’re a seasoned home chef or a curious beginner, you’ll find tips and techniques to create ice cream that rivals even the most beloved parlors. So grab an ice cream maker (or a trusty blender), gather your ingredients, and get ready to chill out with the ultimate homemade ice cream experience!

2. The Benefits of Making Ice Cream at Home

Making ice cream at home is not just a delightful culinary endeavor; it also comes with a plethora of benefits that can elevate your experience beyond what you’d find in a store-bought pint.

First and foremost, there’s the sheer joy of customization. When you make your own ice cream, you have complete control over the ingredients. This means you can craft flavors that cater to your specific tastes, whether that’s a classic vanilla bean, a rich chocolate fudge, or an adventurous lavender honey. You can experiment with mix-ins like fresh fruits, nuts, or even swirls of caramel and fudge, allowing you to create truly unique concoctions that tantalize your taste buds.

Health-conscious individuals will appreciate the ability to choose wholesome ingredients. Homemade ice cream can be made with organic dairy, natural sweeteners, and fresh, seasonal produce, allowing you to indulge guilt-free. You can even explore dairy-free alternatives using coconut milk, almond milk, or cashew cream, making it an inclusive treat for those with dietary restrictions.

Additionally, making ice cream at home fosters creativity and brings a sense of accomplishment. The process can be a fun activity for the whole family, turning a warm afternoon into a memorable experience. Whether you’re hosting a gathering or simply enjoying a quiet evening, the satisfaction of scooping out a bowl of your own creation adds a personal touch that store-bought options simply cannot match.

Finally, there’s an undeniable charm in sharing your homemade ice cream with friends and family. It can become a centerpiece for gatherings, a thoughtful gift, or a delightful treat on a hot summer day. So, not only do you get to enjoy a delicious dessert, but you also create lasting memories that are just as sweet as the ice cream itself. Embrace the joy of making ice cream at home, and discover how it can be so much more than just a treat—it’s an experience!

3. Essential Tools and Equipment for Ice Cream Making

What are the best ways to make homemade ice cream?
Credit : whatcanu.com

Creating your own homemade ice cream can be a delightful adventure, but having the right tools and equipment is essential to achieving that perfect creamy texture and flavor. Here’s a rundown of the must-have items that will elevate your ice cream-making experience:

1. **Ice Cream Maker**: At the heart of your homemade ice cream journey is the ice cream maker. While there are several types available—manual, electric, and compressor models—electric ice cream makers are often the most user-friendly for beginners. They come with built-in freezing mechanisms that take the guesswork out of the process, allowing you to churn your mixture to perfection without the hassle of ice and salt.

2. **Mixing Bowls**: A set of mixing bowls is essential for combining your ingredients. Opt for a variety of sizes, preferably stainless steel or glass, as they are durable and easy to clean. A larger bowl is perfect for mixing your cream and sugar, while smaller bowls can be used for incorporating flavorings or toppings.

3. **Whisk and Spatula**: A sturdy whisk will help you blend your base smoothly, ensuring that the sugar dissolves completely and the ingredients are well incorporated. A silicone spatula is perfect for scraping down the sides of your bowls and transferring your mixture into the ice cream maker with minimal mess.

4. **Measuring Cups and Spoons**: Accurate measurements are crucial in ice cream making. Invest in a set of measuring cups and spoons to ensure you get the ratios of cream, milk, sugar, and flavorings just right. Precision can make a significant difference in the final taste and texture of your ice cream.

5. **Thermometer**: If you’re making a custard base, a food thermometer is invaluable for ensuring that your mixture reaches the correct temperature without overheating. This step is crucial for achieving the perfect custard consistency and preventing scrambled eggs in your ice cream!

6. **Storage Containers**: Once your ice cream is churned to creamy perfection, you’ll need suitable containers to store it. Airtight plastic or glass containers work well, as they help retain freshness and prevent freezer burn. Consider using containers with wide openings for easy scooping!

7. **Ice Cream Scoop**: Finally, don’t forget a high-quality ice cream scoop. A sturdy scoop allows you to serve your homemade creation with ease, ensuring that every bowl is a generous, perfectly rounded portion.

With these essential tools and equipment in your arsenal, you’ll be well on your way to crafting delicious homemade ice cream that rivals your favorite shop. Get ready to experiment with flavors, create scrumptious toppings, and enjoy the sweet rewards of your labor!

4. Choosing the Right Ingredients: Dairy, Sweeteners, and Flavorings

When it comes to crafting the perfect homemade ice cream, the choice of ingredients plays a pivotal role in achieving that creamy, dreamy texture and flavor explosion that keeps everyone coming back for more. Let’s dive into the essential components: dairy, sweeteners, and flavorings.

**Dairy**: The foundation of any great ice cream starts with high-quality dairy. Whole milk and heavy cream are the stars of the show, providing the rich, velvety mouthfeel that we associate with premium ice cream. If you’re looking for a lighter option, you can also experiment with half-and-half or even non-dairy alternatives like coconut cream or almond milk. Just be mindful that non-dairy bases may yield a different texture and flavor profile. For a delicious twist, consider adding a splash of buttermilk or sour cream to enhance the creaminess and introduce a subtle tang.

**Sweeteners**: The sweetener you choose can significantly impact not just the flavor but also the texture of your ice cream. Traditional granulated sugar is the most common choice, providing a classic sweetness that balances the richness of the dairy. However, you might want to explore alternatives like honey, maple syrup, or agave nectar for a unique twist. Remember that liquid sweeteners may require adjustments to your cream base to maintain the right consistency, so don’t hesitate to experiment! For a sugar-free option, consider using erythritol or stevia, but keep in mind that some sugar substitutes can create a different mouthfeel and may not freeze as smoothly as traditional sugar.

**Flavorings**: This is where your creativity can really shine! Whether you’re opting for classic vanilla, decadent chocolate, or fruity strawberry, the key is to select high-quality flavorings. Pure extracts, like vanilla or almond, will elevate your ice cream to a whole new level, while fresh fruits can add a vibrant burst of flavor. If you’re feeling adventurous, try infusing your cream with herbs like basil or mint, or add spices like cinnamon or nutmeg for a unique flavor profile. Don’t forget about mix-ins—think chocolate chips, nuts, or cookie pieces—that can add both texture and surprise to every delightful scoop.

In summary, the right combination of dairy, sweeteners, and flavorings can transform your homemade ice cream from simple to sensational. So gather your ingredients, unleash your inner ice cream artisan, and get ready to savor the deliciousness of your creations!

5. Base Types: Custard vs. Philadelphia Style

What are the best ways to make homemade ice cream?
Credit : whatcanu.com

When it comes to making homemade ice cream, one of the most crucial decisions you’ll encounter is choosing the right base. The two primary styles of ice cream bases are custard and Philadelphia style, each offering distinct flavors and textures that can elevate your frozen treat to new heights.

**Custard Style Ice Cream** is rich, creamy, and indulgent. Made with egg yolks, this base requires a careful cooking process to create a smooth custard before chilling. The addition of egg yolks not only gives the ice cream a luxurious texture but also enhances the overall flavor profile, creating a velvety experience with every spoonful. The custard base is often cooked gently over a double boiler, allowing the eggs to thicken without scrambling. Once cooled, it’s combined with cream, milk, and sugar, resulting in a decadent ice cream that is perfect for those who appreciate a more complex flavor.

On the other hand, **Philadelphia Style Ice Cream** is the simpler, no-cook alternative, making it a favorite among home ice cream makers seeking a quick and straightforward approach. This style relies primarily on heavy cream and milk, with no eggs involved, which allows for a lighter, fresher taste. The absence of eggs means you skip the time-consuming step of cooking the custard, making it an excellent option for those who want to whip up a batch of ice cream on a whim. Philadelphia style ice cream is particularly well-suited for bold flavors, as the creaminess showcases the ingredients beautifully without the rich undertones of eggs.

Ultimately, the choice between custard and Philadelphia style comes down to personal preference. If you’re in the mood for something luxurious and rich, go for the custard base. But if you’re craving a light, refreshing treat that highlights the flavors of your favorite mix-ins, Philadelphia style is the way to go. Whichever you choose, both styles promise to deliver delicious homemade ice cream that’s sure to impress family and friends alike!

6. Step-by-Step Guide to Making Ice Cream from Scratch

Making ice cream from scratch is a delightful and rewarding experience that allows you to indulge in creamy, dreamy flavors tailored to your preferences. Here’s a simple, step-by-step guide to creating your own ice cream masterpiece:

**Step 1: Gather Your Ingredients**
To kick off your ice cream adventure, collect the essential ingredients: heavy cream, whole milk, granulated sugar, and vanilla extract. For a basic vanilla ice cream, you’ll want about 2 cups of heavy cream, 1 cup of whole milk, and 3/4 cup of sugar. Don’t forget to grab your favorite mix-ins like chocolate chips, fruit, or nuts for that personal touch!

**Step 2: Prepare the Base**
In a medium mixing bowl, whisk together the sugar and whole milk until the sugar is completely dissolved. This will ensure a smooth texture without any gritty surprises. Once mixed, gently fold in the heavy cream and vanilla extract. The mixture should be rich and velvety, setting the stage for your creamy creation.

**Step 3: Chill the Mixture**
To enhance the flavor and improve the final texture, refrigerate the ice cream base for at least 1-2 hours. This step helps the ingredients meld together while cooling the mixture, making it easier to churn later.

**Step 4: Churn Your Ice Cream**
Once your base is chilled, it’s time to churn! If you have an ice cream maker, pour the mixture into the machine and churn according to the manufacturer’s instructions, usually around 20-30 minutes. If you don’t have a machine, you can pour the mixture into a shallow dish and place it in the freezer, stirring vigorously every 30 minutes for about 3-4 hours until it reaches a soft-serve consistency.

**Step 5: Add Mix-Ins**
During the last few minutes of churning (or just before your ice cream sets in the freezer), fold in any mix-ins you desire. Think chocolate chunks, cookie crumbles, or fresh berries. This is where you can get creative, adding your favorite flavors and textures.

**Step 6: Freeze Until Firm**
Once you’ve achieved the desired consistency and added your mix-ins, transfer your ice cream to an airtight container and freeze for at least 4 hours, or until it’s hard enough to scoop. This final freeze will give your ice cream that perfect, scoopable texture.

**Step 7: Serve and Enjoy**
After patiently waiting, your homemade ice cream is ready to be served! Scoop it into bowls or cones, and consider topping it with sprinkles, syrups, or whipped cream. Enjoy the fruits of your labor with friends and family, or keep it all to yourself—after all, you deserve it!

By following these simple steps, you’ll be well on your way to mastering the art of homemade ice cream, treating yourself and your loved ones to a sweet, personalized delight that’s sure to impress!

7. Flavor Ideas: Classic, Unique, and Seasonal Variations

What are the best ways to make homemade ice cream?
Credit : whatcanu.com

When it comes to homemade ice cream, the flavor possibilities are as vast as your imagination. Whether you’re a fan of timeless classics or adventurous enough to explore seasonal and unique concoctions, there’s a flavor waiting to tantalize your taste buds.

**Classic Flavors**
Start with the tried-and-true favorites that have stood the test of time. Vanilla, chocolate, and strawberry are the holy trinity of ice cream flavors. Vanilla serves as a blank canvas, allowing you to add a variety of mix-ins like chocolate chips, cookie dough, or fresh fruit. Chocolate lovers can indulge in rich, creamy chocolate ice cream, perhaps swirled with fudge for added decadence. Meanwhile, strawberry ice cream, made with ripe, juicy berries, provides a refreshing and fruity experience that’s perfect for summer.

**Unique Flavors**
If you’re feeling adventurous, why not venture into the realm of unique and unexpected flavors? Consider experimenting with flavors like lavender honey, where the floral notes of lavender beautifully complement the sweetness of honey. Or try a spicy chocolate ice cream infused with a hint of chili for a surprising kick. For a taste of the tropics, coconut lime could transport you straight to a beachside paradise, while matcha green tea offers a delightful earthy flavor that’s both refreshing and invigorating.

**Seasonal Variations**
Embrace the changing seasons by incorporating seasonal ingredients into your ice cream creations. In the spring, consider a fresh mint chocolate chip, with vibrant green mint leaves blended into a creamy base. Summer calls for refreshing fruit flavors like peach or raspberry, using peak-season produce for an unbeatable taste. As autumn approaches, why not whip up a pumpkin spice ice cream, rich with the warm spices of cinnamon and nutmeg? Finally, during the winter months, indulge in a cozy eggnog ice cream, perfect for holiday gatherings and chilly nights.

No matter which direction you choose, the beauty of making homemade ice cream lies in the ability to customize and experiment. So grab your ingredients, unleash your creativity, and get ready to delight in the endless world of flavors that await you!

8. Tips for Achieving the Perfect Texture

Achieving the perfect texture in homemade ice cream is an art that combines science, technique, and a little bit of love. The texture of your ice cream can make or break the experience, transforming a simple scoop into a creamy delight that melts beautifully in your mouth. Here are some essential tips to help you create that coveted silky-smooth texture.

First and foremost, start with a base that has the right balance of fat and sugar. Higher fat content, usually from heavy cream, not only enhances the flavor but also contributes to a richer texture. Aim for a base that contains at least 10-20% fat, as this will help create that luscious creaminess we all adore. Sugar also plays a crucial role; it lowers the freezing point of the mixture, allowing the ice cream to remain softer and easier to scoop after freezing.

Next, don’t underestimate the power of proper chilling. Before churning your mixture, ensure that it is thoroughly chilled in the refrigerator for several hours. This step not only accelerates the churning process but also helps incorporate air into the mixture, creating a light and fluffy texture. For best results, chill your base to at least 40°F (4°C) before pouring it into the ice cream maker.

When it’s time to churn, keep your ice cream maker bowl as cold as possible. If you’re using a bowl that requires pre-freezing, make sure to freeze it for at least 24 hours. The colder the bowl, the quicker the mixture will freeze, which helps minimize ice crystal formation. This results in a smoother texture, so don’t rush this crucial step!

Another tip is to avoid over-churning. While it may be tempting to let your ice cream maker run indefinitely, doing so can lead to a grainy texture as too much air is incorporated. Keep an eye on the consistency and stop churning once you see a soft-serve texture. After churning, transfer your ice cream to an airtight container and freeze it for a few hours to achieve the ideal scoopable consistency.

Finally, consider adding stabilizers to your mixture. Ingredients like cornstarch or gelatin can help improve the texture by preventing ice crystals from forming during the freezing process. These are especially helpful if you plan to store your ice cream for an extended period.

With these tips in your toolkit, you’ll be well on your way to creating homemade ice cream that’s not just delicious, but also boasts the perfect texture that will have your friends and family coming back for more. So grab your ice cream maker and start experimenting—you’re in for a real treat!

9. Add-ins and Mix-ins: Get Creative with Your Ice Cream

When it comes to homemade ice cream, the possibilities for add-ins and mix-ins are virtually endless, and this is where your creativity can truly shine. Imagine scooping into a velvety base of vanilla bean ice cream, only to discover delightful surprises hidden within. From classic favorites to adventurous twists, the right mix-ins can elevate your homemade concoction from ordinary to extraordinary.

Start with the classics: chunks of rich chocolate, ribbons of caramel, or a generous handful of crunchy nuts can all add texture and flavor. But why stop there? Consider mixing in crushed cookies for a delightful cookie dough flavor, or swirl in some fruit preserves for a refreshing tartness that complements the creaminess of the ice cream. Fresh fruit such as strawberries, blueberries, or bananas can infuse natural sweetness and vibrant color, while also providing a burst of freshness in every bite.

For those who love a bit of crunch, think about incorporating granola or toasted coconut flakes, which not only add a satisfying texture but also a unique flavor profile. If you’re feeling particularly adventurous, try adding spicy elements like crushed chili peppers or ginger, or even savory touches like a sprinkle of sea salt to enhance the sweetness.

Don’t forget about the fun toppings! After churning your ice cream, why not serve it with an array of toppings that guests can customize themselves? A DIY sundae bar with whipped cream, sprinkles, and various syrups can turn your ice cream experience into a party, delighting both kids and adults alike.

No matter how you choose to get creative, remember that the heart of homemade ice cream is all about personal expression. So, grab your favorite add-ins and mix-ins, and let your imagination run wild—after all, the best ice cream is the one that reflects your unique taste!

10. Storing Homemade Ice Cream: Best Practices

Storing homemade ice cream properly is key to preserving its creamy texture and delightful flavor. After all the effort you’ve put into creating that perfect batch, you want to ensure it remains as delicious as the day it was made. Here are some best practices to keep your ice cream in top shape.

First and foremost, choose the right container. Opt for an airtight, freezer-safe container that’s made of plastic or metal, as glass can crack under extreme cold. A shallow container is ideal, as it allows for faster freezing and easier scooping. If you have a larger batch, consider dividing it into smaller portions. This way, every time you open the freezer, you’re not exposing the entire batch to warmer air, which can lead to ice crystals forming—a texture enemy for your homemade creation.

When packing your ice cream into the container, leave just a little bit of space at the top to allow for expansion as it freezes. Then, press a piece of parchment paper directly onto the surface of the ice cream before sealing the container. This additional layer acts as a barrier against air, helping to lock in that velvety smoothness you worked so hard to achieve.

Next, store your ice cream in the coldest part of the freezer, ideally the back, rather than the door. The door tends to fluctuate in temperature every time it opens, which can affect the consistency of your ice cream. Aim to keep your freezer at a steady 0°F (-18°C) or lower to maintain the best texture.

Finally, remember to consume your homemade ice cream within a month for optimal flavor and quality. While it may last longer, the longer it sits in the freezer, the more likely it is to succumb to freezer burn or lose that fresh taste. So, gather your friends and family and invite them over for an ice cream party—after all, nothing is quite as delightful as sharing your homemade treat! With these best practices, your homemade ice cream will remain a delightful indulgence, ready to enjoy whenever the craving strikes.

11. Common Mistakes to Avoid When Making Ice Cream

Making homemade ice cream can be a delightful and rewarding experience, but it’s easy to stumble over a few common pitfalls that could turn your creamy dreams into icy disappointments. Here’s a rundown of mistakes to avoid, ensuring that each batch is a success.

**1. Skipping the Pre-Chill Step:** One of the most crucial steps in making ice cream is pre-chilling your ice cream maker’s bowl. If the bowl isn’t cold enough, your mixture won’t freeze properly, leading to a soupy texture rather than the smooth, creamy consistency you desire. Always ensure you’ve placed the bowl in the freezer for at least 24 hours before use.

**2. Not Tempering Eggs:** If your recipe calls for eggs, make sure to temper them before adding them to your mixture. Quickly whisking the eggs with a small amount of hot cream prevents them from scrambling and ensures a silky texture. This step is vital for custard-based ice creams, so don’t skip it!

**3. Using Too Much Sugar:** While sweetness is essential, overdoing it can lead to an overly soft ice cream that doesn’t freeze well. Sugar lowers the freezing point of your mixture, so balance is key. Follow your recipe closely, and consider tasting along the way to hit that sweet spot without going overboard.

**4. Forgetting to Strain:** If your recipe includes a custard base, always strain it after cooking. This removes any potential egg bits and ensures a perfectly smooth texture. You want your ice cream to be a luxurious treat, free of any unwanted crunch.

**5. Ignoring Flavor Balance:** When adding flavors like vanilla, chocolate, or fruit purees, be mindful of your ratios. Too much flavoring can overpower the overall taste, while too little may leave your ice cream bland. Start with smaller amounts, tasting as you go, to create a well-rounded profile.

**6. Overchurning:** While it may be tempting to keep the mixture churning until it’s super thick, overchurning can lead to icy crystals forming. Once your ice cream reaches a soft-serve consistency, it’s time to stop and transfer it to a container for freezing.

**7. Skipping the Freeze Time:** After churning, it’s essential to let your ice cream set in the freezer for at least a few hours before serving. This additional freezing time allows flavors to meld and the texture to firm up, resulting in a more enjoyable scoop.

By avoiding these common mistakes, you’ll be well on your way to crafting delicious, homemade ice cream that rivals the best scoop shops. Whether you’re experimenting with traditional flavors or getting creative with unique combinations, following these tips will help ensure your frozen treats are nothing short of perfection.

12. Dairy-Free and Vegan Ice Cream Options

As the demand for inclusive dessert options continues to rise, crafting delicious dairy-free and vegan ice cream has never been more rewarding. Whether you’re lactose intolerant, following a vegan lifestyle, or simply looking to explore new flavors and textures, there are countless ways to create creamy and satisfying frozen treats without traditional dairy.

Start with a base that’s rich and flavorful. Coconut milk is a popular choice thanks to its luscious consistency and subtle sweetness, making it an ideal canvas for a variety of flavors. Almond milk and cashew milk are also excellent alternatives, imparting their unique nutty notes to your ice cream. For a thicker, creamier texture, consider using silken tofu, which blends smoothly and provides a protein boost, or opt for a blend of nut butters for added richness.

When it comes to sweeteners, the options are plentiful. Agave nectar, maple syrup, and coconut sugar can infuse your ice cream with natural sweetness, while dates or bananas can provide a whole-food option that also contributes to creaminess. Experiment with different sweeteners to find the perfect balance for your palate.

Flavors are where the fun truly begins! From classic vanilla to decadent chocolate, and adventurous combinations like matcha green tea or lavender, the possibilities are endless. Don’t shy away from adding mix-ins like chopped nuts, dairy-free chocolate chips, or chunks of fresh fruit to elevate the texture and taste of your creations.

To make your process even easier, consider using an ice cream maker, which can help achieve that desired smoothness and prevent ice crystals from forming. If you don’t have one, fear not! Simply pour your mixture into a shallow dish and stir every 30 minutes as it freezes to achieve a still creamy texture.

With these dairy-free and vegan options, you can indulge in homemade ice cream that caters to everyone’s dietary needs while tantalizing their taste buds. So gather your ingredients, unleash your creativity, and get ready to enjoy guilt-free frozen delights that are sure to impress family and friends alike!

13. Fun Serving Ideas and Presentation Tips

When it comes to homemade ice cream, the experience isn’t just about the taste—it’s also about how you serve it! Elevating the presentation of your frozen creations can add a dash of excitement to any gathering and make your homemade treats even more memorable. Here are some fun serving ideas and presentation tips that will impress your family and friends.

**1. Colorful Bowls and Unique Cones:** Start by selecting vibrant bowls or quirky ice cream cones to serve your creations. Opt for rainbow-hued cups, vintage glassware, or even edible waffle bowls for a delightful twist. The right container can turn even the simplest scoop into a visual masterpiece.

**2. Layered Sundaes:** Layering your ice cream can create a stunning presentation. Start with a scoop of one flavor, drizzle some sauce (think chocolate, caramel, or fruit compote), and then add another scoop of a different flavor. Top it off with whipped cream, sprinkles, and a cherry for that classic sundae look.

**3. Garnish with Fresh Ingredients:** Fresh fruits can provide a burst of color and flavor. Consider garnishing your ice cream with slices of strawberries, blueberries, or kiwi. Fresh mint leaves can also add a pop of green that brightens up your dish.

**4. Creative Toppings Bar:** Set up a toppings bar at your next gathering, where guests can customize their own sundaes or cones. Include a variety of toppings such as crushed cookies, nuts, mini marshmallows, and a selection of syrups. This interactive approach not only makes serving fun but also lets everyone tailor their dessert to their liking.

**5. Ice Cream Sandwiches:** For a playful twist, create ice cream sandwiches using cookies, brownies, or even donuts. Roll the edges in sprinkles or nuts for an added surprise. These handheld treats are not only delicious but also make for great photo opportunities!

**6. Themed Presentation:** If you’re hosting a themed party, align your ice cream presentation accordingly. For a beach party, serve ice cream in coconut shells topped with crushed graham crackers to mimic sand. For a movie night, use popcorn boxes filled with scoops of ice cream, complete with a drizzle of chocolate sauce for a fun and unexpected treat.

**7. Freeze and Serve:** For a dramatic effect, freeze your serving plates or bowls before serving. The condensation that forms will give your dessert a frosty, inviting look, while also keeping your ice cream from melting too quickly.

Remember, the key to a delightful ice cream presentation is to let your creativity shine. Each scoop of your homemade ice cream is a blank canvas waiting for your artistic touch. With these fun serving ideas and presentation tips, you’ll be ready to create an unforgettable dessert experience that will leave everyone craving more!

14. Hosting an Ice Cream Party: Themes and Recipes

Hosting an ice cream party is a delightful way to gather friends and family while indulging in everyone’s favorite frozen treat. The beauty of an ice cream party lies in its versatility; it can be as simple or as extravagant as you’d like, and the themes can be tailored to suit any occasion. Here are some fun ideas to get you started, along with delicious recipe suggestions that will make your ice cream party unforgettable.

**Themed Parties:**
1. **Classic Sundae Bar:** Set up a stunning sundae bar with a variety of ice cream flavors like vanilla, chocolate, and strawberry. Offer an array of toppings, from hot fudge and caramel sauce to sprinkles, crushed cookies, and fresh fruits. Provide fun bowls and spoons, and let guests create their own masterpiece while mingling.

2. **Tropical Luau:** Transport your guests to a tropical paradise with flavors inspired by the islands. Think coconut, pineapple, and mango ice creams. Pair these with toppings like toasted coconut flakes, macadamia nuts, and rum-infused fruit compote. Decorate with Hawaiian leis and play some upbeat island music to enhance the vibe.

3. **Decadent Chocolate Affair:** For the chocolate lovers, host a chocolate-themed party with rich chocolate ice cream as the star. Experiment with different recipes—dark chocolate, white chocolate raspberry, or even chocolate brownie ice cream. Add toppings like chocolate shavings, brownie bites, and chocolate syrup for an indulgent experience.

4. **Seasonal Flavors:** Celebrate the seasons by featuring flavors that reflect the time of year. In summer, go for refreshing mint chocolate chip and strawberry basil. In fall, pumpkin spice and apple pie ice cream can capture the essence of autumn. Create seasonal decor to complement the flavors and make the event feel special.

**Recipe Inspiration:**
– **No-Churn Vanilla Ice Cream:** Simple to prepare, this recipe requires just heavy cream, sweetened condensed milk, and vanilla extract. Mix and freeze for a creamy, dreamy treat that can serve as a base for countless toppings.

– **Strawberry Sorbet:** Perfect for a refreshing dessert, this sorbet combines fresh strawberries, sugar, and a touch of lemon juice. Blend until smooth, freeze, and serve for a light, fruity option that everyone will love.

– **Chocolate Chip Cookie Dough Ice Cream:** Who doesn’t love cookie dough? Make a classic vanilla ice cream base and mix in chunks of cookie dough for a nostalgic twist that brings back childhood memories.

– **Dairy-Free Coconut Ice Cream:** For guests with dietary restrictions, whip up a coconut milk-based ice cream. Infuse it with vanilla and throw in some shredded coconut for added texture.

As you plan your ice cream party, don’t forget the essential elements—fun activities like ice cream-making contests or tasting games can keep the energy high. Provide comfortable seating and perhaps even a photo booth with fun props to capture the sweet memories. With delicious flavors, creative themes, and a festive atmosphere, your ice cream party is sure to be a hit, leaving your guests with smiles and satisfied taste buds!

15. Conclusion: Enjoying Your Homemade Creations

As you reach the end of this delightful journey into the world of homemade ice cream, it’s time to savor the fruits of your labor. There’s something incredibly satisfying about crafting your own frozen treats—it’s not just about the creamy, dreamy flavors but also the joy of sharing these creations with family and friends.

Imagine opening your freezer to find a colorful array of ice cream tubs, each representing a different flavor you’ve expertly concocted. From classic vanilla bean to adventurous lavender honey or rich chocolate fudge, the choices are as limitless as your imagination. The moment you scoop that first serving, the silky texture and vibrant taste remind you of the care and creativity that went into each batch.

But the enjoyment doesn’t stop there. Picture a sunny afternoon, the laughter of loved ones filling the air as they gather around a bowl of your homemade ice cream. Whether it’s a simple scoop served in a cone or an extravagant sundae topped with whipped cream, sprinkles, and cherries, each bite is a celebration of your culinary skills. You’ll find that your creations spark conversation, evoke memories, and create new experiences, making every scoop a cherished moment.

So, as you conclude your ice cream-making adventure, remember that the real reward lies not just in the creamy delights you’ve made but in the smiles and laughter they bring. Embrace the messiness of experimentation, keep refining your flavors, and most importantly, enjoy every delicious moment of your homemade creations. After all, the joy of ice cream is best when shared!

As we wrap up our ultimate guide to making homemade ice cream, we hope you’re feeling inspired to unleash your inner ice cream artisan and create delightful frozen treats that will impress family and friends alike. With the simple techniques and creative flavor ideas we’ve shared, you now have the tools to craft everything from classic vanilla to adventurous combinations that tickle the taste buds. So, gather your ingredients, fire up that ice cream maker, and embark on a delicious journey that not only cools you down but also warms your heart with the joy of homemade goodness. Don’t forget to share your delicious creations with us—tag us on social media and let the world see your frozen masterpieces! Enjoy every scoop!