How to fix a broken window pane?

A broken window pane can be more than just an eyesore; it can compromise the safety and comfort of your home.

Whether it’s a result of an unfortunate accident, a sudden storm, or simply wear and tear over time, dealing with a shattered or cracked window can feel overwhelming. But fear not! With the right tools and a little bit of guidance, you can tackle this DIY project with confidence and restore your window to its former glory. In this step-by-step guide, we’ll walk you through the essential techniques and tips that professionals use to fix broken window panes efficiently and effectively. From assessing the damage and gathering materials to executing the repair with precision, you’ll discover everything you need to know to become a home repair hero. Say goodbye to that broken pane and hello to a secure and beautifully restored window!

1. Introduction: Understanding the Importance of Window Maintenance

How to fix a broken window pane?
Credit : whatcanu.com

Windows are often the unsung heroes of our homes, quietly serving their purpose while enhancing our living spaces. They not only allow natural light to flood in and provide stunning views of the outside world, but they also play a crucial role in the overall efficiency and safety of your home. A broken window pane, however, can disrupt this balance, leading to issues such as drafts, heat loss, and even security risks.

Understanding the importance of regular window maintenance is key to ensuring that your home remains comfortable and safe. Just like any other part of your house, windows require care and attention to prevent damage and prolong their lifespan. Regular checks can help you identify minor issues before they escalate into costly repairs, saving you time and money in the long run.

Moreover, maintaining your windows enhances your home’s curb appeal and can even increase its value. A well-maintained window not only improves aesthetics but also contributes to energy efficiency, helping to lower utility bills and reduce your carbon footprint. This is especially relevant in today’s world, where eco-conscious living is more important than ever.

In this guide, we will walk you through the steps of fixing a broken window pane, equipping you with the knowledge and skills needed to tackle this task like a pro. Whether it’s a small crack or a shattered pane, with the right approach, you can restore your windows to their former glory and ensure they continue to serve your home effectively for years to come. Let’s dive in and get started!

2. Safety First: Essential Safety Gear and Precautions

When it comes to repairing a broken window pane, safety should always be your top priority. Handling glass can be hazardous, and taking the right precautions can prevent injuries and ensure a smooth repair process. Start by donning essential safety gear to protect yourself from potential hazards. Here’s what you’ll need:

1. **Safety Glasses**: Protect your eyes from flying glass shards and dust. A good pair of safety glasses will shield your vision from any unexpected accidents that might occur as you work.

2. **Gloves**: Thick, cut-resistant gloves are crucial for safeguarding your hands. They will not only protect you from sharp edges but also provide a better grip on tools and materials.

3. **Dust Mask**: If you’re working with older windows, there’s a chance you may encounter lead paint or dust particles. A dust mask will help filter out harmful particles and keep your lungs safe while working.

4. **Long Sleeves and Pants**: Wearing long sleeves and pants is an effective way to cover your skin and minimize the risk of cuts. Opt for durable fabrics that can withstand minor abrasions.

5. **Closed-Toe Shoes**: Ensure you’re wearing sturdy, closed-toe shoes for added foot protection. This is especially important if you drop any glass shards or tools during the repair.

Once you’re properly equipped, make sure to clear the surrounding area of any obstacles or tripping hazards. Lay down a drop cloth or tarp to catch any debris that may fall during the repair, making cleanup easier afterward. Additionally, keep pets and young children at a safe distance from the work area to prevent accidents.

Before you begin the actual repair, take a moment to assess the situation. Look for any exposed glass or sharp edges and ensure you’re prepared to handle them carefully. By taking these essential safety measures, you’ll set the stage for a successful repair while safeguarding yourself against potential injuries. With safety as your foundation, you’re now ready to tackle the next steps in fixing that broken window pane like a pro!

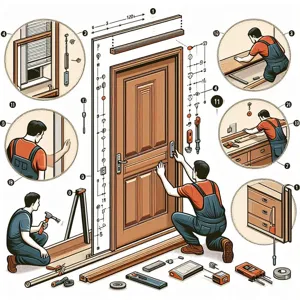
3. Tools and Materials Needed for the Job

How to fix a broken window pane?
Credit : whatcanu.com

Before diving into the repair process, it’s crucial to gather all the necessary tools and materials that will help you fix your broken window pane efficiently and safely. Having everything on hand will save you time and ensure a smoother workflow. Here’s what you’ll need:

1. **Safety Gear**: First and foremost, prioritize safety. Equip yourself with safety goggles to protect your eyes from glass shards, heavy-duty gloves to shield your hands, and a dust mask to avoid inhaling any debris.

2. **Measuring Tape**: A measuring tape is essential for accurately sizing the broken pane and ensuring that your replacement glass fits perfectly into the frame.

3. **Utility Knife**: This will come in handy for cutting away any old paint or putty surrounding the broken pane, allowing for a clean removal and a smooth installation of the new glass.

4. **Putty Knife**: A putty knife is useful for applying new putty and smoothing it out once the replacement glass is in place.

5. **Replacement Glass**: Of course, you’ll need a piece of glass that matches the dimensions of your broken pane. If you’re unsure where to buy it, local hardware stores or glass supply shops are great options.

6. **Glazing Putty**: This is a crucial material for sealing the new glass into the frame. It helps to create a weather-tight seal while also providing stability.

7. **Glazing Points or Clips**: These small metal pieces are used to secure the glass in place. Depending on your window frame, you may need either glazing points or clips to hold the new pane securely.

8. **Hammer**: A hammer is necessary for gently tapping in glazing points or securing any loose components of the window frame.

9. **Caulk or Weather Stripping (Optional)**: If your window has gaps or needs extra insulation, caulk or weather stripping can help improve its energy efficiency.

Once you have all these tools and materials ready, you’ll be well-equipped to tackle your window pane repair like a true professional. Remember, preparation is half the battle, and having the right supplies at your fingertips will make the job not only easier but also more enjoyable.

4. Assessing the Damage: Identifying the Type of Break

Before you dive into repairs, it’s crucial to assess the damage thoroughly. Identifying the type of break in your window pane will help you determine the best course of action and whether you can tackle the fix yourself or if you should call in a professional.

Start by examining the glass closely. Is it a clean break, or is the glass shattered into a multitude of tiny pieces? A clean break often indicates that you can simply replace the pane, while a shattered window may require additional steps for safe removal. If the break is minor, with only a small crack or chip, you might be able to utilize a repair kit designed for glass. However, if the damage extends beyond a small area, it’s likely time for a full pane replacement.

Next, consider the frame. Is it wood, aluminum, or vinyl? Wooden frames may have warped or rotted, requiring not only a glass replacement but also some carpentry work. Aluminum frames can bend or dent, while vinyl frames are generally more durable but can still incur damage.

Don’t forget to check for any potential hazards as well. Are there sharp edges or loose shards that could pose a risk? Wearing heavy-duty gloves and safety goggles is paramount at this stage to protect yourself. By accurately assessing the type of break and the condition of the frame, you can move forward with confidence, knowing exactly what materials and tools you’ll need for your repair job. Remember, a careful evaluation now can save you time and hassle later on as you work to restore your window to its former glory.

5. Preparing the Area: Clearing the Workspace

How to fix a broken window pane?
Credit : whatcanu.com

Before you dive into the repair process, it’s essential to prepare the area where you’ll be working. A clean, organized workspace not only enhances safety but also ensures that you have everything you need within reach, making the repair go smoothly. Start by clearing away any furniture, plants, or decorations that might obstruct your access to the broken window. If you’re working indoors, consider moving items that could be inadvertently damaged by falling glass or dust.

Next, lay down a drop cloth or old newspapers beneath the window to catch any debris or shards that may fall during the repair. This will make cleanup easier and protect your flooring from scratches or stains. If you’re working outside, ensure the area is free of any clutter that could pose a tripping hazard.

Safety should always be your top priority, so don your protective gear before proceeding. Put on safety goggles to shield your eyes from sharp glass fragments and gloves to protect your hands from cuts. If the window is particularly large or high, you might also want to use a sturdy ladder for better access. By taking the time to prepare your workspace, you set the stage for a successful repair, allowing you to focus on the task at hand without distractions or safety concerns. With your area clear and organized, you’ll be ready to tackle the next steps with confidence.

6. Removing the Broken Glass: Step-by-Step Instructions

Removing the broken glass from a window pane can seem daunting, but with the right tools and a careful approach, you can tackle this task like a pro. Here’s a step-by-step guide to ensure you do it safely and effectively.

**Step 1: Gather Your Tools and Safety Gear**
Before you begin, make sure you have a few essential tools on hand: heavy-duty gloves, safety goggles, a flathead screwdriver or putty knife, pliers, and a trash bag for disposal. Wearing gloves and goggles is crucial to protect yourself from sharp glass shards.

**Step 2: Assess the Damage**
Take a moment to inspect the broken window. If there are large shards still held in place, it’s best to leave them alone for now. If the glass has shattered into smaller pieces, you may need to remove the entirety of the pane.

**Step 3: Remove Loose Glass**
Carefully clear away any loose glass from the window frame. Use your gloved hands to pick up smaller pieces, and for larger shards, gently push them towards the center of the pane with your putty knife or flathead screwdriver. This helps to minimize the risk of injury.

**Step 4: Take Out the Glazing Points**
Look for the small metal glazing points or clips that hold the glass in place. Using your flathead screwdriver, gently pry these out from the frame. Be careful not to damage the surrounding wood or material as you do this.

**Step 5: Remove the Glass Pane**
Once the glazing points are removed, it’s time to take out the broken glass pane. If the pane is still partially intact, carefully lift it out from the frame. If it’s in pieces, use your pliers to grip the edges of each shard and pull them out one by one. Make sure to dispose of these pieces in your trash bag immediately to prevent any accidents.

**Step 6: Clean the Frame**
With the broken glass removed, take a moment to clean the window frame. Use a damp cloth to wipe away any debris or glass dust. This step ensures a clean working area for your new glass pane installation.

**Step 7: Dispose of the Broken Glass Properly**
Finally, securely wrap the broken glass in newspaper or other protective material before placing it in the trash bag. This precaution prevents any injuries to you or sanitation workers who handle the waste.

By following these steps, you can safely remove a broken window pane and prepare your frame for a new installation. With patience and care, you’ll be well on your way to restoring your window to its former glory.

7. Measuring and Cutting the New Glass Pane

How to fix a broken window pane?
Credit : whatcanu.com

When it comes to replacing a broken window pane, precision is key. The seventh step in our guide, measuring and cutting the new glass pane, requires careful attention to detail to ensure a snug fit that keeps your home secure and energy-efficient.

Start by taking accurate measurements of the window frame. Use a tape measure to record the height and width of the opening, making sure to measure at multiple points, as frames can sometimes be slightly warped. Take the smallest measurement to ensure your new glass fits perfectly. It’s a good idea to jot down your measurements on a notepad or use your smartphone to avoid any mix-ups.

Once you have your dimensions, it’s time to select the right glass. Choose tempered or laminated glass for added durability, especially if the window is in a high-traffic area or if safety is a concern. With your glass type decided, head to a local hardware store or glass supplier. Many places can cut the glass to your specifications, simplifying the process. If you prefer to cut the glass yourself, make sure to pick up a glass cutter, straight edge, and safety goggles.

To cut the glass, lay it flat on a sturdy surface, ideally a workbench or table covered with a soft cloth to prevent scratches. Align your straight edge with the measurement you recorded, ensuring it is perfectly straight. With firm pressure, score the glass along the edge of the straight edge, creating a shallow incision. Remember to apply even pressure and make a single, continuous motion for the best result. Once scored, gently press down on both sides of the score line to snap the glass cleanly apart.

Finally, smooth the edges of the newly cut glass with a fine-grit sandpaper to eliminate sharp edges that could pose a hazard. With your new pane ready, you’re one step closer to restoring your window to its former glory. This critical phase of the repair not only showcases your precision but also sets the stage for a secure and visually pleasing installation.

8. Preparing the Frame for the New Glass

Before you can insert the new glass pane, it’s crucial to prepare the window frame meticulously. This step is vital to ensure a snug fit and a long-lasting repair, so let’s walk through the process.

Start by inspecting the frame for any debris, old putty, or damaged materials that might hinder the new glass from sitting properly. Carefully remove any remnants of the old glazing compound using a putty knife. Be cautious during this process—too much force can damage the frame or cause splinters. If you encounter stubborn pieces, a heat gun can help soften the putty, making it easier to scrape away.

Once the old putty is cleared, examine the frame for any imperfections or damage. If you spot any cracks or rotting wood, it’s essential to address these issues before proceeding. You can fill small cracks with wood filler and sand them down to create a smooth surface. For larger damage, you might need to replace sections of the frame or even consider a professional repair if the damage is extensive.

Next, clean the frame thoroughly to remove dust and debris. A clean surface allows for better adhesion of the new glazing. If you’re working with a wooden frame, consider applying a coat of primer to protect it from moisture and enhance the bond with the new putty.

Finally, measure the opening carefully to ensure your new glass pane fits perfectly. Take your time with this measurement—precision is key! With the frame prepped and ready, you’ll be all set for the next step: installing the new glass. This preparation not only sets the stage for a secure fit but also ensures that your window will look as good as new, maintaining both functionality and aesthetic appeal.

9. Installing the New Glass Pane: Techniques for a Secure Fit

Installing the new glass pane is a crucial step in ensuring your repair stands the test of time. With the right techniques, you can achieve a secure fit that not only enhances the aesthetic appeal of your window but also provides insulation and protection against the elements. Here’s how to do it like a pro.

**Prepare the Frame:** Before inserting the new glass, ensure the window frame is clean and free of any debris or old putty. Use a putty knife to scrape away remnants of the old glazing compound and sand down any rough edges. This creates a smooth surface for the new pane to rest against, allowing for a better seal.

**Apply a Glazing Compound:** Once the frame is prepped, it’s time to apply a bead of glazing compound. This will act as a cushion and sealant for your new glass. Using your putty knife, spread a generous yet even layer along the frame where the glass will sit. Make sure to cover the edges thoroughly, as this will help secure the glass and prevent drafts.

**Carefully Place the Glass Pane:** With the glazing compound in place, gently lift your new glass pane and position it into the frame. Take your time to ensure it’s seated evenly against the compound. It’s important to handle the glass carefully to avoid any chips or cracks during this process.

**Secure the Glass with Points:** To hold the glass in place, use glazier points—small metal tabs designed to keep the glass from shifting. Insert these points into the frame, spaced about 6 inches apart, using a putty knife or a small hammer. Press each point gently into the frame until they are flush with the surface. This will provide additional stability for the glass.

**Final Touches with Glazing Compound:** Once the glass is secured, it’s time to seal the edges. Apply another layer of glazing compound around the perimeter of the glass, ensuring it fills any gaps between the glass and the frame. Smooth it out with your putty knife for a clean finish. This not only enhances the window’s appearance but also provides insulation and protection against moisture.

**Let it Cure:** Finally, allow the glazing compound to cure according to the manufacturer’s instructions—usually a few days. During this time, avoid putting any pressure on the glass or reattaching any window hardware. This curing period is essential for achieving a solid, long-lasting repair.

By following these techniques, you’ll not only secure your new glass pane but also gain the satisfaction of completing a professional-quality repair. Whether it’s for a small crack or a complete replacement, proper installation is key to maintaining the integrity of your windows and the comfort of your home.

10. Sealing the Edges: Ensuring Weather Resistance

Sealing the edges of your newly installed window pane is a crucial step in ensuring long-lasting durability and optimal weather resistance. This final touch not only enhances the aesthetic appeal of your window but also protects your home from the elements, preventing drafts, moisture, and pests from invading your space.

Begin by selecting a high-quality weatherproof caulk suitable for your window type—silicone or polyurethane caulk are popular choices due to their flexibility and strength. Before applying, make sure the surface is clean and dry. Use a utility knife or scraper to remove any old caulk or debris from the edges of the frame, ensuring a smooth surface for adhesion.

Once prepped, cut the tip of the caulk tube at a 45-degree angle, making a small opening to control the flow. Load the caulk into a caulking gun for easier application. Start at one corner of the window and apply a continuous bead of caulk along the edges, working your way around. It’s important to maintain even pressure on the trigger to produce a consistent line of caulk.

After applying the caulk, use your finger or a caulking tool to smooth the bead, pressing it firmly into the gap between the window frame and the glass. This not only ensures a tight seal but also creates a polished finish that enhances the overall look of your window.

Allow the caulk to cure as per the manufacturer’s instructions, which typically takes 24 hours. Once it’s fully set, your window will be not only beautifully framed but also ready to withstand whatever Mother Nature throws its way. By sealing the edges effectively, you’ll enhance your home’s energy efficiency, reduce maintenance costs, and enjoy peace of mind knowing your window is protected from water infiltration and air leakage for years to come.

11. Finishing Touches: Painting and Touching Up the Frame

Once your new window pane is securely in place and the putty has dried, it’s time to turn your attention to the finishing touches that will restore your window frame to its former glory. This step not only enhances the aesthetic appeal of your window but also protects the wood from the elements.

Start by inspecting the window frame for any signs of wear and tear. If the wood has chipped or the paint has peeled, a light sanding will help create a smooth surface for painting. Use fine-grit sandpaper to gently buff any rough spots, ensuring you don’t damage the new glazing. Wipe away any dust with a damp cloth to prepare the surface for paint.

Next, select a high-quality exterior paint that matches the existing color of your window frame. If you’re feeling adventurous, this could also be the perfect opportunity to refresh the color! Using a small brush, apply a thin layer of paint to the frame, starting from the edges and working your way inward to avoid drips. Be sure to paint any corners and crevices thoroughly for a neat finish. If necessary, a second coat may be applied after the first has dried completely, providing a richer color and better protection.

For added protection against moisture, consider applying a clear sealant over the painted surface once it has dried. This will help extend the lifespan of your paint job and keep your frame looking fresh for years to come.

Finally, take a step back and admire your handiwork. The finishing touches not only complete the repair but also enhance the overall look of your home. With a little patience and attention to detail, you’ve transformed a broken window pane into a beautifully restored feature that adds character and charm to your space.

12. Cleaning Up: Proper Disposal of Broken Glass

Once you’ve successfully replaced the broken window pane and admired your handiwork, it’s time to address the remnants of your project: the shattered glass. Proper disposal of broken glass is not just a matter of convenience; it’s crucial for safety. Sharp shards can pose a serious risk, not only to you but also to anyone else who may come across them.

Start by carefully collecting the larger pieces of glass. Use a pair of sturdy gloves to protect your hands from cuts, and consider using a thick towel or a piece of cardboard to scoop up the shards. Avoid using your bare hands, as even the smallest pieces can be dangerously sharp. Place the larger glass fragments into a sturdy, puncture-resistant container—an old coffee can or a heavy-duty plastic bag works well. Seal the container tightly to prevent any accidental spills.

For the tiny slivers and dust that remain, a damp paper towel or cloth can be your best ally. Gently wipe down the area surrounding the window frame, ensuring that you capture as many of the minuscule shards as possible. Once you’ve thoroughly cleaned the area, dispose of the used paper towels in your puncture-resistant container.

To complete the cleanup, check your surrounding environment for any stray pieces of glass that may have fallen during the repair. Take a moment to scan the floor and nearby surfaces, ensuring the area is completely safe for everyone. Finally, dispose of the sealed container in accordance with your local waste management guidelines. Many municipalities have specific instructions for disposing of broken glass, so be sure to check those to avoid any penalties.

By taking the time to clean up properly, you not only enhance your own safety but also demonstrate responsibility in your DIY endeavors. With everything tidied up, you can step back and admire your finished project, knowing you handled the task like a true professional!

13. Tips for Preventing Future Breaks

Preventing future breaks in your window panes is essential not only for maintaining the aesthetic appeal of your home but also for ensuring safety and energy efficiency. Here are some practical tips that can help you safeguard your windows against potential damage:

1. **Invest in Quality Materials**: When replacing a broken pane or installing new windows, choose high-quality glass and sturdy frames. Tempered glass, for instance, is much more resistant to impact and can withstand extreme weather conditions, reducing the likelihood of future breaks.

2. **Regular Maintenance**: Make window maintenance a routine task. Check for signs of wear and tear, such as cracks in the frames or seals. Ensure that the caulking is intact to prevent water infiltration, which can weaken the structure over time. Regularly clean your windows, as dirt and debris can contribute to scratches and potential fractures.

3. **Install Screens**: If you have windows that open, consider installing screens. Not only do they keep insects at bay, but they also act as a protective barrier against flying debris during windy conditions. Screens can help reduce the risk of accidental impacts, particularly in stormy weather.

4. **Be Mindful of Landscaping**: Keep trees and bushes trimmed away from your windows. Overhanging branches can pose a risk during storms, and falling debris can easily shatter glass. Additionally, ensure that decorative elements like garden ornaments or furniture are placed away from window areas to minimize the chances of accidental bumps.

5. **Window Films**: Applying a protective window film can be an effective way to enhance their durability. These films can help hold shattered glass in place in the event of a break, reducing the risk of injury and preventing further damage. They also provide an additional layer of insulation, helping to maintain your home’s energy efficiency.

6. **Educate Your Family**: Make sure everyone in your household is aware of how to treat windows with care. Teach children not to play rough near windows and to avoid throwing objects in close proximity. Awareness is key in preventing accidental breaks.

7. **Consider Security Measures**: Installing security features, such as window locks or security cameras, can deter potential break-ins that may lead to broken panes. A secure home is less likely to experience random acts of vandalism or accidental damage.

By taking these proactive measures, you can significantly reduce the likelihood of future window breaks, ensuring that your home remains safe, energy-efficient, and visually appealing for years to come.

14. When to Call a Professional: Knowing Your Limits

While tackling a broken window pane can be a rewarding DIY project, there are certain situations where calling in a professional is not just advisable, but necessary. Recognizing your limits is key to ensuring the job is done safely and effectively.

First and foremost, assess the extent of the damage. If the break is a small crack, you might be able to handle it with a simple repair kit. However, if the glass is shattered into countless pieces or the frame is severely damaged, it may be time to reach for the phone. Professionals possess the skills and tools required to manage more complex repairs, ensuring that your window is restored to its original condition without jeopardizing your safety.

Additionally, consider your level of experience. If you’ve never worked with glass before, the prospect of handling sharp shards and heavy materials can be daunting. Professionals are trained to deal with these hazards, minimizing the risk of injury and ensuring the job is completed without mishaps.

Another factor to consider is the type of window. Specialty glass, such as stained or insulated panes, often requires specific expertise to repair. If your window falls into this category, opting for a professional is wise. They can also advise you on whether a complete replacement is necessary, saving you time and potential extra costs down the line.

Lastly, think about your timeline. If you need the repair done quickly to secure your home or office, a professional service can expedite the process, offering prompt solutions that you may not be able to achieve as a DIYer.

In summary, knowing when to call a professional can save you time, ensure your safety, and provide peace of mind. When in doubt, trust the experts to get the job done right. Your windows—and your home—will thank you.

15. Conclusion: The Satisfaction of a Job Well Done

In the world of home repairs, few tasks are as gratifying as fixing a broken window pane. As you stand back to admire your handiwork, a sense of accomplishment washes over you. Not only have you restored functionality and aesthetics to your home, but you’ve also gained valuable skills that will serve you well in future DIY endeavors.

Completing a project like this instills confidence and reinforces the notion that with a bit of patience and the right tools, you can tackle a wide range of repairs. Remember, each step you followed—from measuring the glass and removing the old pane to securing the new one and sealing it tight—was an opportunity to learn and grow.

Moreover, the satisfaction of a job well done extends beyond just the immediate results. You’ve invested time, effort, and care into your living space, enhancing both its value and your personal connection to it. Plus, there’s something undeniably rewarding about knowing you’ve saved money by avoiding costly professional repairs.

As you close the chapter on this project, take a moment to appreciate the transformation. Reflect on how far you’ve come and envision the next repair or upgrade you’ll take on. With every fix, you become more adept, more resourceful, and more empowered to maintain and beautify your home. So, celebrate this victory, and let it inspire you to tackle future projects with the same enthusiasm and determination. After all, the journey of home improvement is as fulfilling as the results it yields.

In conclusion, we hope this step-by-step guide has empowered you to tackle the task of fixing a broken window pane with confidence and ease. By following these professional tips and techniques, you can not only restore your window’s functionality but also enhance the beauty and energy efficiency of your home. Whether you’re a seasoned DIY enthusiast or a first-time fixer, remember that every repair is an opportunity to learn and improve your skills. So gather your tools, roll up your sleeves, and take pride in transforming your broken window into a flawless feature of your home. Happy repairing, and don’t hesitate to share your success stories or any questions you may have!

How to install a new door?

Installing a new door may seem like a daunting task, but with the right guidance, it can be a rewarding DIY project that transforms the look and function of your space.

Whether you’re upgrading for aesthetics, improving energy efficiency, or enhancing security, knowing how to properly install a door can save you time and money while giving you the satisfaction of a job well done. In this comprehensive step-by-step guide, we’ll take you through the entire process—from selecting the perfect door for your home to the final touches that ensure a flawless fit. With practical tips, essential tools, and expert advice, you’ll be equipped to tackle this project with confidence, making your new door installation feel like a professional achievement. So roll up your sleeves and get ready to elevate your home’s entrance with our easy-to-follow instructions!

1. Introduction: Why Installing a Door Yourself is a Great Idea

How to install a new door?
Credit : whatcanu.com

Installing a new door might seem like a daunting task, but taking it on yourself can be a rewarding and cost-effective endeavor. There are several compelling reasons why installing a door yourself is not only practical but also a fantastic opportunity to enhance your home.

First and foremost, DIY door installation allows you to save money. Hiring a professional can quickly add up in costs, with labor charges often exceeding the price of the door itself. By rolling up your sleeves and tackling the project on your own, you not only gain financial savings but also the satisfaction of knowing you accomplished it yourself.

Additionally, installing a door gives you complete control over the design and materials used. You can select the perfect style, color, and finish that complements your home’s aesthetic. Whether you prefer a classic wooden door, a sleek modern design, or a sturdy steel option, the choice is entirely yours. This personal touch can greatly enhance your home’s curb appeal and overall value.

Moreover, the sense of accomplishment that comes with completing a home improvement project cannot be overstated. Each step in the installation process, from measuring and cutting to hanging the door and securing the hardware, provides an opportunity to learn new skills and boost your confidence as a DIYer.

Lastly, the process of installing a door yourself fosters a deeper connection with your home. Each time you pass through that newly installed entrance, you’ll be reminded of your hard work and dedication. You’ll appreciate the time and effort you put into creating a welcoming space for family and friends.

In this guide, we’ll walk you through the step-by-step process of installing your new door like a pro, ensuring you have all the information you need to achieve a flawless finish. So grab your tools, roll up your sleeves, and let’s get started on this exciting home improvement journey!

2. Tools and Materials You’ll Need

Before diving into the installation process, it’s crucial to gather all the necessary tools and materials to ensure a smooth and efficient project. Having everything at your fingertips will not only save you time but also prevent frustration mid-installation. Here’s a comprehensive list of what you’ll need:

**Tools:**
1. **Tape Measure:** A reliable tape measure is essential for ensuring precise measurements of your new door and the frame.
2. **Level:** A level will help you confirm that your door is perfectly aligned, preventing any unwanted gaps or misalignment.
3. **Screwdriver Set:** Both flathead and Phillips screwdrivers will be needed for various screws throughout the installation.
4. **Drill:** A power drill with drill bits is critical for creating pilot holes and securing screws efficiently.
5. **Hammer:** A good hammer will be useful for tapping in shims or prying out old door frames if you’re replacing an existing door.
6. **Chisel:** If your new door requires mortising for hinges, a sharp chisel will ensure clean and precise cuts.
7. **Utility Knife:** This will come in handy for various cutting tasks, such as trimming shims or removing old weather stripping.

**Materials:**
1. **New Door:** Choose a door that fits your style and the dimensions of your door frame. Don’t forget to check if it comes pre-hung or as a slab!
2. **Hinges:** Be sure to select sturdy, high-quality hinges that can support the weight of your new door.
3. **Door Handle/Lockset:** Depending on your preference, choose a handle and lockset that complements your door and enhances security.
4. **Shims:** These small, wedge-shaped pieces will help you adjust the door frame for a perfect fit and level installation.
5. **Weather Stripping:** If you’re replacing an exterior door, weather stripping will help improve energy efficiency by blocking drafts.
6. **Wood Glue or Construction Adhesive:** This will be useful for securing shims in place or reinforcing joints.

With these tools and materials ready, you’ll be well-equipped to tackle your door installation with confidence. Remember, preparation is key to achieving a professional finish, so take the time to gather everything you need before you start. Happy installing!

3. Choosing the Right Door for Your Space

How to install a new door?
Credit : whatcanu.com

Choosing the right door for your space is a pivotal step in your installation journey, as it sets the tone for both aesthetics and functionality. Before you head to the store or browse online, consider the following factors to ensure you select a door that complements your home and meets your needs.

First and foremost, assess the style of your home. Whether you have a modern, traditional, or eclectic design, the door should harmonize with the overall aesthetic. For a contemporary space, sleek and minimalistic designs work wonders, while a classic home may benefit from a solid wood door with intricate details.

Next, think about the material. Doors come in various materials, each offering unique benefits. Solid wood doors exude warmth and durability, while fiberglass doors provide insulation and are resistant to the elements. Steel doors are incredibly secure and great for exterior use, while hollow-core doors are a budget-friendly option for interior spaces. Consider your climate and the level of maintenance you’re willing to commit to when making your choice.

Don’t forget to measure your door frame carefully! A door that’s too large or too small can lead to installation headaches and can compromise energy efficiency. Make sure to note the height, width, and thickness of your existing door frame, and double-check these measurements against the specifications of your chosen door.

Finally, think about the door’s functionality. Do you want a door that swings open, slides, or even folds? Each option has its advantages depending on the space you are working with. For narrow hallways, pocket doors can save space, while traditional swinging doors are ideal for larger openings.

By taking the time to carefully select the right door for your space, you’ll ensure that your installation goes smoothly and that the final result enhances the beauty and functionality of your home. With the right door in hand, you’ll be one step closer to a professional-looking installation!

4. Measuring Your Door Frame Accurately

Measuring your door frame accurately is a crucial step that can make or break the success of your installation. Even the slightest miscalculation can lead to gaps, drafts, or an ill-fitting door that could compromise both aesthetics and functionality. To begin, gather your tools: a tape measure, a level, and a pencil for marking your measurements.

Start by measuring the width of the door frame. Place your tape measure at the inside edge of one side of the frame and extend it to the inside edge of the opposite side. Jot down this measurement; it’s essential to take at least three width measurements at different heights—top, middle, and bottom—to account for any irregularities in the frame. The smallest of these measurements will determine the width of your new door.

Next, measure the height of the door frame. Again, measure from the top inside edge down to the bottom inside edge at both the left and right sides of the frame. Just like with the width, take multiple measurements here to ensure accuracy; the shortest measurement will be your final height.

Additionally, check the squareness of the frame using a level. Place the level diagonally from one corner of the frame to the opposite corner. If the level does not sit evenly, this indicates that your frame may be out of square, which can affect the fit of your new door.

Lastly, don’t forget to note the thickness of the frame and any other relevant details, such as the presence of molding or trim. Accurate measurements are the foundation of a successful door installation, so take your time and double-check your figures. A well-measured door frame sets the stage for a smooth installation process and ensures that your new door will function perfectly for years to come.

5. Preparing the Old Door Frame for Installation

How to install a new door?
Credit : whatcanu.com

Preparing the old door frame for installation is a crucial step that can make or break your project. Before you dive into the installation of your new door, take a moment to assess the condition of the existing frame. Look for any signs of damage, such as warping, rot, or cracks, which could compromise the integrity of your new door. If you notice any issues, it may be wise to repair or replace the frame to ensure a snug fit and long-lasting performance.

Once the frame’s condition is confirmed, it’s time to clean it thoroughly. Remove any dust, debris, or old paint that may have accumulated over the years. A clean surface is key to achieving a smooth installation. Use a putty knife to scrape away any peeling paint, and a vacuum or a damp cloth to pick up the remnants. If you encounter stubborn old caulk or adhesive, a heat gun can help soften it for easier removal.

Next, check the level and plumb of the door frame. Use a spirit level to make sure the frame is straight and aligned correctly; this will help prevent any future issues with your new door not closing properly or getting stuck. If the frame is out of square, you may need to shim it with small pieces of wood to correct its alignment.

Finally, take the time to measure the door frame accurately. Use a tape measure to determine the height and width of the frame, noting down these dimensions. It’s always best to double-check your measurements to ensure a proper fit for your new door. With the old door frame prepped and ready, you’re now set to bring in your new door and transform your space with ease!

6. Removing the Old Door Safely

Removing the old door safely is a crucial step in the installation process, and it requires a bit of care and precision. Begin by gathering your tools: a screwdriver, a pry bar, and a utility knife. Before you start, ensure you have someone to assist you, as doors can be heavy and cumbersome, making it easier to handle with an extra set of hands.

First, close the door and inspect the hinges. Using your screwdriver, carefully remove the screws from the hinges, working from the bottom hinge to the top. This method helps to relieve the weight gradually, minimizing the risk of the door falling unexpectedly. As you remove each screw, place them in a small container to avoid losing them, as you may need them later for your new door.

Once the hinges are detached, gently push the door towards you and lift it off the frame. If the door feels stuck, check for any additional screws that may be holding it in place, or use a utility knife to cut through any paint or caulk that may be sealing it. When you finally have the door free, set it aside safely so it won’t fall or get damaged.

Next, inspect the door frame for any lingering hardware, like strike plates or latches. Removing these components will ensure a clean and smooth installation for your new door. If necessary, use your pry bar to carefully remove any nails or screws that may have been left behind.

Taking your time during this process is vital. Rushing can lead to accidents or damage, so be mindful of your surroundings and the materials you’re working with. With the old door safely removed, you’re one step closer to transforming your entryway with a fresh, new door that will enhance both the functionality and aesthetic of your home.

7. Unpacking and Inspecting Your New Door

How to install a new door?
Credit : whatcanu.com

Unpacking and inspecting your new door is a crucial step that sets the stage for a smooth installation process. Once your door arrives, take a moment to find a clean, spacious area where you can safely unbox it. Gently remove the packaging, being careful not to damage the door itself. Most doors come wrapped in protective materials like cardboard or foam, so handle everything with care as you peel back these layers.

As you unveil your new door, conduct a thorough inspection. Start by checking for any visible damage, such as dents, scratches, or warping. It’s essential to catch these issues early, as they may affect the door’s functionality and aesthetic appeal. Don’t just rely on a cursory glance—run your hands over the surface to feel for any imperfections that might not be immediately visible.

Next, confirm that all components of your door are included in the package. This typically includes the door itself, hinges, a handle or knob, and any additional hardware necessary for installation. Refer to the manufacturer’s instructions to ensure you have everything you need. If something is missing or damaged, reach out to the supplier promptly to arrange for replacements.

Lastly, take a moment to familiarize yourself with the door’s features, whether it’s a solid wood door with intricate designs or a sleek, modern fiberglass model. Knowing the specifics can help you make informed decisions during the installation process, ensuring that you not only install the door correctly but also appreciate its design and functionality to the fullest.

By taking the time to unpack and inspect your new door carefully, you’re ensuring a successful installation ahead. This diligence will save you time and potential headaches down the road, allowing you to enjoy your new door with confidence.

8. Installing Door Hinges: Step-by-Step

Installing door hinges may seem like a small detail, but it’s a crucial step that ensures your door functions smoothly and securely. Follow this step-by-step guide to install your new door hinges like a pro!

**Step 1: Gather Your Tools and Materials**
Before you begin, make sure you have everything you need at hand. You’ll require a drill, a screwdriver, a measuring tape, a chisel, and, of course, your door hinges. Most hinges come with screws, but double-check to ensure you have the correct size for your door.

**Step 2: Mark the Hinge Placement**
Using your measuring tape, measure down from the top of the door to where you want the top hinge to go—typically around 7 inches from the top edge. Mark this spot with a pencil. Repeat this process for the bottom hinge, generally placed about 11 inches from the bottom. If you’re adding a third hinge, position it halfway between the top and bottom hinges.

**Step 3: Create the Hinge Recesses**
Place the hinge flat against the door where you marked it. Using your chisel, carefully carve out a shallow recess for the hinge to sit flush with the door surface. This step is crucial for a clean, professional look and ensures the door swings smoothly.

**Step 4: Attach the Hinges to the Door**
Align the hinge with the recess you created. Using your drill, insert the screws provided with the hinge into the pre-drilled holes. Tighten them securely but avoid overtightening, as this could strip the screws or damage the wood.

**Step 5: Position the Door in the Frame**
With the hinges attached to the door, it’s time to position the door in the frame. You may need a helper for this step to hold the door steady. Align the hinges with the corresponding plates in the door frame.

**Step 6: Secure the Hinges to the Frame**
Once the door is in place, attach the other half of the hinge to the door frame by drilling screws into the hinge plates. Make sure the door swings freely and check for alignment. If it’s too tight or doesn’t close properly, you may need to adjust the hinges slightly or add shims to the frame.

**Step 7: Test the Door**
After everything is secured, give the door a few test swings. It should open and close smoothly without any sticking or rubbing. If there are issues, revisit the hinge placements and make minor adjustments as needed.

**Step 8: Final Touches**
Once you’re satisfied with the installation, clean any dust or debris from the installation process. If your hinges are visible, consider applying a coat of lubricant to ensure they remain functional and quiet.

By carefully following these steps, you’ll have installed your door hinges like a pro, ensuring your new door not only looks fantastic but operates seamlessly in your space! Happy DIY-ing!

9. Hanging the New Door: Tips for Alignment

Hanging a new door can seem daunting, but with a few expert tips on alignment, you can ensure that your installation goes off without a hitch. Proper alignment is crucial not only for aesthetics but also for functionality; a misaligned door can lead to issues such as sticking, gaps, or even security concerns. Here’s how to get it just right.

First, before you even attempt to hang the door, make sure your hinges are properly installed on the door frame. Use a level to check that the hinge side of the frame is plumb, adjusting as necessary with shims. If the frame isn’t square, you may find that your door doesn’t fit correctly, so take the time to get this step right.

Once your hinges are secured, it’s time to position the door. Hold the door in place with the help of a friend or use a door jig to support it temporarily. Begin by securing the top hinge first. This will help anchor the door and allow you to check its alignment without it swinging open or closed unexpectedly.

Next, check the gap between the door and the frame on both the hinge and latch sides. Ideally, you want a consistent gap of about 1/8 inch. If you notice that the door is leaning or there are uneven gaps, adjust the lower hinge by adding or removing shims until the door hangs evenly. It may take a bit of trial and error, but patience is key.

Once you’re satisfied with the alignment, secure the bottom hinge. Before closing the door completely, open and shut it a few times to ensure it swings smoothly without dragging. If you encounter any resistance, it’s likely a sign that further adjustments are needed.

Finally, after confirming that the door is properly aligned and functions smoothly, you can drive in the screws fully and install any additional hardware, such as doorknobs or locks. A well-hung door not only enhances the aesthetic appeal of your space but also contributes to the overall security and efficiency of your home. With these alignment tips, you’ll be hanging doors like a pro in no time!

10. Securing the Door Frame: Shims and Screws

Securing the door frame is a crucial step that ensures your new door operates smoothly and stands the test of time. This process involves using shims and screws to create a sturdy, level framework that can withstand daily use.

Begin by inserting shims—small, wedge-like pieces of wood—into the gaps between the door frame and the rough opening of the wall. Shims are essential for adjusting the alignment of the door; they help fill any uneven spaces, ensuring that the door hangs straight and operates without obstruction. Start at the bottom hinge side and gently tap the shim into place, checking frequently with a level to ensure the frame is perfectly plumb. You want the door to swing effortlessly, so this step cannot be rushed.

Once the shims are in position, it’s time to secure the frame with screws. Using a power drill, fasten screws through the frame into the wall studs. Place screws approximately every 12 to 16 inches along the sides and top of the frame, ensuring they penetrate the studs for maximum stability. Be careful not to over-tighten the screws, as this can warp the frame and affect the door’s functionality.

After securing the frame, double-check the door’s alignment and operation. Open and close the door to make sure it swings freely without sticking or dragging. If adjustments are necessary, you can easily add or remove shims as needed. By carefully securing the door frame with shims and screws, you’ll create a solid base that will enhance the longevity and performance of your new door, giving it the professional finish you desire.

11. Installing the Door Handle and Lockset

Once your door is hung securely in its frame, it’s time to add the finishing touches that not only enhance its functionality but also add to its aesthetic appeal: the door handle and lockset. Installing these components may seem like a straightforward task, but a careful approach ensures smooth operation and a polished look.

Start by selecting the right handle and lockset that matches your door style and complements your home decor. Before you dive into installation, gather your tools: a tape measure, screwdriver, chisel, and a level. Having everything on hand will streamline the process and minimize interruptions.

Begin by determining the correct height for your door handle. A common standard is around 36 inches from the floor, but you can adjust based on your preference or the specific ergonomic needs of your household. Mark the spot lightly with a pencil.

Next, position the lockset, which typically consists of two main components: the latch and the deadbolt (if applicable). Use your chisel to create a mortise for the latch, following the manufacturer’s instructions for depth and width. This step is crucial; a snug fit will prevent any wobbling and ensure the latch operates smoothly.

Once the mortises are cut, insert the latch into the side of the door. Secure it with screws, ensuring that it is flush with the door’s edge. Then, place the strike plate in the door frame, marking the location where it will fit. Chisel out a small recess if necessary to accommodate it, and screw it into place.

Now, it’s time to install the door handle. Align the handle’s spindle with the latch and push it through the hole you’ve prepared. Attach the outer handle by securing it with the provided screws. Make sure both handles are aligned properly and turn smoothly.

Finally, if your lockset includes a deadbolt, repeat the process for this component. Mark the position for the deadbolt, drill the necessary holes, and secure it in place. Once everything is installed, test the lock and handle to ensure they function correctly, making any adjustments as needed.

With the handle and lockset securely in place, you can step back and admire your handiwork. Not only have you successfully enhanced the functionality of your door, but you’ve also added a stylish touch that will welcome guests and provide security for your home.

12. Adjusting the Door for a Perfect Fit

Once your new door is securely hung and you’ve taken a moment to admire your handiwork, it’s time to ensure it fits perfectly within its frame. Proper adjustment is crucial for both aesthetics and functionality, as a misaligned door can lead to operational issues and compromise security.

Start by checking the gaps between the door and the frame. Ideally, there should be an even space of about 1/8 inch on the top and sides, allowing for smooth operation and easy opening and closing. If you notice uneven gaps, it may be necessary to adjust the hinges. Loosen the screws on the hinge plate slightly, use a shim to raise or lower the door as needed, and then retighten the screws. This might take a few attempts, so don’t be discouraged if it takes a bit of tweaking to achieve that perfect alignment.

Next, check how the door swings. It should open and close without catching or scraping against the frame or floor. If the door drags on the floor, you may need to trim the bottom edge. Measure from the floor to the bottom of the door, and then mark where the cut will be. Using a circular saw or hand saw, make a clean cut, and be sure to sand down the edges to prevent splintering.

Finally, test the latch and strike plate. Close the door and ensure that the latch easily engages with the strike plate without excessive force. If the latch doesn’t align properly, you may need to reposition the strike plate. Mark the new position, drill pilot holes, and install it at the adjusted height.

Once you’ve made these adjustments, step back and appreciate your efforts. A well-fitted door not only enhances the overall look of your home but also ensures that it functions seamlessly for years to come. With a little patience and attention to detail, you can achieve a professional finish that reflects your hard work and dedication.

13. Finishing Touches: Painting or Staining Your Door

Once your new door is securely installed and all adjustments have been made, it’s time to focus on the finishing touches that will elevate its appearance and protect it from the elements. Painting or staining your door not only enhances its aesthetic appeal but also adds a layer of protection against wear and tear, moisture, and sunlight.

Before you start, ensure the surface of the door is clean and free of dust. If you’ve just installed a wooden door, consider sanding it lightly to create a smooth surface that will better absorb your chosen finish. For painted doors, a primer may be necessary, especially if you’re transitioning from a darker color to a lighter one or if the door has never been painted before.

When it comes to choosing between paint and stain, consider the look you want to achieve. Paint offers a vibrant, opaque finish that can complement the color scheme of your home, while stain highlights the natural grain of the wood, providing a warm and timeless appearance. If you opt for stain, be sure to select a high-quality product that’s designed for exterior use to ensure durability.

Apply your chosen finish using a high-quality brush or roller for a smooth, even application. For paint, start with the edges and grooves before moving to the flat surfaces, making sure to apply multiple thin coats rather than one thick coat for the best results. If staining, work in the direction of the wood grain and wipe off any excess with a clean cloth to avoid blotches.

Allow ample drying time between coats, and don’t forget to finish with a clear sealant if you chose stain, as this will provide additional protection against moisture and UV damage. Once everything is dry and set, step back and admire your handiwork—your newly installed door not only looks professional but is now ready to withstand the elements while adding curb appeal to your home.

14. Troubleshooting Common Installation Issues

Installing a new door can be a rewarding DIY project, but it’s not without its challenges. Encountering issues during installation is common, and knowing how to troubleshoot these problems can save you time, frustration, and potentially costly repairs. Here are some typical installation issues you might face and how to resolve them like a pro.

**1. Door Doesn’t Fit Properly:**
If your door doesn’t seem to fit in the frame correctly, start by checking the measurements. Ensure that the door is aligned with the hinges and that the frame is square. Use a level to check for evenness; if the frame is out of square, shimming may be necessary. Adjust or trim the door edges slightly if it’s too large, but be cautious—removing too much material can lead to gaps.

**2. Alignment Issues with Hinges:**
Misalignment of hinges can cause your door to sag or not close properly. Check that the screws are tight and that the hinges are mounted flush against the door and the frame. If the door is still misaligned, consider repositioning the hinge plates or using additional shims to elevate the door back into proper alignment.

**3. The Door Sticks or Gets Jammed:**
A sticking door can be a major annoyance. This issue often arises from humidity causing wood to swell or an improper installation. Inspect the door and frame for any obstructions or debris that might be causing the sticking. Sanding down the edges of the door slightly can help alleviate this issue. If the door is swelling due to moisture, consider applying a sealant to protect it from humidity in the future.

**4. Gaps Around the Door:**
If you notice gaps between the door and the frame, it could affect energy efficiency and security. Check that the door is hung evenly and make adjustments as needed. Weather stripping can also be an effective solution for sealing these gaps, as it not only improves insulation but also enhances the overall appearance of your installation.

**5. Difficulty With Lock Mechanism:**
Sometimes, the lock may not align properly, which can be frustrating. Ensure that the strike plate is correctly positioned and that the hole in the door is drilled at the right depth. If the lock cylinder is sticking, lubricate it with graphite or a silicone spray to ensure smooth operation.

By anticipating these common installation issues and knowing how to troubleshoot them, you’ll not only save time but also ensure that your new door functions perfectly for years to come. Remember, every challenge you face is an opportunity to learn and improve your DIY skills!

15. Conclusion: Enjoying Your New Door and Final Thoughts

Congratulations on successfully installing your new door! As you step back and admire your handiwork, take a moment to appreciate not just the aesthetic upgrade but also the functional benefits it brings to your home. A new door can enhance your home’s energy efficiency, improve security, and elevate curb appeal, making it an investment that pays off in more ways than one.

Now that your door is in place, it’s time to revel in the satisfaction of a job well done. Enjoy the fresh look and feel it adds to your space, and take note of how it complements your interior and exterior design. Whether you chose a sleek modern style or a classic wooden finish, your new door serves as a testament to your DIY skills and attention to detail.

Remember, the journey doesn’t end here. Regular maintenance is key to keeping your door looking and functioning at its best. Periodically check the hinges and hardware, clean the surface, and apply any necessary treatments to protect against the elements. Establishing a routine will ensure that your door remains a stunning feature for years to come.

As you close this chapter of your home improvement project, consider sharing your experience with others. Post pictures of your newly installed door on social media, or share tips and tricks with friends and family who may be considering a similar upgrade. Your insights could inspire someone else to take the plunge into their own home improvement journey.

In conclusion, installing your new door is not just about the end result; it’s about the pride you feel in transforming your space. So, enjoy the beauty and functionality it brings, and let it be a reminder of your ability to tackle DIY projects like a pro! Happy home improving!

In conclusion, we hope this step-by-step guide has empowered you with the knowledge and confidence to install your new door like a pro! From selecting the right tools to ensuring a perfect fit, each step is crucial in achieving a polished and professional finish. Remember, patience and precision are your best friends throughout this process. As you stand back and admire your handiwork, take pride in knowing you transformed your space with your own two hands. Whether you’re upgrading for aesthetic appeal, energy efficiency, or security, your new door will undoubtedly enhance your home. We encourage you to share your installation experience and photos with us; we’d love to celebrate your achievement! Happy DIYing!