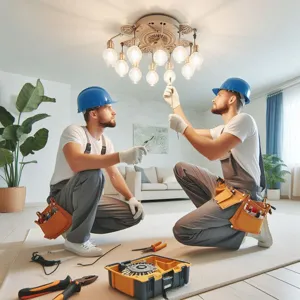
Transforming the ambiance of your home can be as simple as changing a light fixture.
Whether you’re looking to brighten up a dim corner, create a cozy atmosphere in your living room, or add a touch of elegance to your dining area, the right lighting can make all the difference. In this comprehensive guide, we’ll walk you through the entire process of installing a new light fixture, from selecting the perfect design that complements your decor to the practical steps of wiring and mounting. With just a few tools and a little bit of patience, you’ll be able to enhance your space with a fresh glow. So grab your toolkit, and get ready to illuminate your home as we delve into the art of light fixture installation—your space is about to shine brighter than ever!
1. Introduction: The Importance of Lighting in Your Space
Lighting plays a crucial role in defining the ambiance and functionality of any space. Whether you’re transforming a cozy corner in your living room or enhancing the workspace in your kitchen, the right light fixture can make all the difference. It’s not just about illumination; it’s about creating an atmosphere that reflects your personal style and meets your everyday needs.
Good lighting can elevate the aesthetics of a room, highlighting its best features while providing essential illumination for tasks at hand. It can make a small room feel larger, a dull space feel vibrant, and a stark area feel warm and inviting. Think about how the soft glow of a pendant light can create an intimate dining experience, or how a bright chandelier can add a touch of elegance to a foyer.
Moreover, effective lighting has practical benefits as well. It can increase safety and security by eliminating dark corners that may hide potential hazards or intruders. By strategically placing light fixtures, you can enhance visibility and comfort, allowing you to navigate your space with ease at any hour of the day.
In this guide, we’ll take you through the steps of installing a new light fixture, empowering you to harness the transformative power of lighting. Whether you’re a seasoned DIY enthusiast or a first-time installer, our clear instructions and helpful tips will ensure that you can illuminate your space with confidence and flair. Let’s dive in and brighten up your home!
2. Choosing the Right Light Fixture for Your Room
Choosing the right light fixture for your room is a vital step in illuminating your space effectively and enhancing its overall aesthetic. The light fixture you select should not only complement the existing decor but also serve the practical purposes of the room. Start by considering the function of the space. For example, a cozy living room may benefit from warm, ambient lighting, while a kitchen requires bright, focused light for meal prep and cooking.
Next, think about the style that resonates with you and fits the room’s theme. Are you drawn to modern minimalism, rustic charm, or perhaps a vintage flair? Chandeliers can add a touch of elegance to dining areas, while sleek pendant lights work beautifully over kitchen islands. Additionally, wall sconces can contribute to the ambiance without taking up valuable floor space in smaller rooms.
Size matters, too. A fixture that is too large can overwhelm a small space, while one that is too small can get lost in a larger room. As a rule of thumb, consider the dimensions of your room when selecting a fixture: the diameter of the chandelier or light fixture in inches should equal the sum of the room’s length and width in feet. This simple formula helps ensure that your choice will be visually proportional.
Finally, don’t overlook the importance of the light bulb itself. The type of bulb you choose—whether LED, incandescent, or fluorescent—will impact not only the quality of light but also energy efficiency and longevity. Pay attention to the color temperature as well; warmer tones create a cozy atmosphere, while cooler tones can invigorate and energize.
Taking the time to thoughtfully select the right light fixture will transform your room into a beautifully illuminated space that reflects your personal style while meeting your lighting needs.
3. Tools and Materials Needed for Installation

Before diving into the exciting world of light fixture installation, it’s essential to gather the right tools and materials to ensure a smooth and safe process. Here’s a detailed list of what you’ll need, along with some handy tips to help you prepare for the task ahead.
**Tools:**
1. **Screwdriver Set**: Both flathead and Phillips screwdrivers are indispensable for removing old fixtures and securing the new ones. Consider using a magnetic screwdriver to prevent screws from falling during installation.
2. **Wire Strippers**: These are crucial for exposing the ends of the wires if they are covered with insulation. A good pair will make your connections clean and secure.
3. **Voltage Tester**: Safety first! Before you start working with electrical components, use a voltage tester to ensure that the power is off in the wiring area. This tool will provide peace of mind while you work.
4. **Drill and Drill Bits**: A power drill can simplify the process of mounting your new fixture, especially if you need to create pilot holes for screws.
5. **Ladder**: Depending on the height of your ceiling, a sturdy ladder will help you reach the fixture safely and comfortably.
6. **Pliers**: Needle-nose pliers are helpful for tightening wire connectors or securing any loose wires.
**Materials:**
1. **New Light Fixture**: Choose a fixture that complements your space and meets your lighting needs. Make sure it’s compatible with your existing electrical setup.
2. **Wire Connectors**: These small but vital components will help you securely connect the wires from your new fixture to the existing wiring. It’s often recommended to use wire nuts for a safe and effective connection.
3. **Electrical Tape**: This is a handy safety measure for wrapping exposed wires and ensuring that your connections are insulated.
4. **Mounting Hardware**: Most light fixtures come with the necessary mounting hardware, but make sure you have everything you need, including screws and anchors, especially if you’re mounting on drywall or other materials.
5. **Instruction Manual**: Don’t forget to have the manual for your new light fixture on hand! It typically contains specific instructions for installation, including wiring diagrams and safety warnings.
With these tools and materials at your disposal, you’re well-equipped to tackle the installation of your new light fixture. Remember to take your time, follow safety protocols, and enjoy the transformative effect your new lighting will have on your space!
4. Safety First: Preparing for Installation
Before diving into the exciting process of installing your new light fixture, it’s crucial to prioritize safety. Proper preparation can prevent accidents and ensure a smooth installation. Start by gathering the necessary tools and materials: a screwdriver, wire strippers, electrical tape, a voltage tester, and your new fixture, of course. A sturdy ladder is also essential if the fixture is mounted high on the ceiling.
Once you have your tools at hand, the very first step is to turn off the power at the circuit breaker. This might seem like a no-brainer, but it’s a critical step that ensures no electricity is flowing to the existing fixture while you work. Take a moment to confirm that the power is indeed off by using a voltage tester on the wires; this little device will give you peace of mind and help you avoid any electrical shocks.
Next, protect your workspace by laying down a drop cloth or old towels beneath the area where you’ll be working. This will catch any debris or dust that may fall during the installation, keeping your space tidy. If you’re working in a particularly high or hard-to-reach place, consider having a friend or family member nearby to assist you, ensuring you have someone to help stabilize your ladder or hand you tools as needed.
Lastly, don’t forget to wear safety goggles and gloves. While it may seem excessive, these small precautions can protect you from any unexpected accidents, such as falling debris or sharp edges. With safety measures firmly in place, you’re now ready to embark on the installation journey, armed with the knowledge that you’ve taken the necessary steps to keep yourself safe.
5. Turning Off the Power: How to Find Your Circuit Breaker

Before diving into the installation of your new light fixture, ensuring your safety is paramount. The first step in this crucial process is turning off the power to the existing fixture, and that begins with locating your circuit breaker. This may sound straightforward, but a little guidance can make all the difference, especially if you’re unfamiliar with your home’s electrical layout.
Start by making your way to your home’s electrical panel, usually found in a basement, garage, or utility room. The panel may be a metal box mounted on the wall, often with a door that swings open to reveal rows of circuit breakers. Take a moment to familiarize yourself with the panel’s layout. Each breaker is labeled, indicating which area of the house it controls. If you’re unsure which breaker powers the old fixture, you may need to do a bit of detective work.
To identify the correct breaker, you can turn on the existing light fixture and then head to the panel. As you flip each breaker off, pay attention to the light – when it goes dark, you’ve found the right one! Once you’ve identified the correct circuit, switch it to the off position and confirm that the fixture is no longer receiving power.
For added safety, it’s wise to label your breaker box if it isn’t already labeled. This will save you time and effort in future projects and ensure you can quickly find the right breaker when needed. After you’ve confidently turned off the power, it’s a good practice to test the fixture with a voltage tester to guarantee there is no electricity flowing to the wires. With the power securely off, you can proceed with your installation, knowing you’ve taken the necessary precautions to work safely.
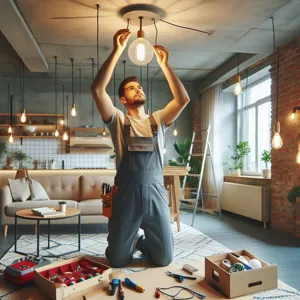
6. Removing the Old Light Fixture: Step-by-Step Instructions
Removing the old light fixture can seem daunting, but with the right approach, it’s a straightforward task that paves the way for your stunning new addition. Before you begin, ensure you have the necessary tools at hand: a screwdriver, a voltage tester, and possibly a pair of wire cutters. Safety is paramount, so let’s dive into the step-by-step process.
**Step 1: Turn Off the Power**
Safety first! Head to your circuit breaker and switch off the power to the light fixture you’ll be replacing. It’s a good idea to double-check that the power is off by using a voltage tester on the wires. This will give you peace of mind while you work.
**Step 2: Remove the Light Bulbs**
Once you’ve confirmed that the electricity is off, carefully remove any light bulbs from the fixture. This will lighten the load and make handling the fixture easier. Store the bulbs in a safe place to avoid breakage.
**Step 3: Detach the Fixture from the Ceiling**
Most light fixtures are secured with screws or mounting brackets. Using your screwdriver, carefully unscrew the fixture from the ceiling. If there’s any resistance, make sure you haven’t overlooked any hidden screws. Once the fixture is loose, gently lower it to inspect the wiring.
**Step 4: Disconnect the Wires**
You’ll typically find three wires connected to the fixture: a black (or red) wire, a white wire, and a green or bare wire. Carefully disconnect these wires by either unscrewing the wire nuts or loosening the screws that hold them in place. It’s a good practice to take a photo of the wiring setup before you disconnect anything, as this will help you when you install the new fixture.
**Step 5: Remove the Mounting Bracket**
After disconnecting the wires, you’ll need to take down the mounting bracket attached to the electrical box in the ceiling. This is often held in place by screws, so use your screwdriver to remove it.
**Step 6: Clean Up**
With the old fixture removed, take this opportunity to clean the area around the electrical box. Dust and debris can accumulate over time, and a clean space will ensure better installation of the new fixture.
Congratulations! You’ve successfully removed the old light fixture and are one step closer to transforming your space with a new, stylish illumination. As you prepare to install the new fixture, keep these steps in mind to ensure a smooth transition.
7. Understanding Electrical Wiring: A Beginner’s Guide

### 7. Understanding Electrical Wiring: A Beginner’s Guide
Before diving into the installation of your new light fixture, it’s crucial to grasp the basics of electrical wiring. While it may seem intimidating at first, understanding a few key concepts can empower you to approach the task with confidence and safety.
Start by familiarizing yourself with the essential components of your home’s electrical system. The most common wiring colors you’ll encounter include black (or red) for hot wires, white for neutral wires, and green or bare copper for ground wires. These colors are not just for aesthetics; they serve important functions that ensure your electrical system operates safely.
Next, take a moment to locate your circuit breaker panel. It’s your first line of defense against electrical mishaps. Before you begin any work, turn off the circuit that powers the existing light fixture. This step is non-negotiable; safety should always come first. Use a non-contact voltage tester to double-check that the power is truly off.
Once the power is disconnected, inspect the wiring in the existing fixture. You might find a combination of wires: the hot wire, neutral wire, and possibly a ground wire. Take note of how they are connected, as this will guide you when installing your new fixture. If you’re unsure, don’t hesitate to take a photo for reference.
When you’re ready to proceed, carefully remove the old fixture, ensuring that you untwist the wire connections gently. This is where your confidence will grow—by seeing how the wires are connected and realizing that it’s just a matter of connecting like with like. The new fixture will typically come with instructions, so follow those closely for any specific wiring requirements.
Finally, once your new light fixture is secured and connected correctly, restore power at the circuit breaker and flip the switch. The moment the new fixture illuminates your space is not just a reward for your hard work; it’s a testament to your newfound understanding of electrical wiring. Remember, if you ever feel uncertain or overwhelmed, consulting a professional electrician is always a wise choice. Your safety is paramount, and sometimes it’s best to leave complex tasks to the experts.
8. Installing the New Light Fixture: A Detailed Process
Once you’ve selected the perfect light fixture to elevate your space, it’s time to get into the nitty-gritty of installation. This stage is where your vision truly comes to life, transforming the ambiance of your room. Follow these detailed steps to ensure a smooth installation process:
1. **Prepare Your Workspace**: Start by clearing the area beneath the existing light fixture. Lay down a drop cloth to protect your flooring and ensure that you have ample space to work. Gather all necessary tools, including a screwdriver, wire stripper, voltage tester, and ladder. Always double-check that your new fixture comes with all the required mounting hardware.
2. **Turn Off the Power**: Safety first! Locate your circuit breaker and switch off the power to the existing light fixture. To ensure there’s no electrical hazard, use a voltage tester to confirm that the wires are not live. This step is crucial for preventing any potential accidents or shocks while you work.
3. **Remove the Old Fixture**: Carefully detach the old light fixture from the ceiling. This typically involves unscrewing the mounting bracket and disconnecting the wires. As you remove the fixture, take note of how the wires are connected—this will help guide you in connecting the new fixture. If you’re unsure, a quick photo with your phone can serve as a handy reference.
4. **Prepare the New Fixture**: Before installation, assemble your new light fixture according to the manufacturer’s guidelines. This may involve attaching bulbs, shades, or other decorative elements. Make sure everything is secure and ready for mounting.
5. **Connect the Wires**: Following the instructions that came with your new fixture, connect the wires from the fixture to the corresponding wires in the ceiling. Typically, this involves twisting the black (live) wire from the fixture to the black wire in the ceiling, the white (neutral) wires together, and grounding it with the green or bare wire. Use wire nuts to secure each connection and ensure that no bare wire is exposed.
6. **Mount the New Fixture**: Once the wiring is secured, it’s time to mount the fixture to the ceiling. Align it with the mounting bracket, and gently push any excess wiring back into the electrical box. Use screws to secure the fixture in place, following the manufacturer’s instructions for proper installation.
7. **Install Light Bulbs and Test**: With the fixture securely mounted, insert the appropriate light bulbs. Once everything is in place, return to your circuit breaker and switch the power back on. Test your new light fixture to ensure it’s working correctly. If it doesn’t illuminate, double-check your wiring connections to troubleshoot any issues.
8. **Final Touches**: With the light fixture functioning properly, take a moment to clean up your workspace. Dispose of any packaging materials and tools, and enjoy the fresh glow of your newly installed light fixture. Consider adjusting the brightness with dimmable bulbs or smart lighting options for added versatility.
By following these detailed steps, you’ll not only enhance the aesthetic of your space but also gain a sense of accomplishment from your DIY project. Enjoy your beautifully illuminated room!
9. Connecting Wires: Tips for Safe and Secure Connections
Connecting wires is a crucial step in the installation of your new light fixture, and it’s essential to approach this task with both care and precision to ensure safety and functionality. Before diving into the process, it’s imperative to turn off the power at the circuit breaker to avoid any electrical hazards. Once you’ve confirmed that the power is off, gather your tools: a wire stripper, a voltage tester, and some wire nuts.
Begin by removing the existing fixture and carefully inspecting the wiring. You should see three types of wires: the hot wire (usually black or red), the neutral wire (typically white), and the ground wire (green or bare copper). It’s helpful to organize these wires visually so you can clearly identify which ones need to be connected to your new fixture.
When connecting wires, always follow the color-coded system: twist the hot wires together, pairing the black from your fixture with the black from the ceiling. Then, do the same for the neutral wires, connecting white to white. Ground wires are connected last; secure them to the fixture’s ground wire or a grounding screw on the mounting bracket. Ensure that each twist connection is tight and secure, as loose connections can lead to flickering lights or, worse, electrical fires.
After making your connections, it’s a good idea to use a voltage tester to double-check that everything is safe before powering the circuit back on. Once you’ve verified that there are no exposed wires and that all connections are insulated with wire nuts, you can gently tuck the wires into the electrical box and mount your new light fixture according to the manufacturer’s instructions.
Remember, if at any point you feel uncertain about the wiring process, it’s always wise to consult with or hire a professional electrician to ensure that your installation is safe and up to code. With the right approach, your new light fixture will not only brighten your space but will also be installed securely and safely.
10. Securing the Fixture: Ensuring Stability and Safety
Securing your new light fixture is a crucial step that ensures both stability and safety in your home. After you’ve successfully connected the wiring, it’s time to focus on mounting the fixture securely to the ceiling or wall. Begin by aligning the fixture with the mounting bracket, ensuring that any screws or clips designed to hold it in place are easily accessible.
Before you proceed, double-check that the mounting bracket is firmly attached to the electrical box. If the electrical box wobbles or feels loose, it’s imperative to address this issue first. A sturdy mount is essential for preventing accidents or damage, particularly for heavier fixtures.
Once you are confident that everything is secure, carefully position the fixture against the ceiling. If it has a canopy, make sure it covers the electrical box completely to prevent any exposed wiring. Use the included screws to fasten the fixture to the mounting bracket, ensuring that they are tightened adequately but not overly so, as this could strip the threads or damage the fixture.
As you work, it’s important to keep your hands steady and check for level alignment. An uneven fixture can not only look unappealing but can also place undue stress on the wiring, leading to potential electrical issues down the line. Use a level tool if necessary to ensure that everything is straight.
After the fixture is secured, take a moment to gently tug on it to confirm that it is firmly in place. If it holds steady, you’ve successfully completed this phase of the installation! This attention to detail will not only enhance the aesthetic appeal of your space but also provide peace of mind knowing that your light fixture is safe and secure. With the fixture now in place, you’re just a switch flick away from illuminating your space beautifully!
11. Restoring Power: How to Turn the Electricity Back On
Restoring power after installing a new light fixture is a crucial step that marks the culmination of your hard work. Once you’ve ensured that the fixture is securely mounted and all electrical connections are properly made, it’s time to breathe life back into your newly illuminated space.
Start by locating your circuit breaker panel, which is typically found in a basement, utility room, or closet. Before you flip the switch back on, take a moment to double-check that all tools and materials are cleared from the installation area. It’s essential to ensure that everything is clean and free of any debris, as this will help prevent any accidents when the power is restored.
Identify the circuit breaker that corresponds to the area where you installed your new light fixture. Most panels are clearly labeled, but if yours isn’t, you may need to turn off and on a few breakers to find the correct one. Once you’ve identified the right breaker, firmly switch it back to the ‘on’ position.
As you do this, remain vigilant for any unusual sounds or smells. If you hear a pop or notice any burning odors, turn the breaker off immediately and double-check your connections. A simple mistake can lead to a short circuit, so it’s better to be cautious.
Now, with the power restored, it’s time to test your new light fixture. Flip the wall switch and bask in the glow of your hard work. If the light illuminates as intended, you’ve successfully completed the installation! If not, revisit your wiring connections to ensure everything is in order.
Lastly, take a moment to tidy up your workspace and dispose of any old fixtures or packaging materials. Enjoy the fresh ambiance your new light fixture brings to your space, and revel in the satisfaction of having accomplished this illuminating task!
12. Testing Your New Light Fixture: What to Look For
Once you’ve successfully installed your new light fixture, it’s time for the moment of truth: testing it to ensure everything is functioning as it should. This step is crucial, as it not only confirms that your hard work has paid off but also ensures that the fixture is safe and effective in illuminating your space.
Start by flipping the switch to turn on your new fixture. Observe the light closely. Is it illuminating the room as you envisioned? Take note of the brightness and the quality of the light. Does it cast a warm, inviting glow, or is it harsh and unflattering? If the light seems dim or overly bright, you may need to consider swapping out the bulb for a different wattage or type to achieve the desired ambiance.
Next, check for any flickering or unusual noises. Flickering could indicate a loose connection or the need for a different bulb, while buzzing sounds might suggest an issue with the fixture itself or the electrical wiring. If you notice any of these issues, it’s best to turn the power off and double-check your connections to ensure everything is secure.
Additionally, pay attention to the fixture’s placement. Walk around the room to see how the light interacts with the space. Are there any dark corners that could benefit from additional lighting? Does the fixture create any unwanted shadows? This is your opportunity to adjust the height or angle of the fixture if it’s adjustable, or to consider adding supplementary lights for a more balanced illumination.
Lastly, allow your fixture to run for a short period and monitor how it behaves over time. This will help you identify any potential overheating issues. If everything checks out, congratulations! You’ve successfully illuminated your space and created a beautiful focal point in your home. With your new light fixture shining brightly, you can now enjoy the enhanced atmosphere and style it brings to your environment.
13. Troubleshooting Common Installation Issues
Even the most meticulous DIY enthusiasts can encounter a few bumps in the road when installing a new light fixture. Troubleshooting common installation issues is essential to ensure your lighting project goes smoothly and safely. Here are some of the most frequent problems you might face, along with tips to resolve them.
**1. The Light Fixture Won’t Turn On:**
If your new light fixture isn’t illuminating, the first step is to check the power supply. Ensure that the circuit breaker is switched on and that you have replaced any blown fuses. Next, verify that all connections are secure—loose wires can easily disrupt the flow of electricity. If you’ve done all this and the fixture still doesn’t work, consider testing the bulb in a different fixture to rule out a faulty light bulb.
**2. Flickering Lights:**
A flickering light can be more than just an annoyance; it could indicate a deeper electrical issue. Check to make sure the bulb is tightly screwed in. If that doesn’t resolve the flicker, inspect the wiring connections in the junction box. Corroded or loose connections can cause fluctuations in power. If your fixture is compatible with a dimmer switch, ensure the bulb type is compatible as well, as some LED bulbs don’t work well with older dimmer systems.
**3. Uneven Lighting:**
If your new fixture isn’t providing the desired amount of light, it may be positioned incorrectly or the wrong type of fixture for the space. Consider the wattage and lumens of the bulb you’re using—an underpowered bulb could be the culprit. Additionally, assess the height and angle of the fixture; sometimes simply adjusting its position can enhance light distribution.
**4. Noise from the Fixture:**
Humming or buzzing sounds from your fixture can be frustrating. This is often caused by incompatible dimmer switches or a faulty ballast in fluorescent fixtures. If you suspect the dimmer is the issue, try replacing it with a compatible one or switch to standard switches to see if that eliminates the noise. If the problem persists with a fluorescent fixture, you may need to replace the ballast.
**5. Incorrect Fixture Size:**
Sometimes, the size of your new fixture can feel out of place, either dwarfing the room or overwhelming it. If you find that your new light fixture isn’t proportional to the space, take a moment to evaluate the room’s dimensions. Consider swapping it out for a size that better complements your decor and the scale of the room.
By addressing these common issues head-on, you can ensure that your new light fixture not only shines brightly but also enhances the beauty and functionality of your space. Remember, safety is paramount, so if you encounter complex wiring problems or persistent issues, don’t hesitate to consult a professional electrician. With a little patience and problem-solving, you’ll have your space illuminated just the way you envision!
14. Final Touches: Enhancing Your Space with Light
Once your new light fixture is securely installed and shining bright, it’s time to consider the final touches that will truly enhance your space. Lighting is not just about functionality; it plays a pivotal role in setting the mood and atmosphere of a room. Here are some simple yet effective ways to elevate your newly illuminated area.
First, think about the color of your bulbs. Soft white or warm LED bulbs create a cozy ambiance, perfect for living rooms and bedrooms, while bright white or daylight bulbs work well in kitchens and workspaces, promoting clarity and focus. Experiment with different bulb options to find the perfect hue that complements your decor and personal style.
Next, consider adding dimmers. A dimmer switch allows you to adjust the brightness of your new fixture, giving you control over the ambiance depending on the time of day or the occasion. Whether you want bright light for a lively gathering or a soft glow for a romantic dinner, dimmers give you that versatile flexibility.
Additionally, think about layering your lighting. While your new fixture may serve as the centerpiece, incorporating other light sources can create depth and interest. Table lamps, floor lamps, or even wall sconces can provide supplementary light, enhancing the overall aesthetic and functionality of the space.
Don’t forget to consider decorative elements that can enhance the light itself. Mirrors can reflect light, making your space feel larger and brighter. Placing a strategically positioned mirror across from your light fixture can double the effect of your new installation.
Finally, add personal touches that resonate with your style. Whether it’s a beautiful lampshade, decorative bulbs, or even a few accents around the base of your fixture, these details will tie your design together and make the space feel uniquely yours.
By focusing on these final touches, you can transform your newly installed light fixture from a mere necessity into a stunning focal point that enhances both your space and your experience within it. Happy illuminating!
15. Conclusion: Enjoying Your Newly Illuminated Room
Congratulations! After following the steps outlined in this guide, you have successfully transformed your space with a new light fixture. Stepping back to appreciate your handiwork is not just a moment of pride; it’s the beginning of a new chapter in how you experience your room. The gentle glow of your freshly installed fixture creates an inviting atmosphere that enhances both the aesthetics and functionality of the space.
As you bask in the warm light, take a moment to notice how the illumination has altered the dynamics of the room. Perhaps the colors on your walls now shine brighter, or the texture of your furniture becomes more pronounced under the new lighting. Whether it’s a cozy dining area, a vibrant living room, or a serene bedroom, your choice of fixture has undoubtedly added a personal touch that reflects your style.
Moreover, consider the various ways you can maximize your new lighting. Experiment with dimmers to adjust the ambiance according to the time of day or occasion. Layer your lighting by adding complementary sources, such as floor lamps or wall sconces, to create depth and warmth. You may even find joy in arranging your decor to highlight the new fixture, turning it into a focal point that draws the eye.
Lastly, don’t forget to share your achievement! Showcase your newly illuminated room on social media or with friends and family. Your project may inspire others to embark on their own lighting upgrades. So, sit back, relax, and enjoy the transformed atmosphere that your new light fixture brings—because a well-lit room is not just about visibility; it’s about setting the mood for countless memories to come.
As we wrap up our guide on installing a new light fixture, we hope you feel empowered to transform your space with newfound brilliance. Whether you’re looking to create a cozy ambiance in your living room or a bright workspace in your home office, the right lighting can truly elevate the atmosphere of any room. By following our step-by-step instructions, you can confidently tackle this DIY project and enjoy the satisfaction of a job well done. Remember, the process may take a little time and patience, but the end result—a beautifully illuminated space that reflects your personal style—will be well worth the effort. So gather your tools, unleash your creativity, and let your home shine with warmth and elegance! Happy illuminating!