In an era where sustainability and mindful eating are at the forefront of our culinary conversations, the art of food preservation has made a remarkable comeback.
Gone are the days of letting leftover fruits and vegetables wilt away in the depths of your refrigerator. Instead, home cooks and food enthusiasts alike are rediscovering the time-honored techniques that not only extend the shelf life of their favorite foods but also enhance their flavors. Whether you’re looking to stock your pantry with seasonal bounty or create a stash of homemade delights, mastering the methods of food preservation can transform your kitchen game entirely. In this post, we’ll explore the top seven tried-and-true methods that will empower you to preserve food like a pro, ensuring that nothing goes to waste and every bite is as delicious as the day you harvested it. From traditional canning to innovative fermentation techniques, get ready to roll up your sleeves and embark on a flavorful journey that celebrates freshness and sustainability!
1. Introduction to Food Preservation
Food preservation is an age-old practice that has evolved over centuries, yet its fundamental purpose remains the same: to extend the shelf life of food while retaining its flavor, texture, and nutritional value. In a world increasingly focused on sustainability and reducing waste, knowing how to preserve food effectively has never been more relevant. Whether it’s through canning, freezing, drying, or fermenting, each method offers unique benefits and flavors, allowing you to savor the bounty of seasonal produce throughout the year.
Imagine biting into a sun-ripened tomato in the heart of winter, or enjoying the tangy crunch of homemade pickles on a hot summer day. These experiences are made possible through the art of food preservation, enabling you to capture nature’s flavors at their peak and store them for later enjoyment. Not only does preserving food help in saving money and reducing food waste, but it also empowers you to take control of what goes into your meals, steering clear of unnecessary additives and preservatives found in many store-bought options.
In this guide, we will delve into the top seven tried-and-true methods for preserving food like a pro. From the vibrant colors of jars filled with homemade jams to the satisfying crunch of dehydrated fruits, each technique offers a hands-on approach to enjoying your favorite foods all year round. Whether you’re a seasoned home cook or a beginner, these methods are accessible and rewarding, transforming your kitchen into a hub of culinary creativity and sustainability. Let’s embark on this flavorful journey and discover how you can master the art of food preservation!
2. Understanding the Importance of Food Preservation
Understanding the importance of food preservation is more critical than ever in our fast-paced, convenience-focused world. At its core, food preservation is not just a method to extend the shelf life of perishable items; it is a vital practice that can significantly contribute to minimizing waste, saving money, and ensuring food safety.
With the alarming rates of food spoilage and waste reported globally, learning how to preserve food effectively can have a profound impact. Each year, millions of tons of fresh produce and other food items end up in landfills simply because they were not consumed in time. By mastering preservation techniques, you can take a stand against this wastefulness, ensuring that the fruits of your labor—or the products you purchase—last longer and remain enjoyable.
Moreover, food preservation allows you to harness the flavors and nutrition of seasonal produce, capturing the essence of each harvest for enjoyment throughout the year. Imagine savoring the taste of summer strawberries in the depths of winter or enjoying homemade pickles that add zest to your meals long after the cucumbers have been harvested. This not only enriches your culinary experiences but also promotes a more sustainable lifestyle.
Additionally, understanding food preservation is essential for food safety. Techniques such as canning, freezing, and fermenting can inhibit the growth of harmful bacteria and pathogens, protecting you and your family from foodborne illnesses. With proper techniques, you can create a safe, delicious, and nutritious pantry stocked with your favorite foods.
In essence, food preservation is a skill that empowers you to take control of your kitchen. It enhances your cooking options, reduces grocery bills, and helps you to build a sustainable food system at home. Embracing these practices is not just about storing food; it’s about creating a lifestyle that values freshness, sustainability, and health.
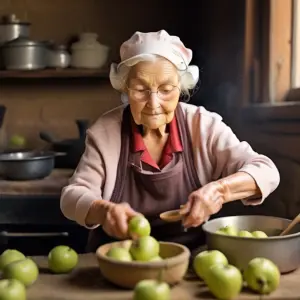
3. Method #1: Canning – The Basics to preserve food
Canning is one of the oldest and most reliable methods of food preservation, allowing you to enjoy the bounty of your garden or the flavors of your favorite seasonal produce year-round. At its core, canning involves sealing food in airtight containers and heating them to kill bacteria, yeasts, and molds that cause spoilage. This method not only extends shelf life but also locks in nutrients and flavors, making your preserved foods taste as vibrant as the day they were processed.
**Getting Started with Canning**
Before diving into the canning process, it’s essential to gather the right equipment. You’ll need canning jars with tight-fitting lids, a large pot or canner, a jar lifter, and a funnel. These tools help ensure a safe and efficient canning experience. When selecting jars, opt for those specifically designed for canning, as they are made to withstand high temperatures and create a proper seal.
**Choosing Your Ingredients**
When it comes to canning, freshness is key. Select fruits and vegetables that are ripe but not overripe, as they’ll yield the best flavor and texture. Common choices for canning include tomatoes, pickles, peaches, and jams. Be sure to wash and prepare your produce thoroughly, cutting them into appropriate sizes for the jars.
**The Canning Process**
The canning process typically involves two methods: water bath canning and pressure canning. Water bath canning is ideal for high-acid foods like fruits and pickles, while pressure canning is necessary for low-acid foods, such as vegetables and meats, to ensure safety.
1. **Prepare Your Jars**: Start by sterilizing your jars in boiling water for about 10 minutes to eliminate any bacteria. Keep the jars warm until you’re ready to fill them to prevent breakage.
2. **Fill the Jars**: Using the funnel, fill each jar with your prepared food, leaving the recommended headspace to allow for expansion during processing. Make sure to wipe the rims of the jars clean to ensure a proper seal.
3. **Seal and Process**: Place the lids on the jars and tighten the rings just until snug—over-tightening can prevent a proper seal. Process the jars in your water bath or pressure canner according to the recommended times for each type of food.
4. **Cool and Store**: After processing, remove the jars using the jar lifter and set them on a towel or cooling rack. Allow them to cool completely, usually taking 12 to 24 hours. Once cooled, check the seals by pressing down in the center of each lid. If it pops back, the jar hasn’t sealed properly and should be refrigerated and used immediately. Properly sealed jars can be stored in a cool, dark place for up to a year or more.
**Final Thoughts**
Canning not only preserves food but also captures the essence of your culinary experiences and memories. With practice, you’ll hone your skills and gain confidence in your canning abilities, allowing you to create a pantry full of delicious, homemade delights that you can enjoy throughout the year. Whether you’re canning out of necessity or as a fun hobby, this timeless method is sure to elevate your food preservation game.
4. Method #2: Freezing – Best Practices to preserve food
Freezing is one of the most effective and convenient methods for preserving food, allowing you to enjoy seasonal flavors year-round. By properly freezing your food, you can lock in freshness, nutrients, and taste, ensuring that your meals are just as delicious as the day they were harvested or cooked. Here are some best practices to keep in mind when freezing food like a pro:
**1. Choose Quality Ingredients:** The foundation of successful freezing begins with high-quality ingredients. Select fresh, ripe produce or freshly cooked meals without any signs of spoilage. Remember, you can only freeze what you start with, so prioritize the best.
**2. Prepare Food Properly:** Before freezing, make sure to clean, peel, chop, or cook your food as necessary. For vegetables, blanching—briefly boiling and then plunging them into ice water—helps to preserve color, texture, and nutrients. For meats, trim off excess fat to prevent freezer burn, which can affect the taste and quality.
**3. Use Proper Packaging:** Invest in quality freezer-safe bags, airtight containers, or vacuum sealers. Remove as much air as possible before sealing to prevent freezer burn and oxidation. Label each package with the contents and date to keep track of what you have and how long it’s been stored.
**4. Don’t Overload the Freezer:** When freezing food, it’s crucial to maintain a consistent temperature. Avoid overloading your freezer, which can hinder air circulation and lead to uneven freezing. Ideally, your freezer should be set to 0°F (-18°C) or lower for optimal preservation.
**5. Freeze in Portions:** Portioning your food into meal-sized servings not only makes it easier to thaw only what you need but also helps maintain quality. Consider using muffin tins or ice cube trays for smaller portions of sauces, broths, or herbs, which can be easily popped out and stored.
**6. Thaw Safely:** When you’re ready to enjoy your frozen food, ensure to thaw it safely. The best methods include transferring it to the refrigerator overnight, using the defrost setting on your microwave, or cooking directly from frozen, depending on the food type. Avoid thawing at room temperature, as this can promote bacterial growth.
**7. Keep an Inventory:** To avoid wasting food, keep a simple inventory of what you have in your freezer. This not only helps you keep track of your frozen treasures but also encourages you to use older items before they become forgotten.
By following these best practices, you can master the art of freezing and ensure that your favorite foods are always within reach, ready to be enjoyed whenever you desire. Whether it’s a bounty of summer berries or a hearty batch of soup, embracing the freezer will elevate your food preservation game to a whole new level.
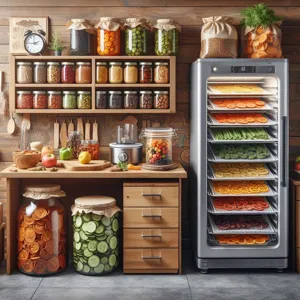
5. Method #3: Dehydrating – How to Get Started
Dehydrating is one of the oldest and most effective methods of food preservation, allowing you to extend the shelf life of fruits, vegetables, herbs, and even meats while retaining their essential nutrients and flavors. This technique not only enhances the taste of your favorite foods, but it also creates convenient, lightweight snacks that are perfect for hiking, camping, or simply enjoying at home. If you’re eager to dive into the world of dehydrating, here’s a step-by-step guide to get you started.
**Choosing Your Equipment**
First, consider your options for dehydrating. You can use a dedicated food dehydrator, which offers consistent temperature control and airflow for optimal results. Alternatively, your oven can double as a dehydrator if you set it to a low temperature (usually around 140°F or 60°C), allowing moisture to escape without cooking the food. Whichever method you choose, make sure to have some parchment paper and airtight containers on hand for storage.
**Selecting Your Ingredients**
Next, choose the right foods for dehydrating. Fruits like apples, bananas, and strawberries are excellent choices, while vegetables such as bell peppers, zucchini, and tomatoes also work wonderfully. For meats, lean cuts are best; consider making jerky from beef, chicken, or turkey. Remember, the key to successful dehydrating is starting with fresh, high-quality ingredients.
**Preparation and Cutting**
Once you have your ingredients, it’s time to prepare them. Wash your fruits and vegetables thoroughly and peel them if necessary. Slice them into uniform pieces to ensure even drying, typically about 1/4 inch thick. For items like apples and bananas, consider soaking them in a mixture of lemon juice and water for a few minutes to prevent browning and enhance flavor.
**Dehydrating Process**
Arrange the prepared food on your dehydrator trays or baking sheets in a single layer, leaving space between each piece for air circulation. Set your dehydrator or oven to the recommended temperature for the items you are drying—generally, fruits should be dehydrated at around 135°F (57°C), while vegetables can be done at 125°F (52°C). Depending on the moisture content of the food, the drying process can take anywhere from a few hours to a full day. Be sure to check periodically, as different foods may require different drying times.
**Storing Your Dehydrated Food**
Once fully dehydrated, allow the food to cool completely before transferring it to airtight containers. Glass jars, vacuum-sealed bags, or Mylar bags with oxygen absorbers work well for storage. Keep your dehydrated foods in a cool, dark place, and they can last for months—sometimes even years!
By mastering the art of dehydrating, you’ll not only be able to preserve the bounty of your garden or local farmers’ market but also create delicious snacks that are perfect for any occasion. Happy dehydrating!
6. Method #4: Fermentation – A Flavorful Choice
Fermentation is not just a preservation method; it’s a culinary art that transforms ordinary ingredients into vibrant, flavorful delights. This ancient technique harnesses the power of beneficial bacteria and yeasts to convert sugars into acids, gases, or alcohol, resulting in foods that are not only shelf-stable but bursting with complex flavors and nutritional benefits.
Imagine the tangy crunch of sauerkraut, the rich umami of miso, or the effervescent zing of homemade kombucha—these are just a few examples of the wonders fermentation can conjure. The process begins with fresh, high-quality ingredients, whether you’re working with vegetables, fruits, grains, or dairy. The key is to create an environment that encourages the right microorganisms to thrive while inhibiting harmful ones. This often involves submerging your ingredients in a brine or utilizing a starter culture, allowing the magic of fermentation to take place over days, weeks, or even months.
One of the best parts of fermentation is its versatility. You can experiment with different spices, herbs, and flavoring agents to create unique variations that suit your palate. Not only does fermentation enhance flavors, but it also increases the nutritional value of your food, making vitamins and minerals more bioavailable. Plus, fermented foods are known for their gut health benefits, thanks to the probiotics they contain.
To get started with fermentation, all you need is some basic equipment—think jars, weights, and a cool, dark space in your kitchen. There are countless resources and recipes available to guide you through the process, whether you’re a seasoned pro or a curious beginner. Embrace the art of fermentation, and soon you’ll find that not only are you preserving food like a pro, but you’re also enhancing your meals with layers of flavor that will keep your taste buds excited and satisfied.
7. Method #5: Pickling – Step-by-Step Guide
Pickling is an age-old preservation method that not only extends the shelf life of your favorite fruits and vegetables but also infuses them with vibrant flavors. Whether you’re looking to preserve a bountiful harvest from your garden or simply want to add a tangy twist to your meals, pickling can be both a practical and enjoyable process. Here’s a step-by-step guide to help you master the art of pickling like a pro.
### Step 1: Choose Your Produce
Start by selecting fresh, high-quality fruits or vegetables. Cucumbers, carrots, green beans, and cabbage are popular choices, but don’t hesitate to experiment with unique options like radishes, beets, or even watermelon rinds. The fresher your ingredients, the better your pickles will taste.
### Step 2: Prepare Your Jars
Sanitize your jars and lids by washing them in hot, soapy water and then rinsing them well. To ensure they are completely clean, you can also run them through a dishwasher cycle. For long-term storage, consider processing your jars in a boiling water bath to eliminate any lingering bacteria.
### Step 3: Make the Brine
The brine is the heart of the pickling process. In a saucepan, combine water, vinegar (white, apple cider, or rice vinegar works well), and salt. You can also add sugar for a sweeter pickle or spices like mustard seeds, dill, garlic, and peppercorns to enhance the flavor. Bring the mixture to a boil, stirring until the salt and sugar dissolve completely.
### Step 4: Pack Your Jars
Once your brine is ready, pack your cleaned produce tightly into the jars. You can slice or quarter your vegetables as needed to fit them snugly. Leave some headspace at the top—about half an inch—to allow for the brine to expand during processing.
### Step 5: Pour in the Brine
Carefully ladle the hot brine over your packed jars, ensuring the produce is fully submerged. Use a clean utensil, like a chopstick or a skewer, to remove any air bubbles trapped within the jars. Wipe the rims of your jars with a clean cloth to ensure a tight seal, then place the lids on securely.
### Step 6: Process Your Jars
For long-term preservation, process your jars in a boiling water bath. Submerge the jars in boiling water, making sure they are covered by at least an inch of water. The processing time will depend on the size of your jars and the specific recipe you are following, typically ranging from 10 to 15 minutes.
### Step 7: Cool and Store
After processing, carefully remove the jars from the water and let them cool on a clean kitchen towel or cooling rack. You should hear the satisfying “pop” of the lids sealing as they cool. Once cooled, check the seals by pressing down in the center of each lid—if it doesn’t flex up and down, it’s sealed properly. Store your pickled goodies in a cool, dark place for at least a few weeks to allow the flavors to develop before enjoying the tangy delights of your homemade pickles.
By following these steps, you’ll not only be able to preserve your favorite produce but also create delicious additions to salads, sandwiches, and charcuterie boards that will impress your family and friends. Happy pickling!
8. Method #6: Vacuum Sealing – Keeping Food Fresh
Vacuum sealing has emerged as one of the most effective methods for keeping food fresh for extended periods, and it’s no wonder that professional chefs and home cooks alike are turning to this technique. This method involves removing air from specially designed bags or containers before sealing them tightly, which significantly reduces the oxidation process that causes spoilage.
When you vacuum seal food, you not only keep it fresher but also retain its flavor, color, and nutritional value. Fruits and vegetables, when vacuum sealed, can maintain their crispness and vibrant hues, while meats and fish stay juicy and flavorful, free from freezer burn and dehydration. The magic lies in the absence of air; without exposure to oxygen, the growth of bacteria and mold is inhibited, allowing you to enjoy your favorite foods for weeks or even months longer than traditional storage methods allow.
Moreover, vacuum sealing is incredibly versatile. It can be used for meal prep, portion control, or even sous vide cooking, where vacuum-sealed bags are immersed in hot water to cook food to perfection. Whether you’re preserving leftovers, bulk buying perishable items, or planning for a camping trip, investing in a vacuum sealer can greatly enhance your food storage strategy.
To get started, simply place your food in a vacuum bag, adjust your vacuum sealer to the appropriate settings, and let the machine do the work. If you’re looking to take your food preservation skills to the next level, consider adding a variety of marinades or seasonings before sealing to infuse your meals with flavor while they marinate.
In conclusion, vacuum sealing is a game-changing technique that not only extends the life of your food but also elevates your culinary experience, making it an essential tool for anyone serious about food preservation.
9. Method #7: Root Cellaring – Natural Preservation Techniques
Root cellaring is an age-old preservation technique that taps into the natural conditions of the earth to keep your produce fresh and flavorful. This method, which dates back centuries, relies on the simple principles of temperature, humidity, and darkness to create an ideal environment for storing various fruits and vegetables.
Imagine stepping into a cool, dimly lit space lined with shelves filled with potatoes, carrots, onions, and apples, all nestled in layers of straw or sand. A root cellar can be as simple as a dug-out space in your backyard or a designated corner of your basement, designed to maintain a steady temperature of around 32 to 40 degrees Fahrenheit. The key is to choose a location that remains consistently cool and has good ventilation to prevent rot and spoilage.
The beauty of root cellaring is its sustainability; it requires no electricity and minimal effort once set up. Many root vegetables, such as beets and turnips, thrive in these conditions, developing a sweeter taste as they store sugars from the surrounding earth. Apples, stored in a single layer to avoid bruising, can last for months, providing you with the crisp taste of fall long into the winter.
To maximize your success with root cellaring, consider the type of produce you’re storing. Hardier varieties, like squash and pumpkins, benefit from the dry air of a root cellar, while moisture-loving crops, such as carrots, should be kept in slightly damp sand to maintain their crispness. Regularly check your stored items for signs of decay, and rotate them as necessary to ensure nothing goes to waste.
Ultimately, root cellaring is not just a method of food preservation; it’s a connection to our agricultural roots and a reminder of the bounty that each season brings. Embracing this technique allows you to enjoy the flavors of homegrown produce year-round while reducing your reliance on modern refrigeration and packaging. So, dig in, and discover the satisfying art of root cellaring—you might find it becomes a cherished tradition in your kitchen!
10. Common Mistakes to Avoid in Food Preservation
When it comes to preserving food, even the most seasoned home cooks can fall prey to common pitfalls that can compromise both the quality and safety of their preserved goods. Understanding these mistakes is essential for anyone looking to maintain the integrity of their food, and avoiding them can mean the difference between delicious, long-lasting preserves and a regrettable batch gone wrong.
One of the most frequent errors is neglecting proper sanitation. It’s easy to overlook the importance of sterilizing jars and equipment, but even the smallest amount of bacteria can spoil an entire batch. Ensure that all your tools are thoroughly cleaned and that your jars are either new or properly sanitized to prevent contamination.
Another common mistake is misunderstanding the principles of acidity. Many preservation methods rely on the correct pH level to inhibit the growth of harmful microorganisms. For example, when canning vegetables, it’s crucial to add sufficient acid—whether through vinegar or lemon juice—to ensure safety. Ignoring this step can lead to serious food safety risks.
Overfilling jars is also a mistake many make in the heat of the moment. Leaving proper headspace in jars is essential for the food to expand during processing and for creating a vacuum seal as they cool. Too little space can not only lead to messy, poorly sealed jars but can also jeopardize the preservation process.
Additionally, it’s important to pay attention to processing times and temperatures. Each type of food has specific guidelines that should be followed closely. Rushing through the canning process or using incorrect temperatures can result in under-processed food, which is a breeding ground for bacteria and spoilage.
Lastly, don’t overlook the importance of labeling. Failing to mark your jars with the contents and the date can lead to confusion months down the line. Not only does this help you keep track of what you have, but it also ensures you use older items first, reducing waste and keeping your pantry organized.
By being mindful of these common mistakes, you can elevate your food preservation game, ensuring that your efforts yield safe, tasty, and long-lasting results every time. With a little diligence and attention to detail, you’ll be able to preserve your bounty like a true pro!
11. Tips for Storing Preserved Foods
When it comes to storing preserved foods, proper techniques can make all the difference in maintaining flavor, texture, and safety. Here are some essential tips to ensure your hard work in canning, pickling, or fermenting pays off long term.
**1. Choose the Right Containers:** Opt for glass jars with airtight seals for canning, as they resist leaching and maintain the integrity of your preserved foods. For freezer storage, use freezer-safe plastic containers or heavy-duty freezer bags designed to prevent air exposure, which can lead to freezer burn.
**2. Label Everything:** Always label your jars and containers with the date of preservation and the contents. This simple step will help you keep track of freshness and ensure you use older items first, minimizing waste and optimizing your culinary repertoire.
**3. Store in a Cool, Dark Place:** Light and heat can degrade the quality of preserved foods over time. Store your jars in a cool, dark pantry or cupboard, away from direct sunlight and temperature fluctuations. Ideal storage temperatures range between 50°F and 70°F (10°C to 21°C).
**4. Keep it Dry:** Moisture can lead to mold and spoilage. Ensure that your storage area is dry, and avoid placing jars directly on the ground where humidity can be higher. Consider using a shelf or rack to provide better airflow and reduce moisture exposure.
**5. Check Seals Regularly:** For canned goods, periodically inspect the seals on your jars. If you notice any swelling, rust, or broken seals, it’s best to discard those jars to ensure safety. Healthy seals should be tight and not flex when pressed.
**6. Use Preserved Foods Within a Year:** While many preserved foods can last longer, for optimal flavor and quality, aim to use your preserves within a year of storage. Some items, like jams or pickles, may last up to two years, while others, such as canned vegetables, are best enjoyed fresh within a few months to a year.
**7. Refrigerate After Opening:** Once you’ve opened a jar of preserves, transfer any unused portions to the refrigerator. Most opened canned goods should be consumed within a week or two, while pickles and jams can last longer, typically up to a month.
By following these storage tips, you can enjoy the fruits of your labor for months to come, savoring the flavors of home-preserved foods while minimizing wastage and ensuring quality. Happy preserving!
12. How to Choose the Right Method for Your Needs
Choosing the right food preservation method is crucial to ensuring that your hard-earned harvest or grocery haul remains fresh, flavorful, and safe to consume. With a plethora of techniques available, the key is to align your preservation choice with your specific needs, available resources, and the types of food you wish to preserve.
**Consider Your Food Types:** Different foods have distinct preservation requirements. For instance, high-moisture fruits like peaches and berries often lend themselves well to canning or freezing, while denser vegetables such as carrots and potatoes may be better suited for blanching and freezing or dehydration. Assessing the moisture content and texture of your food can help determine the most effective method.
**Evaluate Equipment and Space:** Next, take stock of the tools and space you have at your disposal. Canning requires specialized equipment like jars, lids, and a pressure cooker or water bath canner, while freezing merely needs airtight containers or freezer bags. If space is limited, consider methods that require less room, such as dehydrating or fermenting, which can often be done with minimal equipment.
**Think About Shelf Life:** Different preservation methods offer varying shelf lives. If you want to keep food for extended periods, canning or vacuum sealing may be your best options. On the other hand, freezing is perfect for short-term storage, keeping food fresh for several months without sacrificing quality.
**Assess Your Time Commitment:** Some methods, like pickling or fermenting, require more time and patience but can yield delicious and unique flavors. Others, such as freezing or dehydrating, are quicker and require less hands-on involvement. Consider how much time you can dedicate to the preservation process, as this will help you choose a method that fits your lifestyle.
**Health Considerations:** Lastly, don’t overlook health and safety. Ensure you understand the specific guidelines for each preservation method, especially when canning. Following safe practices is vital to prevent foodborne illnesses and ensure the longevity of your preserved foods.
By carefully considering these factors, you can confidently select the food preservation method that best meets your culinary needs and lifestyle, empowering you to enjoy the fruits of your labor all year round.
13. Safety Guidelines to Preserve Food
When it comes to preserving food, safety should always be your top priority. Proper preservation techniques not only help maintain the quality and flavor of your food but also ensure that what you’re storing is safe to consume later. Here are some essential safety guidelines to follow as you embark on your food preservation journey:
1. **Start with Clean Equipment**: Before you dive into any preservation method, ensure that all your equipment—jars, lids, utensils, and surfaces—are thoroughly cleaned and sanitized. This reduces the risk of contamination and helps prevent spoilage.
2. **Choose Fresh Ingredients**: The quality of your preserved food starts with the raw ingredients. Select only the freshest produce, meats, or dairy products. Overripe or damaged items can harbor bacteria and lead to spoilage, compromising your efforts.
3. **Follow Tested Recipes**: When preserving food, stick to researched and tested recipes from reputable sources. This is particularly crucial for canning, as improper methods can lead to serious foodborne illnesses, such as botulism. Resources like the USDA or local extension services provide reliable guidelines.
4. **Monitor Processing Times and Temperatures**: Whether you’re canning, freezing, or fermenting, adhering to the recommended processing times and temperatures is vital. This ensures that harmful bacteria are destroyed and that your food remains safe for consumption.
5. **Use Proper Storage Techniques**: Once your food is preserved, store it in a cool, dark place to maximize shelf life. For frozen items, ensure your freezer is set to 0°F (-18°C) or lower. Label and date your jars or bags to keep track of when they were processed.
6. **Check for Signs of Spoilage**: Before using any preserved food, inspect it carefully. Look for any signs of mold, unusual odors, or changes in texture. If something seems off, it’s better to err on the side of caution and discard it.
7. **Educate Yourself Continuously**: Food preservation techniques are continually evolving, and new safety information can emerge. Stay informed by reading books, attending workshops, or joining online communities dedicated to food preservation. This knowledge will help you avoid common pitfalls and enhance your preserving skills.
By adhering to these safety guidelines, you can confidently preserve food like a pro, ensuring that your home-canned goods and frozen delights are not only delicious but also safe for you and your loved ones to enjoy. Happy preserving!
14. Creative Uses for Preserved Foods
Preserved foods are not just staples in your pantry; they’re a gateway to culinary creativity that can elevate your meals and spark your imagination. Once you’ve mastered the art of preserving, the real fun begins with exploring the myriad of ways to incorporate these flavorful delights into your everyday cooking.
Imagine opening a jar of tangy pickled vegetables to add a crunchy, zesty punch to your sandwiches or salads. The vibrant colors and bold flavors can transform a simple dish into a gourmet experience. Similarly, jars of homemade fruit preserves can be spread across morning toast or swirled into yogurt, turning breakfast into a delightful treat that’s both nutritious and satisfying.
But it doesn’t stop there. Think beyond the basics—use preserved tomatoes to create a rich, savory sauce for pasta, or add a spoonful of your favorite chutney to enhance the flavors of grilled meats and fish. Dried herbs and spices, for instance, can be rehydrated and incorporated into marinades, soups, and stews, infusing your dishes with depth and complexity.
For the adventurous home cook, preserved foods can inspire unique flavor combinations. Consider crafting a savory galette topped with roasted vegetables preserved in oil, or a vibrant salad featuring both fresh greens and preserved fruits for a surprising contrast. Even baked goods can benefit from your preserved creations—adding a layer of fruit preserves to cakes or muffins can introduce unexpected sweetness and moisture.
Moreover, preserved foods aren’t just about taste; they add a splash of color and texture to your meals. A simple charcuterie board adorned with various preserved items—like olives, pickles, and jams—can become the centerpiece of your gatherings, impressing guests while showcasing your preserving prowess.
So, roll up your sleeves and get creative! The options are limitless when it comes to utilizing your preserved foods. By incorporating them into your cooking, you not only enhance your meals but also celebrate the fruits of your labor, making every bite a nod to your culinary skills and dedication to sustainable eating.
15. Conclusion: Embrace the Art of Food Preservation
In a world that often prioritizes convenience over quality, embracing the art of food preservation can feel like stepping back in time. However, this age-old practice is not only a means of extending the life of your food but also a way to enhance its flavor and nutritional value. As we’ve explored throughout this blog, there are various tried-and-true methods to preserve food, each with its unique charm and benefits.
From the crisp crunch of pickled vegetables to the rich, concentrated taste of homemade jams, the rewards of preserving your food are manifold. Not only do you gain the satisfaction of transforming fresh, seasonal produce into delightful pantry staples, but you also engage in a sustainable practice that reduces waste and promotes mindful consumption. Each jar you fill, each batch you freeze, serves as a testament to your creativity and resourcefulness as a home cook.
Moreover, food preservation fosters a deeper appreciation for the ingredients you use. By understanding the intricacies of each method—whether it’s canning, dehydrating, fermenting, or freezing—you’ll develop a more profound connection to your food and the seasons. You’ll learn to respect the natural rhythms of harvest, enhancing your meals with flavors that reflect the time and care you’ve invested in them.
So, gather your ingredients, dust off those jars, and immerse yourself in the fulfilling world of food preservation. Whether you’re preserving your garden’s bounty or taking advantage of seasonal sales at the local market, remember that each technique you master brings you closer to becoming a true food preservation pro. Embrace this culinary art, and you’ll not only savor the fruits of your labor year-round but also inspire those around you to appreciate the beauty of homemade goodness. Happy preserving!