How to choose the right paint color for your kitchen?
Choosing a kitchen color is not just about aesthetics. It is a technical decision that impacts how your space handles grease, moisture, and daily wear. A poor choice leads to premature peeling and cleaning headaches. This guide helps you select a durable, high-performance paint job for a professional result.
The physics of kitchen lighting
Color behaves differently based on your kitchen’s compass orientation. Think of your kitchen walls like a white t-shirt; they take on the color of whatever light shines on them. Before buying paint, map your natural light source.
- North-facing kitchens: These spaces receive cool, bluish light. Avoid stark whites, which will look clinical or greyish. Opt for warm-toned whites or soft creams to balance the coolness.
- South-facing kitchens: You get consistent, warm light. Strong yellows can become overwhelming here. Choose cooler neutrals to keep the room feeling crisp rather than hazy.
- The 24-hour test: Never trust a store sample. Paint a 2×2 foot board and move it around the kitchen at 8:00 AM, 1:00 PM, and 8:00 PM. Lighting shifts constantly, and so will your perception of the color.
Aligning artificial lighting
Your light bulbs act as filters for your paint. If you use 2700K (warm white) bulbs, they will pull out red and yellow undertones. If you use 4000K (daylight) bulbs, the paint will lean towards blue. Always finalize your paint choice after your permanent lighting is installed.
Selecting the finish: Durability matters
The kitchen is a high-traffic environment. Matte paints are porous, meaning they soak up grease like a sponge. Once grease is in a matte finish, it is nearly impossible to remove without scrubbing the paint off.
- Satin finish for walls: Satin is the gold standard for kitchen walls. It provides enough sheen to be wipeable but keeps enough texture to hide minor wall imperfections.
- Semi-gloss for cabinets and trim: Think of this like a car’s clear coat. Cabinets endure constant touching and scrubbing. A harder, glossier finish acts as a protective shield against moisture and oil.
- The ‘shell’ analogy: Imagine your kitchen walls as a surface that needs to repel water. A higher gloss rating creates a smoother surface where liquid drops bead up rather than soaking into the drywall.
Color strategy for kitchen dimensions
Use color to manipulate how your brain perceives space. You do not need a massive kitchen to make it look impressive; you just need to manage the contrast.
- Small kitchens: Use a monochromatic scheme. Painting your walls and your cabinets the same light color removes ‘visual borders.’ Your eyes cannot track where the wall ends and the cupboard begins, making the room feel larger.
- Large kitchens: You can experiment with contrast. A deep navy island against light-grey walls creates a focal point. This anchors the room and prevents it from feeling like a sterile laboratory.
- The 60-30-10 rule: Allocate 60% of the room to a neutral base, 30% to your cabinets or secondary features, and 10% to a bold accent like matte black hardware or copper fixtures.
Field report: Avoiding common mistakes
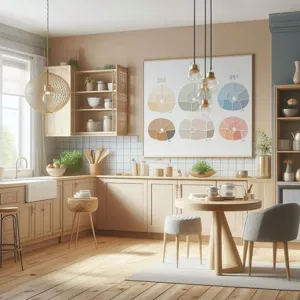
Renovations often stall because of overlooked details. Here are three common traps that lead to expensive do-overs.
- Ignoring undertones: If your granite countertop has flecks of beige or orange, a cool blue-grey wall will look jarring. Match the wall color to the ‘silent’ colors hidden inside your flooring or countertops.
- The tiny chip trap: A 2-inch paint chip is a poor representation of a 10-foot wall. The color will intensify significantly when multiplied across a large surface. If in doubt, go one shade lighter than you think you need.
- Ceiling neglect: Most people default to ceiling white. However, if your kitchen lacks natural light, painting the ceiling a slightly lighter version of your wall color helps bounce existing light back down into your workspace.
The DIY vs. professional threshold
Painting walls is an accessible DIY task, but cabinets belong in a different category. Achieving a factory-like finish on cabinets requires a paint sprayer and catalyzed lacquer.
- When to hire a pro: If you want a smooth, non-brush-mark finish that won’t peel when you wipe down a greasy spill, hire a pro with a dedicated spray booth.
- The DIY trap: If you choose to paint cabinets yourself, the finish is 90% preparation. You must use a high-quality bonding primer designed specifically for cabinetry. Without it, the paint will chip within six months of opening and closing doors.
- Avoid standard wall paint: Never use standard latex wall paint on cabinets. It is too soft. Look for ‘cabinet-grade’ enamels that are designed to harden into a durable, scratch-resistant film.
Content updated on 2026-10-10